rayhunter classic <recursion-depth>
  <image-width> <image-height>
<input-filename> <output-filename>rayhunter
Table of Contents
1. Introduction
rayhunter is a command-line program that takes a 3D model (like a X3D or glTF) and renders an image that would be visible from given camera looking at given scene. Two ray-tracing algorithms may be used: deterministic (classic Whitted-style ray-tracer) and Monte Carlo path tracing.
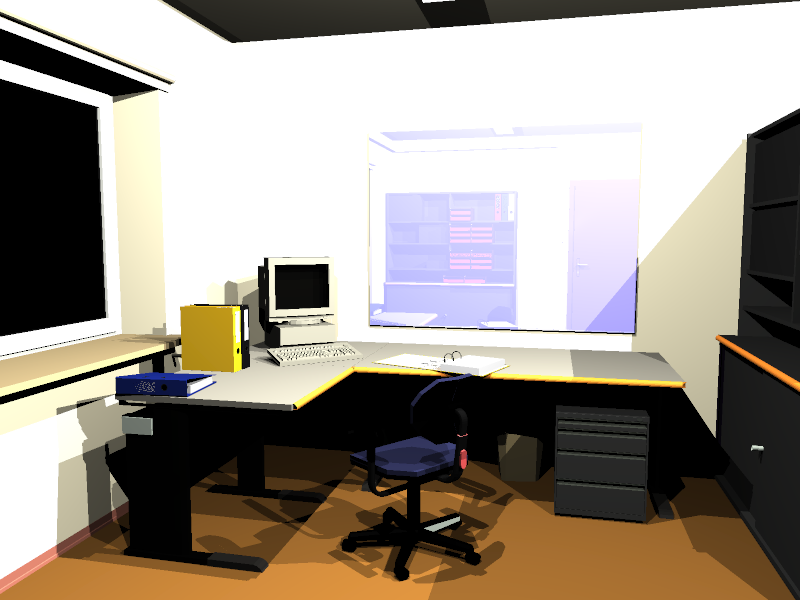
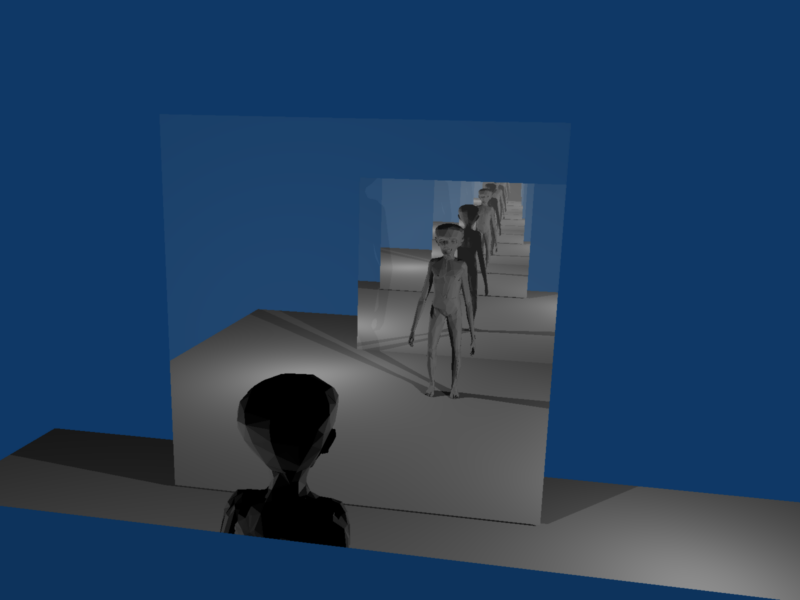
You can take a look at the gallery of images rendered using rayhunter as a demonstration of rayhunter’s capabilities.
|
Warning
|
This tool is mostly a demonstration that you can develop alternative renderers, using any algorithm, and they don’t have to run "live" (they can instead spend time making a single image), using the Castle Game Engine exposed information about the 3D model. This is not a production-quality ray-tracer. There are many other ray-tracers and non-real-time renderers that are more advanced, e.g. all amazing Blender renderers. |


2. Download
Installation: just extract the archive and run the executable.
This is free/open-source software. Get the code from GitHub.
3. Required command-line options
Basic syntax to call rayhunter is
or
rayhunter path <recursion-depth>
  <non-primary-samples-count> <image-width> <image-height>
<input-filename> <output-filename>-
First option,
classicorpath, says which ray-tracing algorithm to use.classic-
This is normal Whitted-style deterministic ray-tracer. All normal VRML lights are handled (point, spot, directional, including the headlight). No area lights, so no soft shadows. Algorithm sends one primary ray for each pixel. Ray-tracing is recursive, where the ray casts on some surface we check rays to light sources and eventually we recursively check refracted ray (when
Materialhastransparency> 0) and reflected ray (whenMaterialhasmirror> 0). Wikipedia has a nice article about ray-tracing that describes Whitted-style ray-tracing. path-
This is path tracer. Every surface with non-zero
emissiveColoris a light emitter. For each pixel many random paths are checked and final pixel color is the average color from all paths.Actually
rayhunterfor every pixel checks<primary-samples-count>of primary rays, and then each primary ray that hits something splits into<non-primary-samples-count>. So in total we check<primary-samples-count>*<non-primary-samples-count>paths. This is a sensible optimization, because usually there is no need to take many<primary-samples-count>, since all primary rays hit more-or-less the same thing, since they have very similar direction.<non-primary-samples-count>is set using the 3rd required command-line option, and<primary-samples-count>is set using optional option--primary-samples-count(by default it’s 1).
-
<recursion-depth>This is interpreted differently by different ray-tracing algorithms:
-
For classic ray-tracer this is maximum allowed recursion depth. If you will give here too small value, then some optical effects will not be visible. For normal scenes (without too complex mirror and transparent surfaces' setting) values 2 or 3 are appropriate.
0 means that each object will have only his own color. 1 means that light rays can light the surface, and ray may be once reflected or refracted. Greater values allow rays to be reflected and/or refracted more times along the way.
-
For path tracer this is minimal path length. I.e. Russian-roulette will not be used to decide about the termination until the path will reach this length. (Of course, some paths may still be shorter than this minimal length, because the ray will not hit anything in the scene.) E.g. if you will set this to 3, and Russian-roulette parameter (see
--r-roul-continueoption) will be 0.5 (the default value), then 1/2 of all paths will have length 3, 1/4 of all paths will have length 4, 1/8 of all paths will have length 5 etc.Russian-roulette makes sure that the result is unbiased, i.e. the expected value is the correct result (i.e. the perfect beautiful realistic image). However, Russian-roulette introduces also a large variance, visible as a noise on the image.
That’s where forcing some minimal path length helps. Sensible values for this are 1 or 2. Of course, the greater the better, but it will also slow down the rendering. 0 means that Russian-roulette will always be used to decide about path termination (expect a lot of noise on the image!).
-
-
<non-primary-samples-count>Only for path tracer. Together with
<primary-samples-count>, this specifies how many paths will be checked at each pixel. Various scenes may require different numbers here to look nice — you can start with 10, then 100, then even 1000. But beware — this value directly affects rendering speed. -
<image-width> <image-height>Width and height of resulting image.
-
<input-filename>3D model filename. Any format supported by our engine is OK.
-(single dash) as a filename means stdin.
-
<output-filename>Filename where to write final image. Image format will be automatically derived from filename extension, known image formats and extensions are:
-
rgbe(orpic) -
png -
jpg(orjpeg) -
ppm -
bmp
If you will use
--write-partial-imagefeatures (see below), then partial images will be also written to this file. Moreover, if you will use--first-rowfeatures (see below), then initial image contents will be read from this file.Notes about RGBE format: This format was developed by Greg Ward, and is used e.g. by Radiance. Colors in RGBE images are written with a very good precision, while not wasting a lot of disk space. Good precision means that you may be able to expose in the image some details that were not initially visible for the human eye, e.g. by brightening some areas. Also color components are not clamped to [0; 1] range — each component can be any large number. This means that even if resulting image is too bright, and some areas look just like white stains, you can always correct the image by darkening it or applying gamma correction etc.
You can process RGBE images using Radiance programs. Also my Castle Image Viewer can be used to view RGBE images.
-
4. Optional command-line options
Options below may be placed anywhere at command-line (before, between or after required options listed above).
--camera-pos <float> <float> <float>(short form-p)--camera-dir <float> <float> <float>(short form-d)--camera-up <float> <float> <float>(short form-u)-
These options set camera position, looking direction and up vector.
--camera-up-zis shortcut for--camera-up 0 0 1.Initial camera settings are determined by:
-
These command-line parameters.
-
First
*Cameraor*Viewpointnode in VRML file. Remember that placement of camera node in VRML file is important — camera’s properties are modified by current transformation of camera node. -
Default values (default VRML 1.0 perspective camera):
-
camera-pos = 0 0 1, -
camera-dir = 0 0 -1, -
camera-up = 0 1 0,
-
Things above are given in descending priority. E.g. if you will use
--camera-pos 1 2 3parameter then starting camera position will be always1 2 3. If you don’t use--camera-posparameter then program will try to find camera node in VRML file. If such node is present — we will use camera position specified there. If not — we will use default camera position (i.e.0 0 1).Notes:
-
If
camera-dirandcamera-upwill not be orthogonal, vectorupwill be corrected.camera-dirandcamera-upvectors must not be parallel. In particular, they must not be zero-vectors. Lengths ofcamera-dirandcamera-upare not important,dirvector is always scaled based oncamera-radiuswhen program starts. -
Besides VRML/X3D, also Collada and 3DS can include camera information, so we can use it. Other 3D formats don’t support camera information.
Note that you can use castle-model-viewer to comfortably determine good values for these options — see Console → Print rayhunter command-line to render this view menu item in castle-model-viewer.
-
--view-angle-x <float>-
Use perspective projection, with given field of view angle in horizontal direction. In degrees. Default is 60 degrees. Note: vertical angle will be automatically determined based on horizontal view angle and window width/height (unless you specify
force-view-angle-y, see below). --force-view-angle-y <float>-
Use perspective projection, with given field of view angle in vertical direction. Normally camera vertical angle will be automatically derived from
--view-angle-xand requested output<image-width>and<image-height>. You can use this parameter to force some other non-proportional camera vertical angle. --ortho <float> <float> <float> <float>-
Use orthographic projection, with given left, bottom, right, top dimensions. This makes previous
--view-angle-xand--force-view-angle-yignored (they are not sensible in orthographic projection). Note that order of arguments follows the X3D OrthoViewpoint specification (and differs from typical OpenGL, like used by glOrtho). --scene-bg-color <red> <green> <blue>-
Sets scene background color. Each RGB color component is a float in the range [0; 1]. By default background is black.
--write-partial-rows <rows> <log-rows-file>-
Always after generating
<rows>rows, rayhunter will write the (partially finished) output image (to<output-filename>, i.e. to the same file where final image is supposed to be written). Additionally, each time when writing such partial image, rayhunter will write a file<log-rows-file>that will contain a single integer — the number of already finished rows.This option has a couple of uses:
-
First of all, obviously, it lets you view unfinished results of
rayhunter, if you’re not patient. -
This allows you to interrupt
rayhunterprocess at any time and you will remain with a partially completed image. Then you can runrayhunteronce again with--first-rowoption to finish rendering the image. You can look at<log-rows-file>to know how many rows are already finished.E.g. you can use such script:
rayhunter ... --first-row `cat rows.log` --write-partial-rows 10 rows.logThis way after doing every 10 rows,
rayhunterwill save it’s partially finished work. And if you will interrupt, kill etc.rayhunterprocess, you will be able to just run this script once again andrayhunterwill start rendering roughly at the point where it finished. -
If you want to render the image on more than one computer at the same time, you can easily run
rayhunteron every computer with different--first-rowargument and with appropriately small<rows>value for--write-partial-rows. When all processes will finish their work, you will only have to combine resulting images into one.Note that very small
<rows>value can slow down the rendering process. But usually it’s not a significant slowdown, after all usually ray-tracing takes a lot of time and wasting a couple of additional seconds is not a problem.Give value of 0 for
<rows>to disable writing partial image and<log-rows-file>file. This is the default behavior.Note about writing partial image: when writing partial image, any errors during write are reported as warnings and then ignored. This is handy is you will view the image with some other program while rayhunter process is running: there’s always a small chance that rayhunter will write the partial image exactly when another program is trying to read it. Depending on your OS, in such case writing of the partial image file may fail. That’s why errors when writing partial image are ignored and rayhunter will just proceed with rendering.
-
--r-roul-continue <float>-
This option is meaningful only when you use path tracer. Argument is a float number in range [0; 1]. At each point on the path, if the specified
<recursion-depth>is exceeded, Russian-roulette is used to determine whether the path should terminate here. If random number from [0; 1] range is larger than argument given to this option, the path will terminate. In other words, argument for this option is the "continuation probability" — larger argument means that average path will be longer.Usually too small values will produce a lot of noise, and too large values will make long rendering time.
However, note that there are some sensible scenarios when argument 1 for this option is sensible: if your scene is very very simple and you want all paths to terminate in a "natural" way (when ray will not hit anything in the scene). This will give you very accurate result (although some noise on the image will still be present, since the ray directions are still random), although rendering time will be really long even for simplest scenes.
When argument for this option is exactly 0, Russian-roulette will always lose. In other words, Russian-roulette will not be used at all. In this case
<recursion-depth>value will work like for classic ray-tracer. But the result will always be biased, i.e. (slightly) incorrect, usually darker than it should be.Default value is 0.5.
--primary-samples-count <count>-
This option is meaningful only when you use path tracer. By default this is 1. Generally there is no sense in incrementing this too much. You can use here 10 or something like that to have anti-aliased image. If you want to just increment number of paths, usually it’s wiser to increment
<non-primary-samples-count>, this way you will slow down rendering by a little lesser factor. --direct-illum-samples-count <count>-
This option is meaningful only when you use path tracer. At each path point, the specified number of random rays directed towards light sources are checked. By default this is 1. You can increase this, which can bring good results if your scene has a complex light setting (many light sources, in different places etc.) Remember that you can also just increase number of paths (i.e.
<non-primary-samples-count>), as this will also produce more checks for rays to light sources.For educational purposes you can also set this to 0 — then you will get a naive path tracer that just hopes to hit some light sources with random rays. You will then need many many paths, even for simplest models, to get nice renderings.
--first-row <first-row-num>-
If you will use this option with non-zero argument then
<output-filename>must already exist.rayhunterwill load the initial image from this file. Then the image will be resized, if needed, to<image-width>and<image-height>. Thenrayhunterwill start rendering, but not from the beginning: from the given<first-row-num>row number. Rendering results will be written on the image.This way you can tell
rayhunterto resume rendering that is already partially done. This is particularly handy in connection with--write-partial-rowsoption, see there for description.Argument 0 (the default) for this options means that rendering should proceed normally, from the beginning of the image.
5. Some notes about 3d models handling by this ray-tracer
-
Only for
classicray-tracer:Implemented light model is as close as possible to the light model outlined in VRML 2.0 / X3D specification. Some modifications were needed because I have recursive ray-tracing (while VRML 97 specifies only local light model). Also VRML 1.0 models require different treating in some cases (e.g.
SpotLightfocus is specified using a different way andambientIntensityis not available in standard VRML 1.0).We handle all X3D light nodes —
DirectionalLight,SpotLightandPointLight. Also the headlight is used, configurable byNavigationInfo.headlightand NavigationInfo.headlightNode.For
<recursion-depth>equal zero we use onlydiffusematerial color. According to VRML 97 light model,emissioncolor would be more correct but in 99% of real casesemissioncolor is just black so the whole rendered image would be black. That’s why I decided to usediffusecolor instead ofemission. Everyone understands that setting<recursion-depth>to zero is only for testing purposes anyway. -
Mostly for
classicray-tracer: -
Only for
pathtracer:We don’t use point and directional lights, so VRML
DirectionalLight,SpotLightandPointLightnodes are completely ignored. Only the surface lights are used. Every object with a non-blackemissiveColoris a light source.Implemented BRDF is Phong’s BRDF. See fields describing physical properties (Phong’s BRDF) for
Materialnode. -
Some things not handled (yet): textures, interpolating normal vectors (i.e. we’re of course calculating pixel color at every surface point separately, but our surfaces are flat with regards to normal vectors).
-
This concerns actually most 3d engines, including ray-tracer algorithms inside
rayhunterand real-time OpenGL rendering inside castle-model-viewer: 3d model’s geometry must be correct. Which means that:-
No T-Intersections allowed. Otherwise you may see cracks.
-
If two faces cross each other, the intersection may be a line, not a plane. I.e. they shouldn’t be coplanar in such case. Otherwise they will fight which one is nearer than the other and which one casts the shadow over the other.
Actually
rayhuntershould be able to handle such bad case of coplanar surfaces (i.e. result will look OK as long as surfaces have the same material), but there is never 100% warranty for such things (because it involves floating-point errors and ultimately we cannot guess what was "the 3D author intention" at some point).
-
6. Advantages over using ray-tracer built in castle-model-viewer
The same ray-tracer code as is used by rayhunter is also used inside castle-model-viewer. While using ray-tracer from castle-model-viewer is more comfortable, using command-line rayhunter has also some advantages:
-
The obvious advantage is that you can use
rayhunterin batch mode, from scripts etc. -
rayhuntercan produce images in RGBE format. -
You can use options
--first-rowand--write-partial-rowsto be able to kill rayhunter process at any time and then later resume rendering from last point. You can also use the same options to render various parts of the image simultaneously on multiple systems. These advantages may be crucial if you want to do some serious rendering using path tracer, since they may take a lot of time. -
Options
--r-roul-continue,--direct-illum-samples-count,--primary-samples-countthat allow you to better control path tracing are not available incastle-model-viewer. -
rayhuntermay work a little faster since it doesn’t display the image while rendering. Although using--write-partial-rowsyou can forcerayhunterto write partial result from time to time.
To improve this documentation just edit this page and create a pull request to cge-www repository.