Use custom code editor (Emacs, Atom, VS Code…) when opening Pascal source from CGE editor

Posted on

Custom code editor configuration

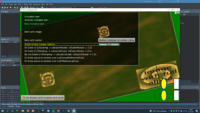
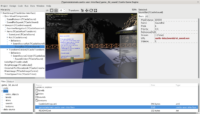
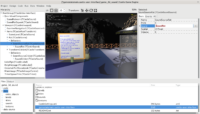
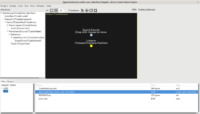
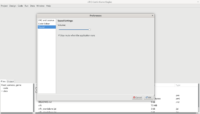
A small but important improvement to our CGE editor: Now various commands that open Pascal files can use your custom editor, configured in Preferences -> Code Editor. By default we keep invoking Lazarus but you can now freely change it.

This affects a few editor commands:

  • menu item Edit Unit…,
  • menu item Edit Unit Associated With Open Design (F12),
  • opening newly added unit at New Unit…,
  • opening Pascal file by double-clicking in Files browser,
  • menu item Open Project in Code Editor (previously called Open Project in Lazarus)

Note that it means you don’t even need to install Lazarus and you still have a 100% functional CGE editor integrated with your favorite code editor. For CGE applications using TCastleWindowBase (which is what we advise by default) you don’t need Lazarus or LCL, “bare” FPC installation is enough.

Comments on the forum ➤

GPU-based 3D particle system, and upgraded 2D particle system for Castle Game Engine

Posted on

3D particle system editing - fire
2D particles - million
3D particle system - basic
3D particle system - fireflies
3D particle system editing - beam
3D particle system - beam
2D particle system - spiral
2D particle system - lots of particles
2D particle system

With huge thanks to Trung Le (Kagamma), we have a new 3D particle system for CGE, and serious upgrades to the existing 2D particle system:

  1. The 2D particle system has now an alternative GPU-based implementation.

    It allows to render 1 million particles on the screen, with FPS still stable at 60 🙂

    Note: It is using Transform Feedback and some OpenGL 3+ stuff, so an OpenGL 3.3+ compatible graphics card is required, and it doesn’t yet work on mobile. But there is still a CPU-based compatible implementation, just use TCastle2DParticleEffect instead of TCastle2DParticleEmitterGPU, and it will work everywhere.

  2. We have a new 3D particle system:

    • With a GPU-based implementation.

      As above, it is using Transform Feedback, so an OpenGL 3.3+ compatible graphics card is required, and it doesn’t yet work on mobile. There is no CPU implementation in this case, so it doesn’t (yet!) run everywhere where CGE is.

    • With its own 3D particle editor and JSON-based format to design 3D particle systems.

Both particle emitters nicely integrate in the editor — you can put them in editor_units in your CastleEngineManifest.xml, and they will register components like 3D Particle Emitter (GPU), 2D Particle Emitter, 2D Particle Emitter (GPU).

Get the linked repositories and run demos inside!

Both repositories are listed now on our gallery of CGE components. (Do you develop any components that may be useful for other CGE developers? Let us know and we’ll happily add your components there.)

See also forum posts about these developments: 3D particle system, Cge-2d-particle-emitter now supports GPU-based particle.

Comments on the forum ➤

More permissive license to use our examples code

Posted on

isometric game demo

We change the license of our examples (stuff in examples/ subdirectory) to be more permissive. Namely, all our example code and almost all our example data are now covered by the modified BSD (3-clause) license. It’s a very permissive license that basically says “we keep our copyright, but otherwise do what you want with these files, modify them as you like, and you don’t need to show your modifications to anyone”.

This was always our intention, we want you to use the example code as a basis of your applications without any fuss.

More details, and precise legal words, are in our licensing terms and the modified BSD (3-clause) license text is here.

Comments on the forum ➤

Automatic downscaled textures can be now specific to a platform

Posted on

The Unholy Society

We improve the process of automatic texture downscaling. The automatic downscaling is determined by data/material_properties.xml file and documented here. The new features are:

  • Ability to specify any set of scales, not necessarily a continuous range.

  • Ability to specify that some scale values are packaged only for particular platforms. E.g. scale 3 (which means that each size is downscaled 1/4) may only be packaged for Android and iOS, and not for desktops. This is useful, as mobile platforms often have GPUs with more limited memory, so textures often have to be provided there with lower resolution.

New features are documented on manual page about “Auto-generated compressed and scaled textures”.

Thanks go to Eugene Loza for doing this! This is another feature pushed by upcoming The Unholy Society release on mobile 🙂

Comments on the forum ➤

Various improvements (2D navigation, PhysicsRayCast, examples upgrades, important bugfixes)

Posted on

2D Navigation
  1. The navigation in 2D viewports (with orthographic projection and standard direction/up: -Z/+Y) is now much better. We have a new algorithm TCastleExamineNavigation.ExactMovement that makes the navigation more natural, and we have a dedicated TCastle2DNavigation class (descendant of TCastleExamineNavigation) to make the mouse buttons easiest to discover (just drag with left mouse button). You can assign the TCastle2DNavigation in editor too: just use the “hamburger” menu at the viewport (see the screenshot in this post).

    view3dscene also has now a “2D” navigation button.

  2. We have a new PhysicsRayCast utility, to cast rays using physics engine (Kraft). It is used by examples/platformer/ now.

    Note that it is only a temporary state that we have 2 methods to cast rays: using Kraft (PhysicsRayCast) and not using Kraft (TCastleTransform.RayCast, MyViewport.Items.WorldRayCast — see examples/3d_rendering_processing/collisions demo). In the long run, we want to have a single API to cast rays, and it should always use physics engine, and it should be configurable “what is the current physics engine”.

  3. Subcomponents in the editor (like TCastleTransform.Translation or TCastleScene.RenderOptions) are no longer gray (it was confusing, as one could think “gray means inactive”).

    Thanks go to Andrzej Kilijański for 1-3 above!

  4. A lot of examples have been upgraded to follow latest CGE conventions: DesignUrl, CastleAutoGenerated unit, {$region...} comments and more.

  5. Fixed a fascinating bug with blinking lighting in some cases (see here for details — normal matrix was flipping between 2 different values, due to a determinant of modelview matrix being very very close to zero).

  6. A bug related to using Scene.StopAnimation right after Scene.PlayAnimation was fixed. See details.

  7. Upgraded OpenSSL Windows DLLs to 1.0.2u from 1.0.2n.

Comments on the forum ➤

Introducing TUIState.DesignUrl, DesignPreload, DesignedComponent

Posted on

TUIState in zombie demo

We expose TUIState.DesignUrl (and some friends) as a more comfortable alternative to the TUIState.InsertUserInterface method. InsertUserInterface was a method used by many CGE applications to load a designed UI into a TUIState. Advantages of the new TUIState.DesignUrl approach:

  1. It looks simpler. You do not need to think about UiOwner and FreeAtStop parameters passed to InsertUserInterface. You have TUIState.DesignedComponent to replace previous UiOwner.FindRequiredComponent.

  2. It allows to trivially use new DesignPreload property, a powerful way to load state data in the constructor (instead of at start), which is sometimes desirable — this way state can later start instantly, albeit at the cost of longer application initialization time and larger memory usage (e.g. textures and images used by state are preloaded in memory).

All of CGE examples and templates have been adjusted to use the new approach.

Previous code looked like this:

procedure TStateMenu.Start;
var
  UiOwner: TComponent;
begin
  inherited;

  { Load designed user interface }
  InsertUserInterface('castle-data:/gamestatemenu.castle-user-interface', FreeAtStop, UiOwner);

  { Find components, by name, that we need to access from code }
  MyButton := UiOwner.FindRequiredComponent('MyButton') as TCastleButton;
end;

New code looks like this:

constructor TStateMenu.Create(AOwner: TComponent);
begin
  inherited;
  DesignUrl := 'castle-data:/gamestatemenu.castle-user-interface';
  // DesignPreload := true; // use this to preload design in constructor
end;

procedure TStateMenu.Start;
begin
  inherited;

  { Find components, by name, that we need to access from code }
  MyButton := DesignedComponent('MyButton') as TCastleButton;
end;
Comments on the forum ➤

Full-featured Sprite Sheet Editor inside Castle Game Engine, also our own castle-sprite-sheet format

Posted on

Sprite sheet editor
Sprite sheet editor
New sprite sheet menu
Sprite sheet import Starling
Sprite sheet import atlas
Sprite sheet platformer demo - title
Sprite sheet platformer demo
Sprite sheet editor
Sprite sheet editor
Sprite sheet editor

Our CGE editor now includes a full-featured sprite sheet editor. This allows to create and modify sprite sheets that can be then trivially used (loading, playing animation) through TCastleScene. The resulting sprite sheets are saved in our own format (based on Starling XML) with extension .castle-sprite-sheet.

The editor is available by menu item Data -> New Sprite Sheet (or use the context menu, just right-click on the “Files” panel). You can start by opening an existing sprite sheet, or importing an existing atlas file, or just add animation from a series of images.

The sprite sheet is comprised from a number of animations, each with its own speed (number of frames per second). You can freely create/modify/rename animations, and move images (frames) between them.

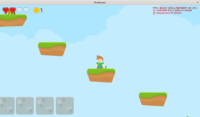
  1. A simple demo of the new approach is in examples/sprite_sheets/sprite_sheets_demo/. Note that it was done 100% visually in the editor — no extra code necessary just to load/play sprite sheet animation.

  2. Andrzej is working on a much more impressive demo in examples/platformer.

See the documentation about using sprite sheets through TCastleScene.

All of this work was done by Andrzej Kilijański — thousand thanks for getting our sprite sheet support to a whole new level!

Comments on the forum ➤

Docker image, Android upgrades, Aarch64 optimizations, FMOD on Android

Posted on

The Unholy Society

A bunch of improvements of particular interest to mobile (Android, iOS) developers. In completely related news, stay tuned for The Unholy Society on Android and iOS release 🙂

Improvements:

  1. Updated our Docker image (affects also FPC/Lazarus used to build the default CGE releases) to:

    • for FPC 3.0.2, upgrade Lazarus version to 2.0.0
    • for FPC 3.0.4, upgrade Lazarus version to 2.0.12
    • for FPC 3.2.0, upgrade Lazarus version to 2.0.12
    • for FPC trunk, upgraded SVN revisions to latest 48998 (FPC) and 64830 (Lazarus). Also documented FPC trunk support.
    • use latest Android NDK layout for libraries (to adjust to changes described here (they removed ndk-bundle/platforms/ subdirectory) and here.

    Why? We want to use latest fixes from everything 🙂 We also want GTK2 fixes from latest Lazarus 2.0.12. We also want latest FPC trunk with fix for optimizations on 64-bit ARM (Aarch64), important for mobile platforms.

  2. Updated Android and fpcupdeluxe wiki docs to reflect new locations of Android libs in Android NDK.

  3. Our Android build process was updated to use latest Android Gradle Plugin (4.1.0). Note that this also requires newer Gradle (6.5+), it will be downloaded automatically in normal setups. This fixes building with latest NDK.

  4. We now have examples/mobile/achievements/ demo. This is almost identical to the “New Project -> 2D Game” template but also reports achievements to Google Play Games or Apple Game Center.

    Old example examples/2d_dragon_spine_game/ was removed. The template “New Project -> 2D Game” now serves better to show it.

  5. Aarch64 optimizations are now enabled when FPC is >= 3.3.1 .

    Note: we just assume that if we have FPC version >= 3.3.1 then it is at least revision 48104. Documented here, see Trello ticket.

  6. FMOD service on Android works! This allows to use FMOD sound library on Android easily. By Eugene Loza and Michalis. See FMOD service on Android docs and FMOD docs.

Comments on the forum ➤

Better code navigation, new units/states creation, new ways to open source code for editing, better integration with Lazarus project

Posted on

Code menu
New TUIState dalog
New unit with class dalog
New empty unit dalog

I’ve done a number of improvements to our editor and build tool to improve the advised organization of a CGE project and allow to comfortably edit Pascal code from CGE editor.

The goal of all these changes is to make editing CGE project easier. We want to turn the combo “CGE editor + Lazarus” into something like “Unity + Visual Studio”. CGE editor can manage your project and invoke Lazarus for you to do actual editing of Pascal files. (For those of you that would prefer to use Emacs or VS Code or other editor for Pascal: this is of course coming soon too. First we just want to nail down the Lazarus experience.)

To edit the unit you have now various options:

  • In CGE editor: enter the code/ subdirectory, and double-click on a Pascal unit.

  • In CGE editor: use menu item “Code -> Edit Unit …”.

  • In CGE editor: press F12 when some design is open. This will open the associated unit.

  • In Lazarus: open the project in Lazarus, and open necessary units. All Pascal files found on the search path are automatically part of the LPI project.

Engine and editor changes:

  1. All templates and most CGE examples now put the Pascal units in code/ subdirectory. I found that it is a much better layout than keeping all Pascal files in a top-level directory (that gets “crowded” with files in larger projects).

  2. All templates come with an initial .gitignore and README.md files. You can now push your new project to GitHub / GitLab etc. quicker.

  3. New Code menu in the editor, to edit Pascal code:

    1. Open Project in Lazarus

    2. Regenerate Project (overwrites LPR, LPI, CastleAutoGenerated) (more on this below)

    3. Edit Unit… (choose unit by a dialog box)

    4. Edit Unit Associated With Design (F12, searches for unit with same basename as current design but extension .pas)

    5. New Unit (also available on popup menu when right-clicking in the “Files” panel at the bottom):

      1. Empty
      2. With Class
      3. With State (it can even automatically add the state initialization!)

    Most of the new options are rather straightforward. But 2 things listed below require following certain conventions to make them work. You may want to adjust your existing projects to follow these conventions too (nothing bad happens if you don’t, these conventions are only necessary to allow editor to perform these operations automatically; your existing games work regardless):

    1. The option “Edit Unit Associated With Design” (F12) assumes that the filenames of Pascal units and designs match. That is, for design file like xxx.castle-user-interface it just searches for Pascal unit called xxx.pas (using search paths from CastleEngineManifest.xml). This means that e.g. using it with state_main_menu.castle-user-interface design file will not automatically find gamestatemainmenu.pas unit — we recommend you to rename your state file to gamestatemainmenu.castle-user-interface.

      (We accept also .pp extension, and unit name may be lowercase or CamelCase. But lowercase is advised as more reliable on case-sensitive filesystems. This follows FPC / Lazarus.)

    2. Adding new state to the initialization requires that one of the units (listed on game_units, reachable using search paths from CastleEngineManifest.xml) has special comments:

      {$region 'Castle Initialization Uses'}
      {$endregion 'Castle Initialization Uses'}
      {$region 'Castle State Creation'}
      {$endregion 'Castle State Creation'}
      

      The first pair delimits state units declaration in the uses clause, and may look like this:

      uses SysUtils,
        CastleWindow
        {$region 'Castle Initialization Uses'}
        // The content here may be automatically updated by CGE editor.
        , GameStateMenu
        , GameStatePlay
        {$endregion 'Castle Initialization Uses'};
      

      The second pair delimits state creation lines (typically in Application.OnInitialize call) and may look like:

      {$region 'Castle State Creation'}
      // The content here may be automatically updated by CGE editor.
      StatePlay := TStatePlay.Create(Application);
      StateMenu := TStateMenu.Create(Application);
      {$endregion 'Castle State Creation'}
      

      Of course all our templates have been updated to follow these conventions. All the examples will follow shortly.

  4. “Regenerate Program” menu item (command-line: castle-engine generate-program) now generates also castleautogenerated.pas file that does some useful things:

    This avoids the need to care about them in LPR or manual gameinitialize.pas code. This way there’s less “boilerplate” in your gameinitialize.pas.

    It also allows to put in gameinitialize.pas custom command-line parsing (previously it required to modify LPR file, making it not 100% easy to autogenerate).

    Our templates and examples have been updated to follow this. You can (but don’t have to!) update your existing projects to follow this too. Just generate standalone program by “castle-engine generate-program” (and do not edit LPR or LPI or castleautogenerated.pas, to be ready to call them again). Your project will continue to build by both Lazarus and build tool (that is also why auto-generated stuff is not hidden in some temporary directory — it needs to be available for running from Lazarus).

    The LPI file now includes all Pascal files found in the CastleEngineManifest.xml search paths into the project. This makes Lazarus behavior nicer out-of-the-box, it can navigate among all units (they are all in “Project Inspector”), it looks at all Pascal source code to know when to rebuild the project.

  5. When creating a new project, we ask for Main State Name. This makes the first state name configurable for “Empty” and “3D Model Viewer” templates.

I also have some small changes to mention, too small to deserve own news post:

  1. More useful “Basic” editor tab, it is no longer disjoint from “Layout”.

  2. Initial log output is now better, with a line like Platform: Android, OS: Android, CPU: arm (32-bit).

  3. Fixed src/library/ compilation.

Comments on the forum ➤

Multi-sampling (full-screen anti-aliasing) on iOS

Posted on

iOS anti-aliasing
iOS without multi-sampling requested (some anti-aliasing done anyway)
iOS with multi-sampling requested (more anti-aliasing done)
No multi-sampling (desktop)

You can now activate multi-sampling on iOS using Window.AntiAliasing := aa4SamplesFaster. You should set this before window is opened, which usually means it should be done in the initialization section of a unit like GameInitialize.

What values of AntiAliasing are actually meaningful?

Internally iOS supports only “none” or “4” multi-sampling values. So actually there are only 2 different states on iOS depending on Window.AntiAliasing:

  • aaNone, aa2Samples* -> means no anti-aliasing
  • aa4Samples* and higher options -> means 4x anti-aliasing

The suffix “faster” or “nicer” also doesn’t matter for anti-aliasing on iOS, e.g. aa4SamplesFaster and aa4SamplesNicer are equivalent. This suffix matters only on OpenGL with NV_multisample_filter_hint.

Testing

Unfortunately the log always says Current: 1 samples per pixel because it seems Apple didn’t bother to implement glGetInteger(GL_SAMPLES) correctly. It always returns 0 (so it would seem that no multi-sampling happens).

But if one looks at actual rendering, then yes, multi-sampling does make an effect!

Actually, it seems that iOS always does some multi-sampling, which I guess is just something they do on the high pixel resolutions on iOS (these are results of my tests on iPhone SE). But there’s definitely more multi-sampling when you request aa4SamplesFaster than if you leave it at aaNone. See the screenshots from iOS device with and without multi-sampling requested on the side of this post. They show an unlit box, which should produce very sharp edge without anti-aliasing (see desktop screenshot).

Comments on the forum ➤