Spine - 2D Animations
 |
 |
 |
 |
1. Introduction
Castle Game Engine https://castle-engine.io/ has an advanced support for Spine http://esotericsoftware.com/ 2D animations.
Spine is a great software to design 2D animations for games, using modern techniques (bones, skins, meshes etc.). Animations done this way are lightweight: their loading and rendering is very efficient, even on mobile devices like Android or iOS. But they are also very flexible:
-
they look smooth regardless of the playback speed,
-
you can reuse the same animations by changing skins,
-
you can change attachments during animation,
-
and more (see Spine website for exhaustive list :).
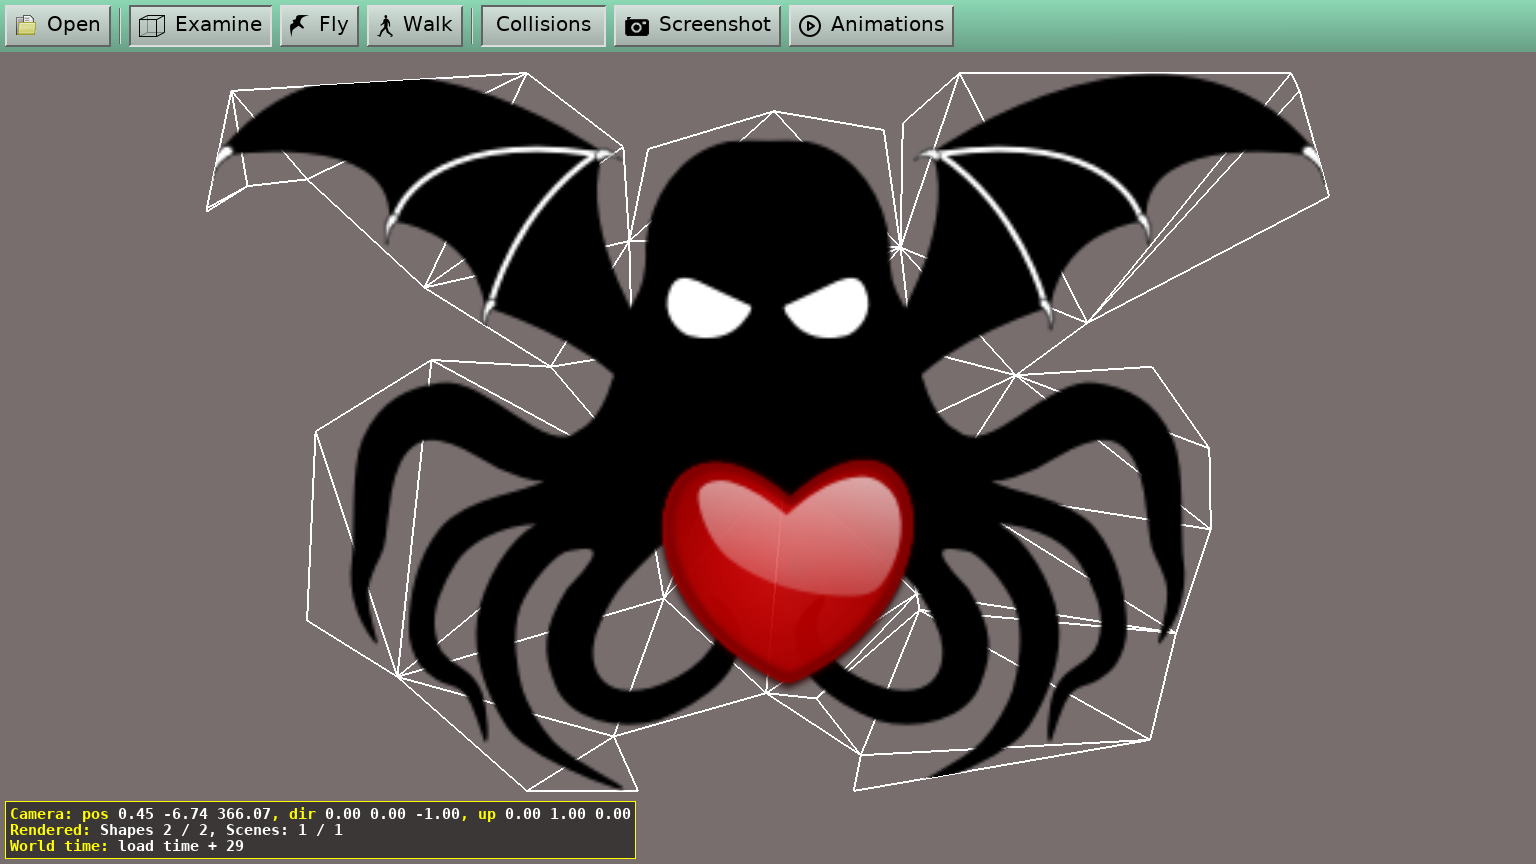
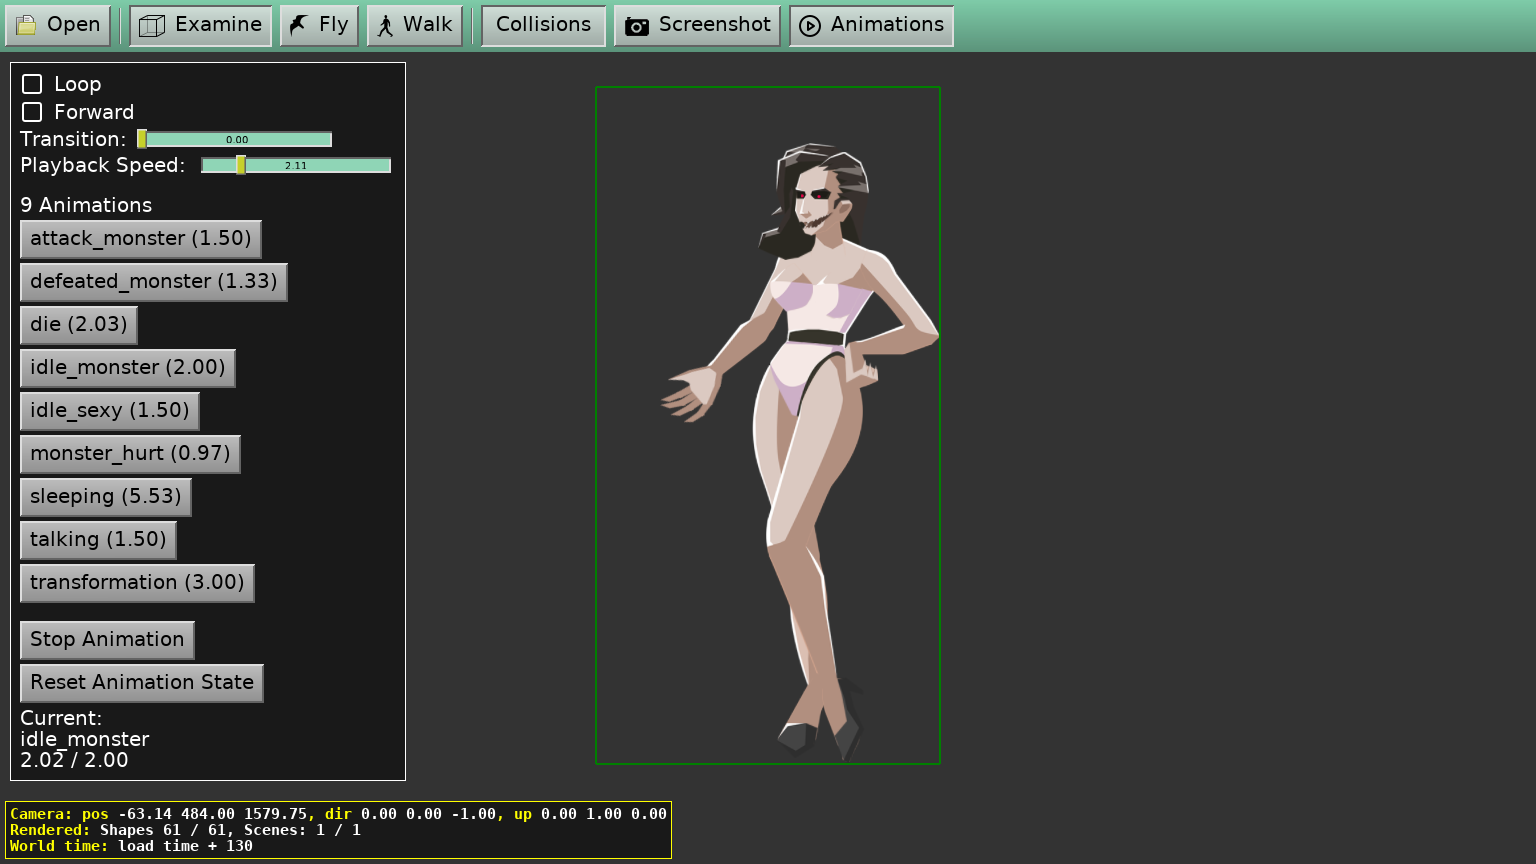
You can use Castle Model Viewer to open Spine animations.
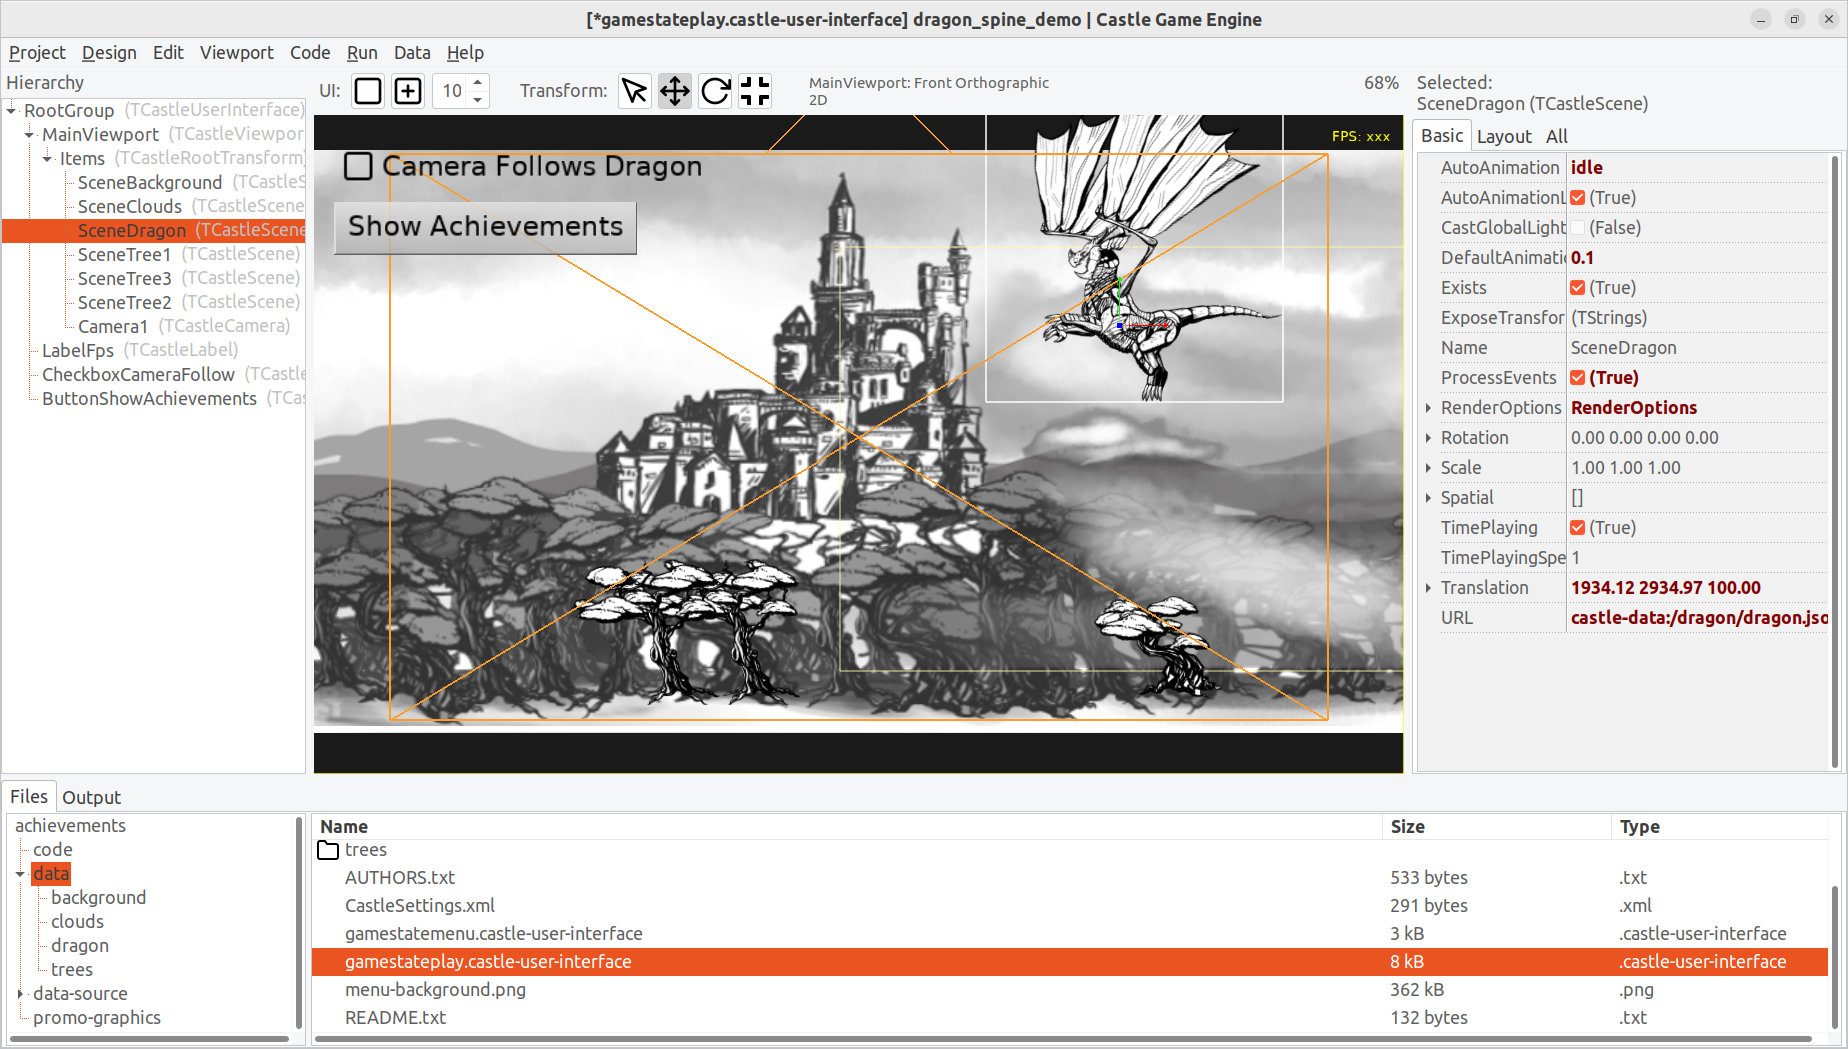
You can also add Spine animations using the editor, just add a TCastleScene and set the scene URL to point to the JSON file.
-
Some sample Spine animations are in demo models in subdirectory spine. They are also used by some examples, like examples/animations/play_animation and by our "New Project" -> "2D game" template.
-
Just open a project exported from Spine (as a JSON file) using Castle Model Viewer File->Open .
-
To run a named animation, use Animations panel in Castle Model Viewer.
2. How to use Spine animations in your own games
2.1. Overview of Spine and 2D usage in the engine
See our engine documentation for an overview how to use the engine.
When you run our editor, create a "New Project" and use template "2D Game". This shows a viewport with multiple Spine scenes. A Spine scene is just a TCastleScene instance and you add it to TCastleViewport to make it visible, animated etc.
To play a Spine animation,
-
In editor or from code set
TCastleSceneCore.AutoAnimation. -
Or from code call
TCastleSceneCore.PlayAnimationmethod. UseTCastleSceneCore.AnimationsListto list available animations.
See viewport and scenes for more information about using viewports and scenes — there’s nothing special about scene using Spine model.
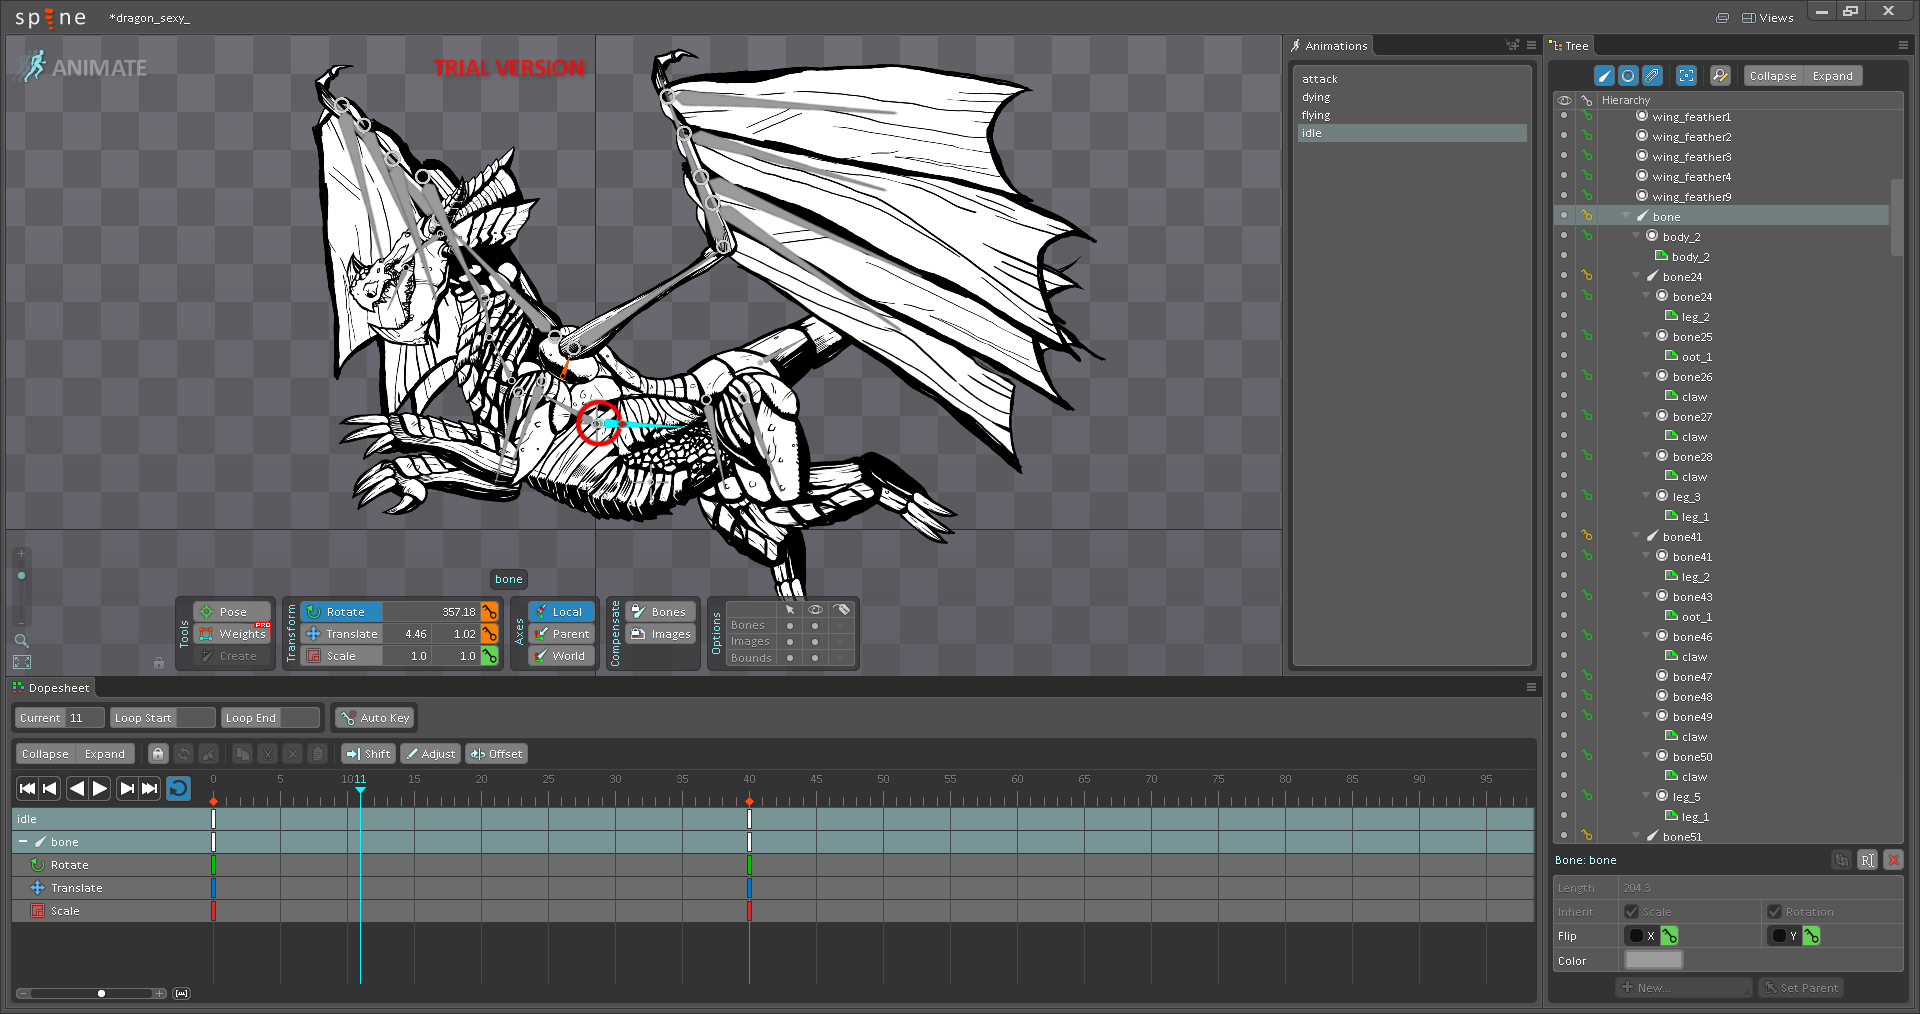
3. Creating Spine models
Basically, just create Spine models/animations as usual, and export them to JSON. Often it is comfortable to test your animations first in Castle Model Viewer before trying them out in your game.
It is advised (although not required) to create an atlas when you export to JSON, as rendering with atlas will be more efficient. Atlas options:
-
Make sure to select "Bleed" at atlas creation options (it is necessary to avoid visible seams during rendering).
-
It is simpler to use "Atlas Per Skeleton", although we also support "Single Atlas For All Skeletons". The latter is more efficient when multiple skeletons share the images, but requires loading by a special URL like
my_animation.json#atlas:my_atlas_name(see below).
4. Spine features support
4.1. Skins
-
You can choose a skin at loading, by loading a filename like
my_animation.json#skin:my_skin_nameinstead ofmy_animation.json. -
By default we use the first (non-default) skin.
-
If you don’t know the list of possible skins: you can see them in Spine, or in our log.
-
For backward compatibility, instead of
my_animation.json#skin:my_skin_namewe also supportmy_animation.json#my_skin_name. But the latter form is deprecated.
4.2. Atlases
We fully support all Spine texture atlas options.
-
This includes handling multiple atlas pages, stripping whitespace, rotating… so you can pack your atlases really tight.
-
We also support "single atlas for multiple skeletons" feature of Spine. You can use it when exporting (it can be beneficial, may allow to reuse texture space better). To do this, specify atlas name explicitly, like this:
my_animation.json#atlas:my_atlas_name. This will read atlas from filemy_atlas_name.atlasin the same directory asmy_animation.jsonfile. To specify both skin, and atlas name, separate them by a comma, like this:my_animation.json#skin:my_skin_name,atlas:my_atlas_name. -
You can also work without the atlas (we expect images then to be inside
images/.png</tt>).
4.3. Other features
-
Support for all Spine versions, JSONs exported by Spine 3.x and 4.x are tested.
-
Of course, complete rendering of skeleton with attachments, and complete playback of normal bone animations (hierarchy of translations, rotations, scaling). All animations are imported from Spine, and can be selected by
TCastleSceneCore.PlayAnimation(...)method. -
Animation of slot timeline attachment, this allows to change the attachment during animation, e.g. to make something appear/disappear or for frame-by-frame animations.
-
Animation of slot color and transparency.
-
Animating slot draw order (draw order timeline).
-
Bezier curves for animating parameters.
-
Support for "mesh" attachment.
-
Partial support for "skinnedmesh" attachment. The skinnedmesh in setup pose is affected by bones correctly, and during animation it moves as a whole (is affected by parent bone transformation). Missing is the ability to recalculate vertexes affected by bones during animation (that is, to deform skinnedmesh during animation).
-
Spine "paths" are supported, to use as custom paths for any purpose in the game. Internally they are converted to
NurbsCurveX3D nodes, fully supported by the engine — you can render them, or query them for any purpose. They are invisible by default (Shape.render= false), since that is the intention of Spine paths, but you can make them visible easily if needed. From Castle Model Viewer, use "Edit->Reveal All Hidden Shapes" to show them. -
Animating vertexes of meshes using FFD. See the spine/free_form_deformation demos in demo-models.
-
Animating vertexes of skinned meshes to deform them by the bones. See the Weighted mesh (skinned mesh animation) news and spine/weighted_mesh demos in demo-models.
-
Cross-fading between animations (Spine and otherwise) is supported since Castle Game Engine 6.5
-
Our implementation of Spine converts the Spine project under the hood into an X3D node graph. This means that Spine animation is a full 3D model, and uses stuff like X3D interpolators for animation. This also means that you can use all existing X3D rendering/processing tools to extend the Spine animation (for example, you can use sensors, texture settings, screen effects, you can cast shadows!, you can use shaders etc.).
-
Note that you could also create an X3D file with your 2D world, where you insert multiple Spine animations with X3D
Inlinenode. This allows to combine multiple 2D and 3D models already at data level.
4.4. Missing (contributions are welcome!)
Some more exotic Spine animation features are not implemented (yet!). If you would like to see support for them please submit an issue or ask on Castle Game Engine forum. Or submit a pull request :). Many of the features below are a matter of adding some reading and conversion to X3DLoadInternalSpine unit.
-
Attachment type "regionsequence" (should be easy, but needs test models; in principle, this should be exactly how you can use things like "xxx@counter(4).png" in X3D MovieTexture with our engine, see https://castle-engine.io/x3d_extensions.php#section_ext_movie_from_image_sequence ).
-
Attachment type "boundingbox" (easy to do, convert to X3D TransformSensor; will need special code to actually use it for something).
-
Events and Event Timeline (easy to do; note that events don’t do anything by themselves, they just allow animator to "name" some events on the timeline; we would convert them to some sensor that can be watched (using X3D ROUTE) by user code).
-
IK (Inverse Kinematics). Difficulty unknown, this is a new Spine feature.
-
We do not support paths for "path constraints" or animations.
To improve this documentation just edit this page and create a pull request to cge-www repository.