Blender
1. Introduction
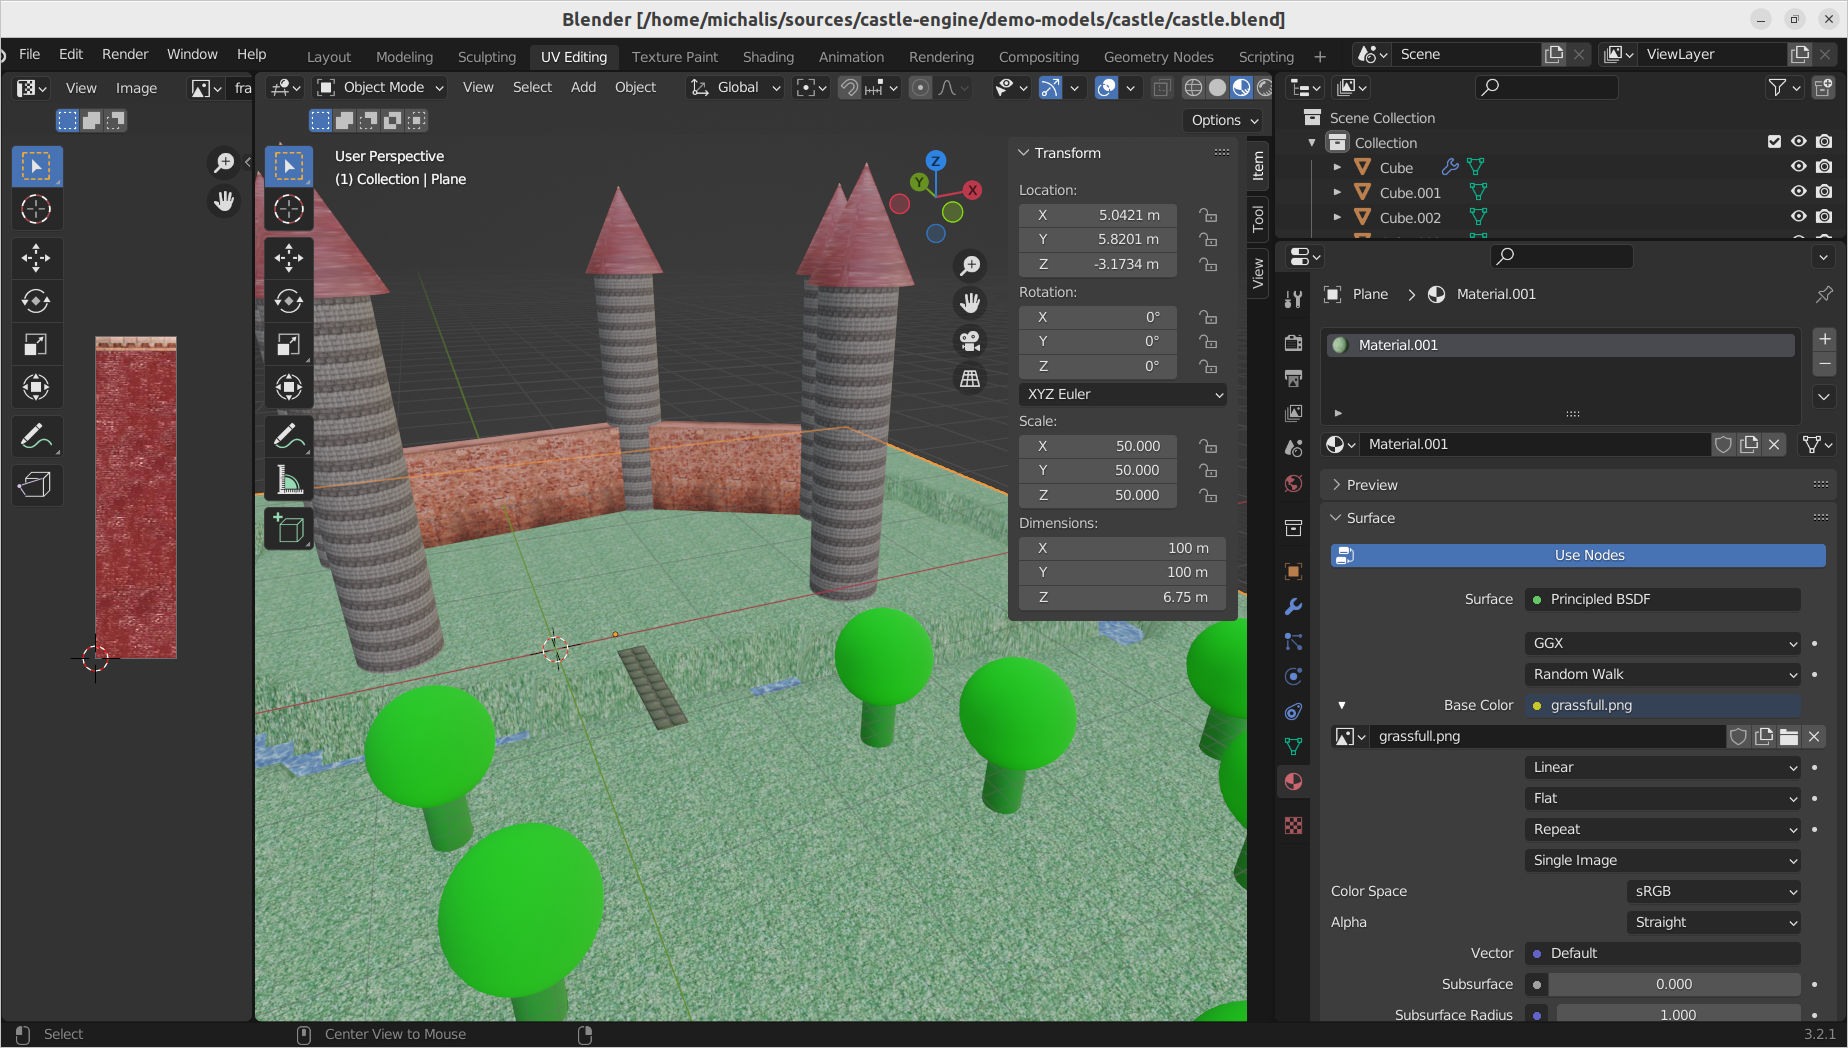
Blender is a magnificent free open-source modeling software.
You can use Blender to create 3D and 2D models, with animations, and export them to glTF.

2. Exporting to glTF
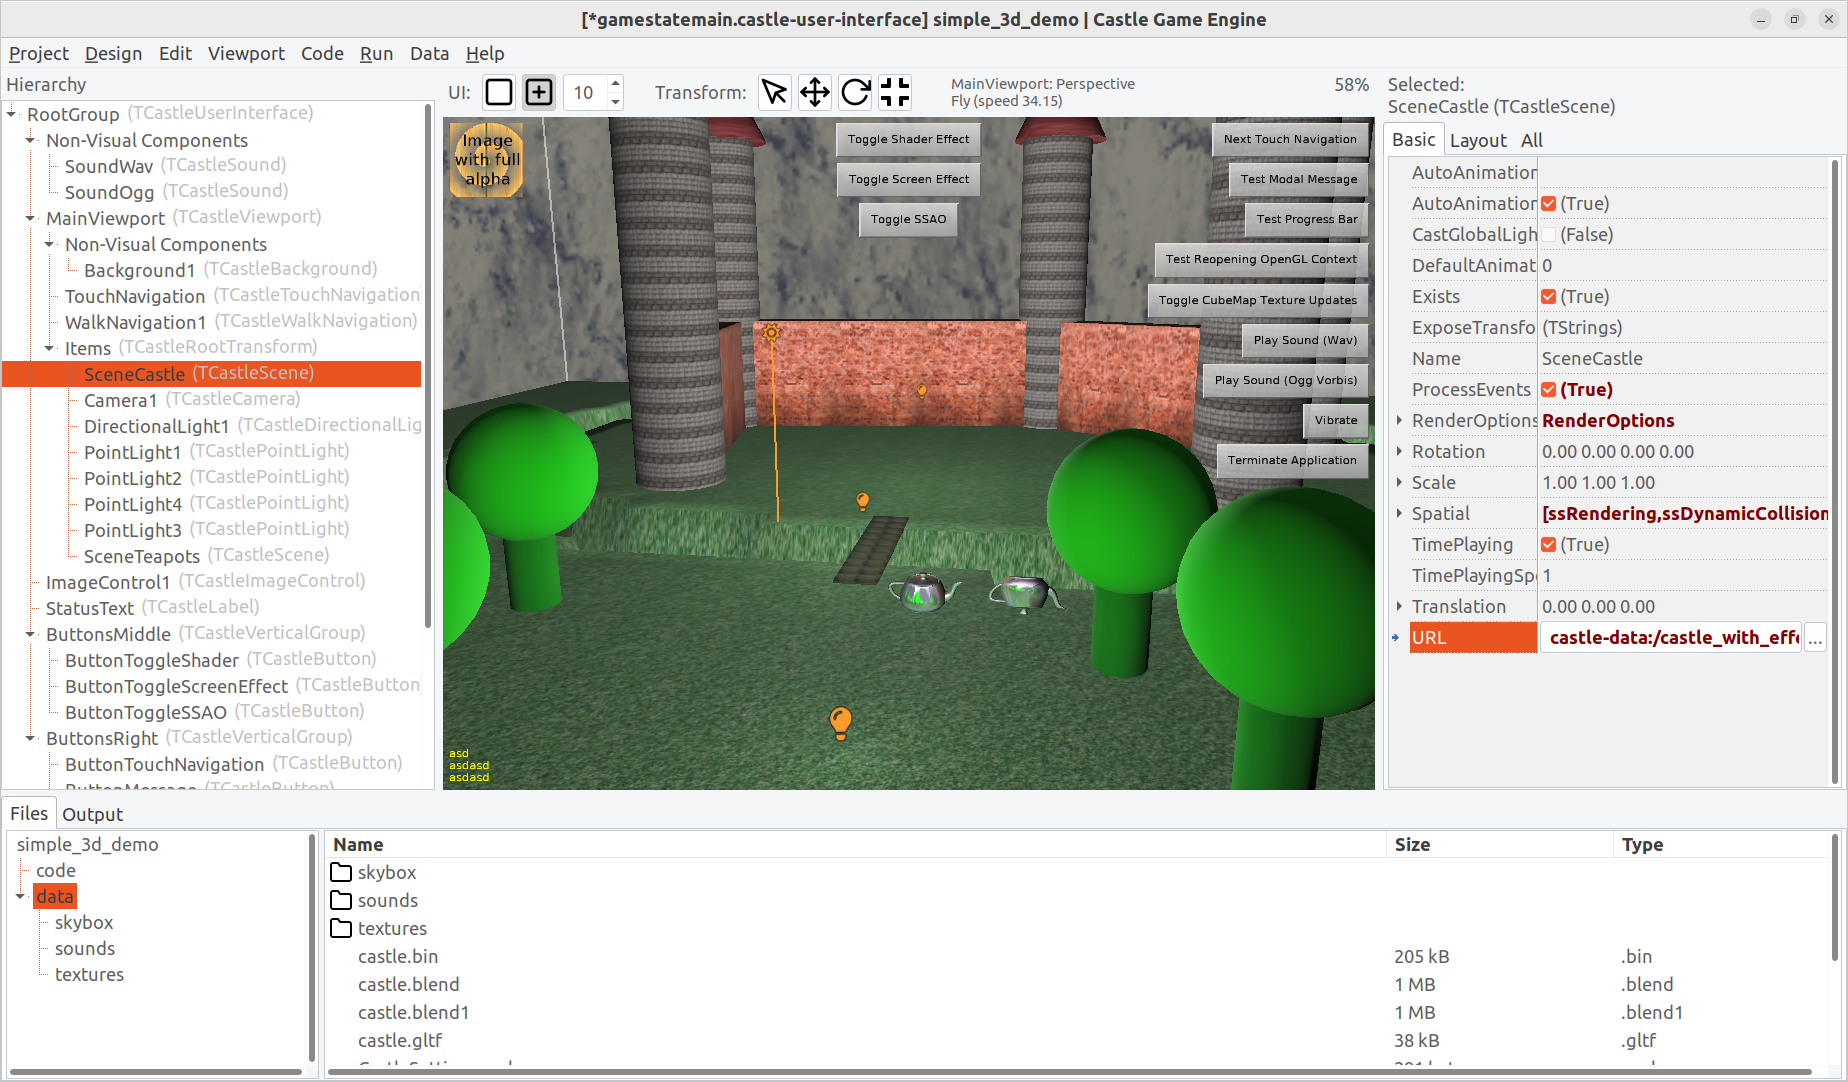
Exporting from Blender to glTF 2.0 is the best way to use Blender with Castle Game Engine.
-
Export using the File → Export → glTF 2.0 menu item in Blender.
-
Load the resulting file (in
.glbor.gltfformats) toTCastleScene. See manual about viewports and scenes. -
You can also open the glTF file with Castle Model Viewer.
2.1. Important links
-
Blender documentation of the glTF exporter documents how to setup your models in Blender to export correctly to glTF.
-
Details about Castle Game Engine support for glTF. We support most glTF features, including physical materials and skinned animation.
2.2. Advised glTF export settings
-
You usually want to check "Geometry → Apply Modifiers" in the export dialog.
-
"Remember Export Settings" is also usually useful.
-
For typical games (where you distribute the game data with your application) we recommend exporting to "glTF Separate (.gltf + .bin + textures)" variant.
Moreover select "Keep Original" or edit the "Textures" directory in the export dialog, so that glTF file will refer to your existing textures by relative filenames. In the simplest case, if your textures are already in the same directory as your glTF file, you don’t need to do anything, "glTF Separate (.gltf + .bin + textures)" will just use these textures.
This means that glTF file will only refer to your texture files. This allows to share textures between various models and keeps importing fast. It also allows to easily edit the textures in other applications, without the need to export glTF again.
2.3. Exporting normalmaps from Blender to glTF (and Castle Game Engine)
3. Advanced topics
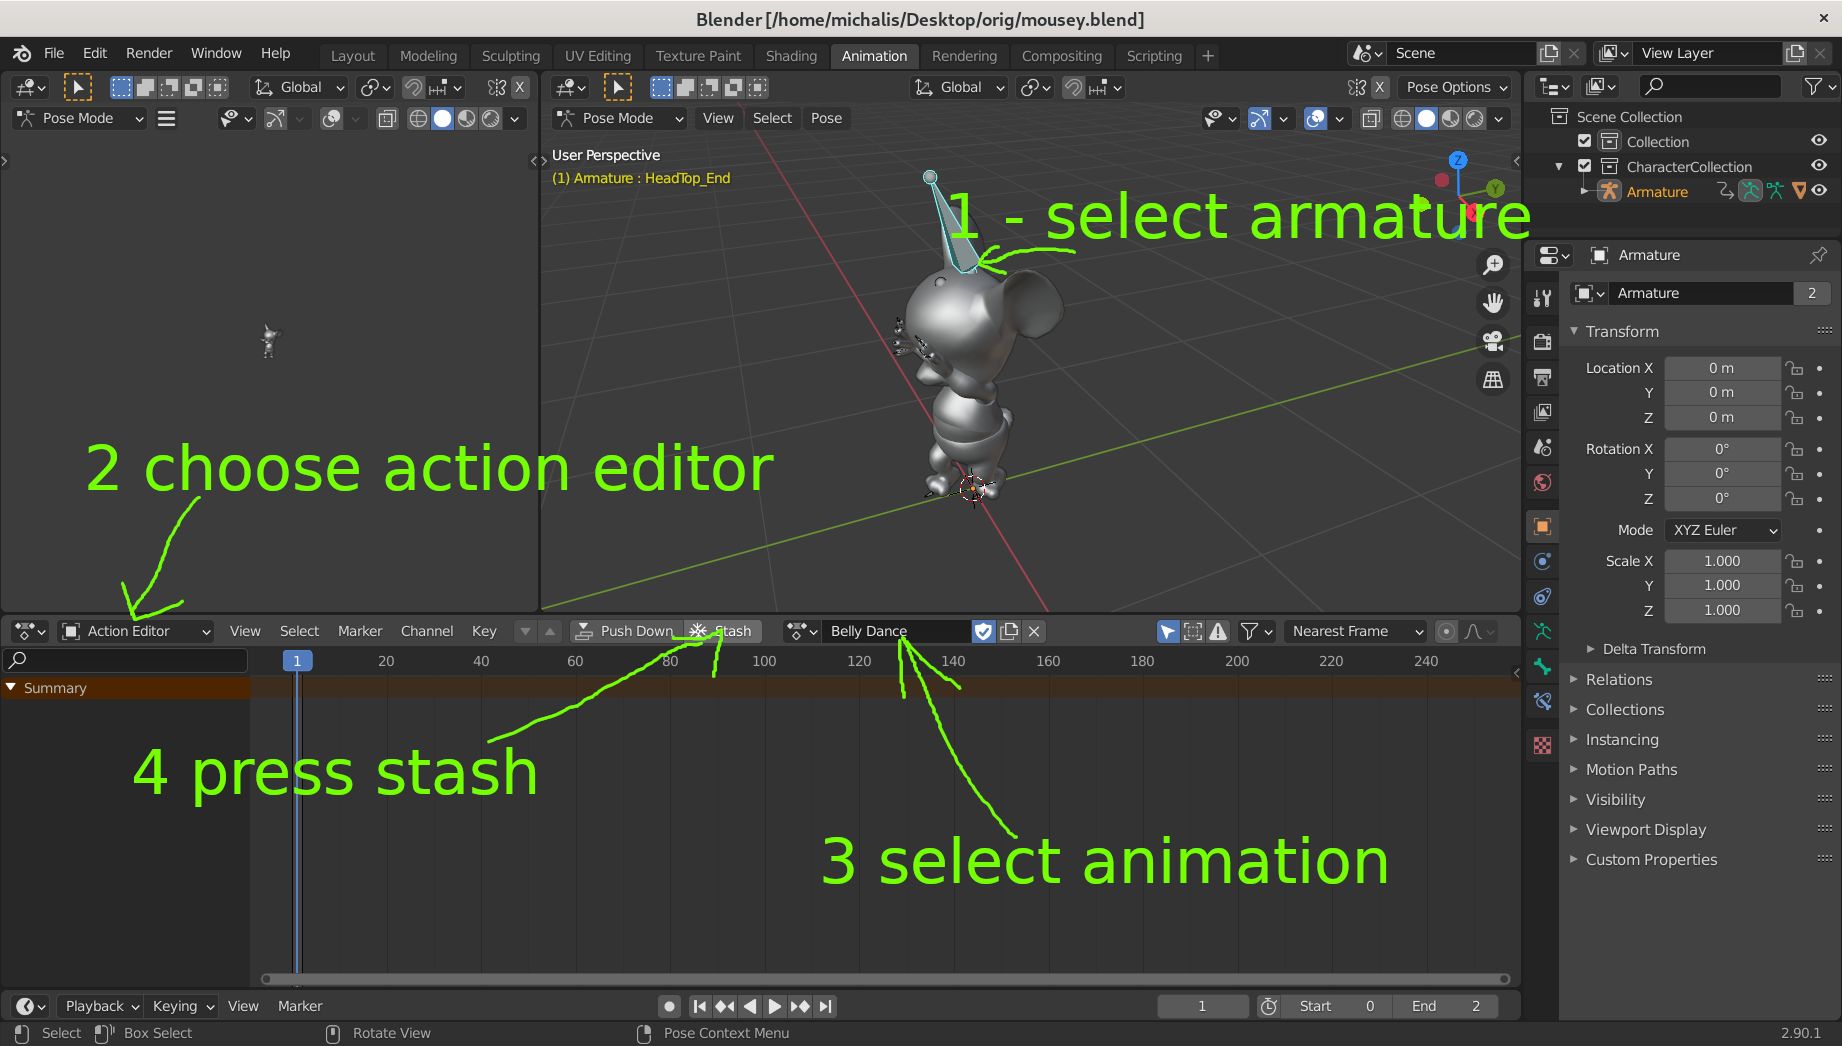
3.1. Stashing animations
You may want to Stash animations to have them reliably exported, as is briefly mentioned by exporter docs. That is:
-
go to "Animation" view (or turn any Blender window into "Dope Sheet")
-
select Armature (e.g. by left-clicking in 3D view)
-
change "Dope Sheet" mode to "Action Editor"
-
select each animation (aka "action" in Blender) you want (repeat this for all animations you want to export)
-
click "Stash"
3.2. Custom properties
 |
Blender can export Custom properties from various objects to glTF, and our engine reads them. You can access them by MetadataString and similar properties on X3D nodes. Demos:
-
See our demo-models, subdirectories
blender/custom_properties/andblender/custom_properties_2/, for sample models. -
See examples/short_api_samples/metadata/metadata_use.dpr for sample Pascal code getting/setting metadata from Pascal.
Usage of custom properties:
-
Custom properties on Blender materials are imported as metadata on X3D material nodes, like
TPhysicalMaterialNode.For example access them like:
MyString := MyMaterial.MetadataString['material_property_name']; -
Custom properties on Blender cameras are imported as metadata on X3D viewpoint nodes, like
TViewpointNode. -
Custom properties on Blender meshes are imported as metadata on the immediate parent
Groupof each X3DShapenode. Note that many X3D shapes may be part of one Blender mesh.For example, if you have a
TShapeNodeinstance, you can look at parent group byTX3DNode.ParentFieldsNodeproperty. To read metadata from the corresponding Blender mesh do this:if MyShape.ParentFieldsCount = 1 then MyString := MyShape.ParentFieldsNode[0].MetadataString['mesh_property_name'] else WritelnWarning('Shape not created by glTF importer'); -
Custom properties on Blender objects are imported as metadata on the immediate parent
Transformof each X3DGrouprepresenting Blender mesh. Note that one Blender mesh may be part of multiple Blender objects.
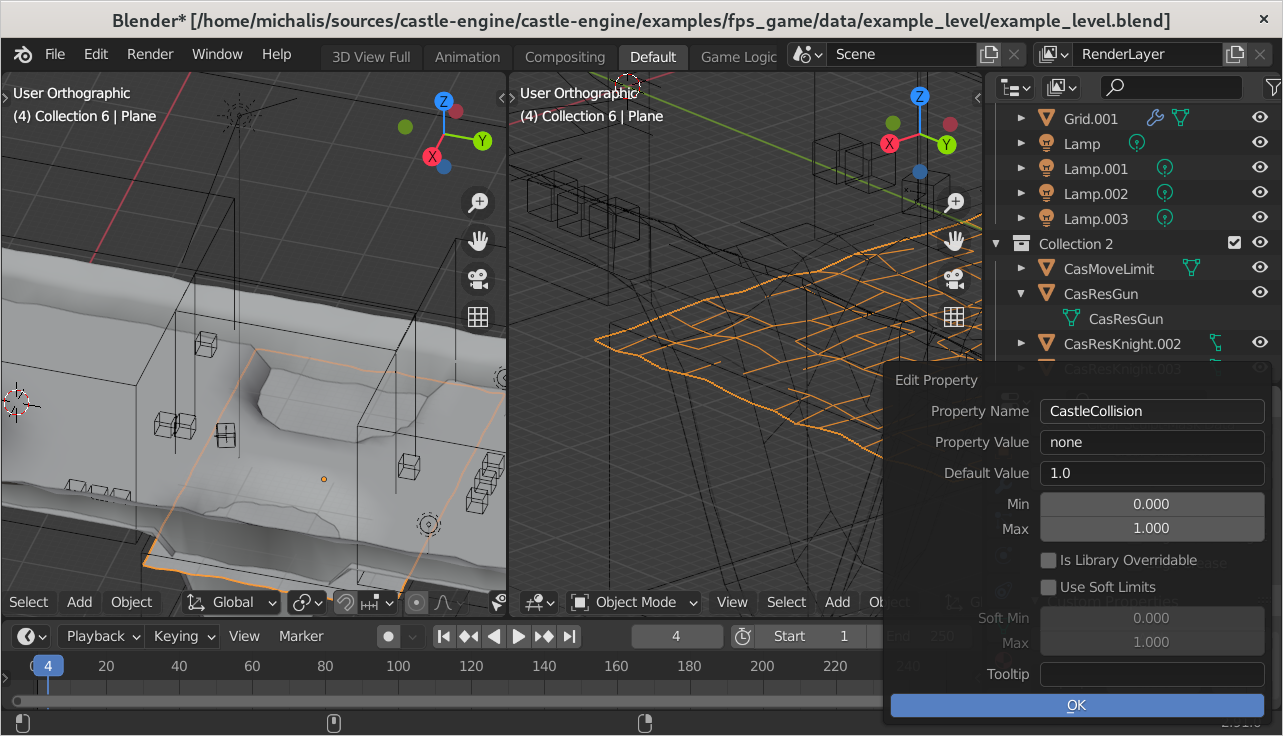
3.3. Controlling if the shape is collidable in Castle Game Engine
We recognize a special property CastleCollision at Blender mesh. It sets X3DShapeNode.collision field in X3D (TAbstractShapeNode.Collision in Pascal API). It accepts the following values:
-
none— non-collidable mesh. -
box— mesh collides as a simple axis-aligned box (auto-calculated from bounding box of the shape, unless Shape.Bbox is explicitly specified). -
default— mesh collides as a precise set of triangles.
3.4. Baking Lighting
You can use baking to store the result of a Blender computation (rendering) into a texture. For example, you can bake lights (that is, bright light spots on objects), shadows, procedural Blender textures and more. Everything that Blender can render, can also be stored in a baked texture.
Once done, you can export a model with unlit materials to glTF.
This is a powerful optimization technique when the lights and objects are static. Once the lighting effects have been baked into the texture, the engine can just render the object unlit, applying the texture without any additional lighting calculations at run-time. E.g. we used this trick in "Darkest Before the Dawn", an old game targeting old Android devices. Since 100% of the lighting was just baked into textures in Blender, the game worked smoothly everywhere, and yet we used lots of "dramatic" local lights.

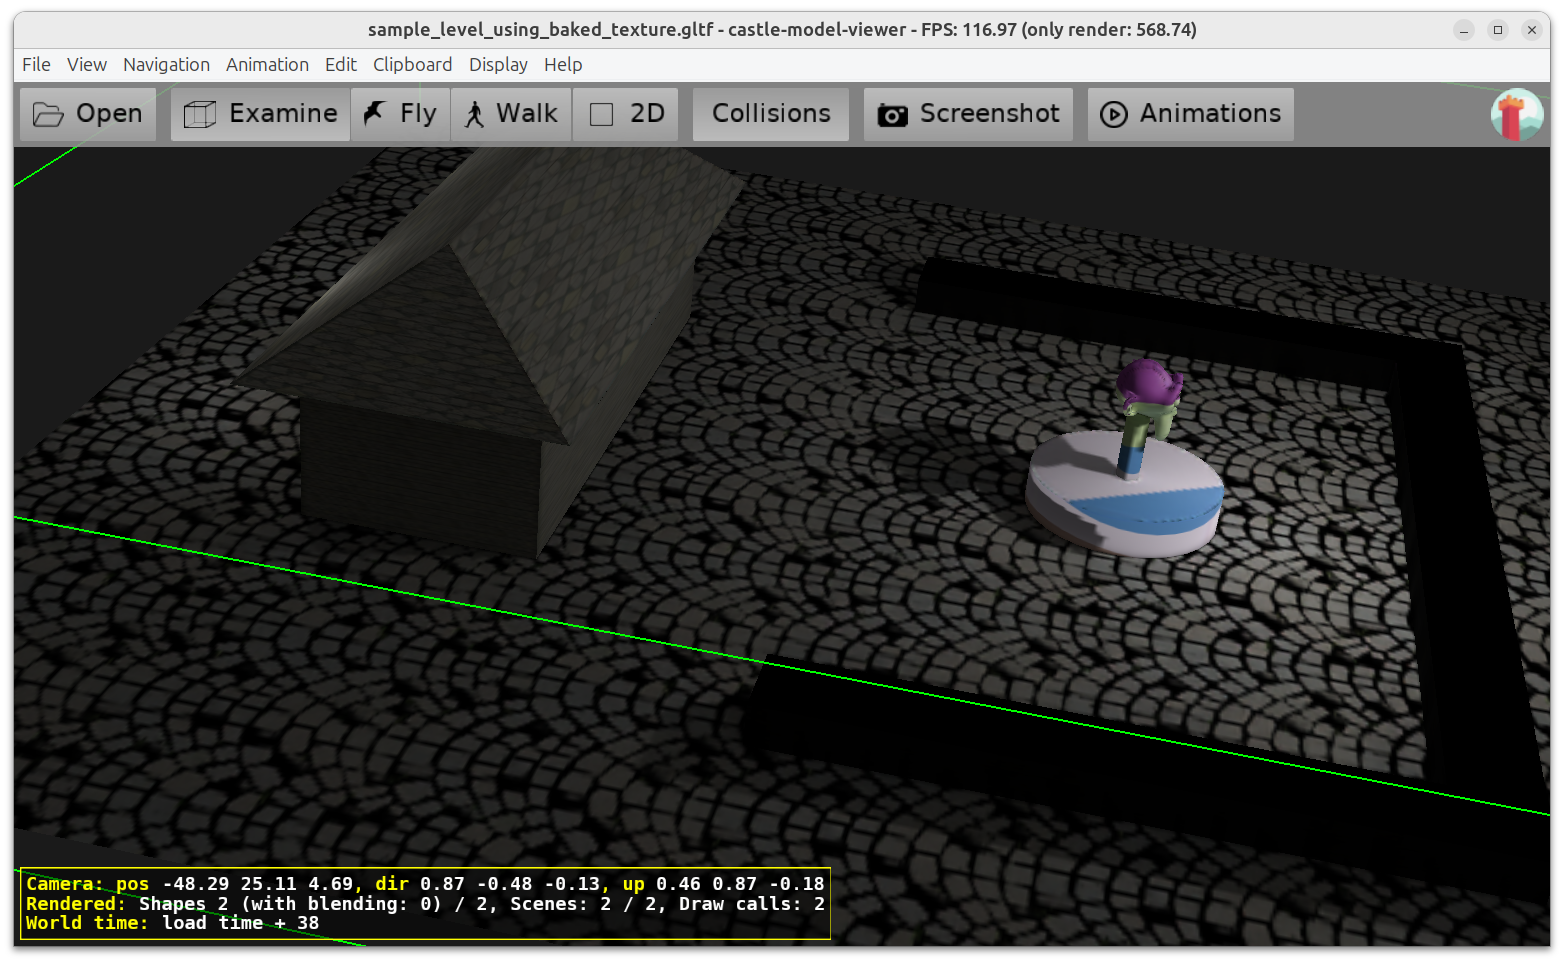
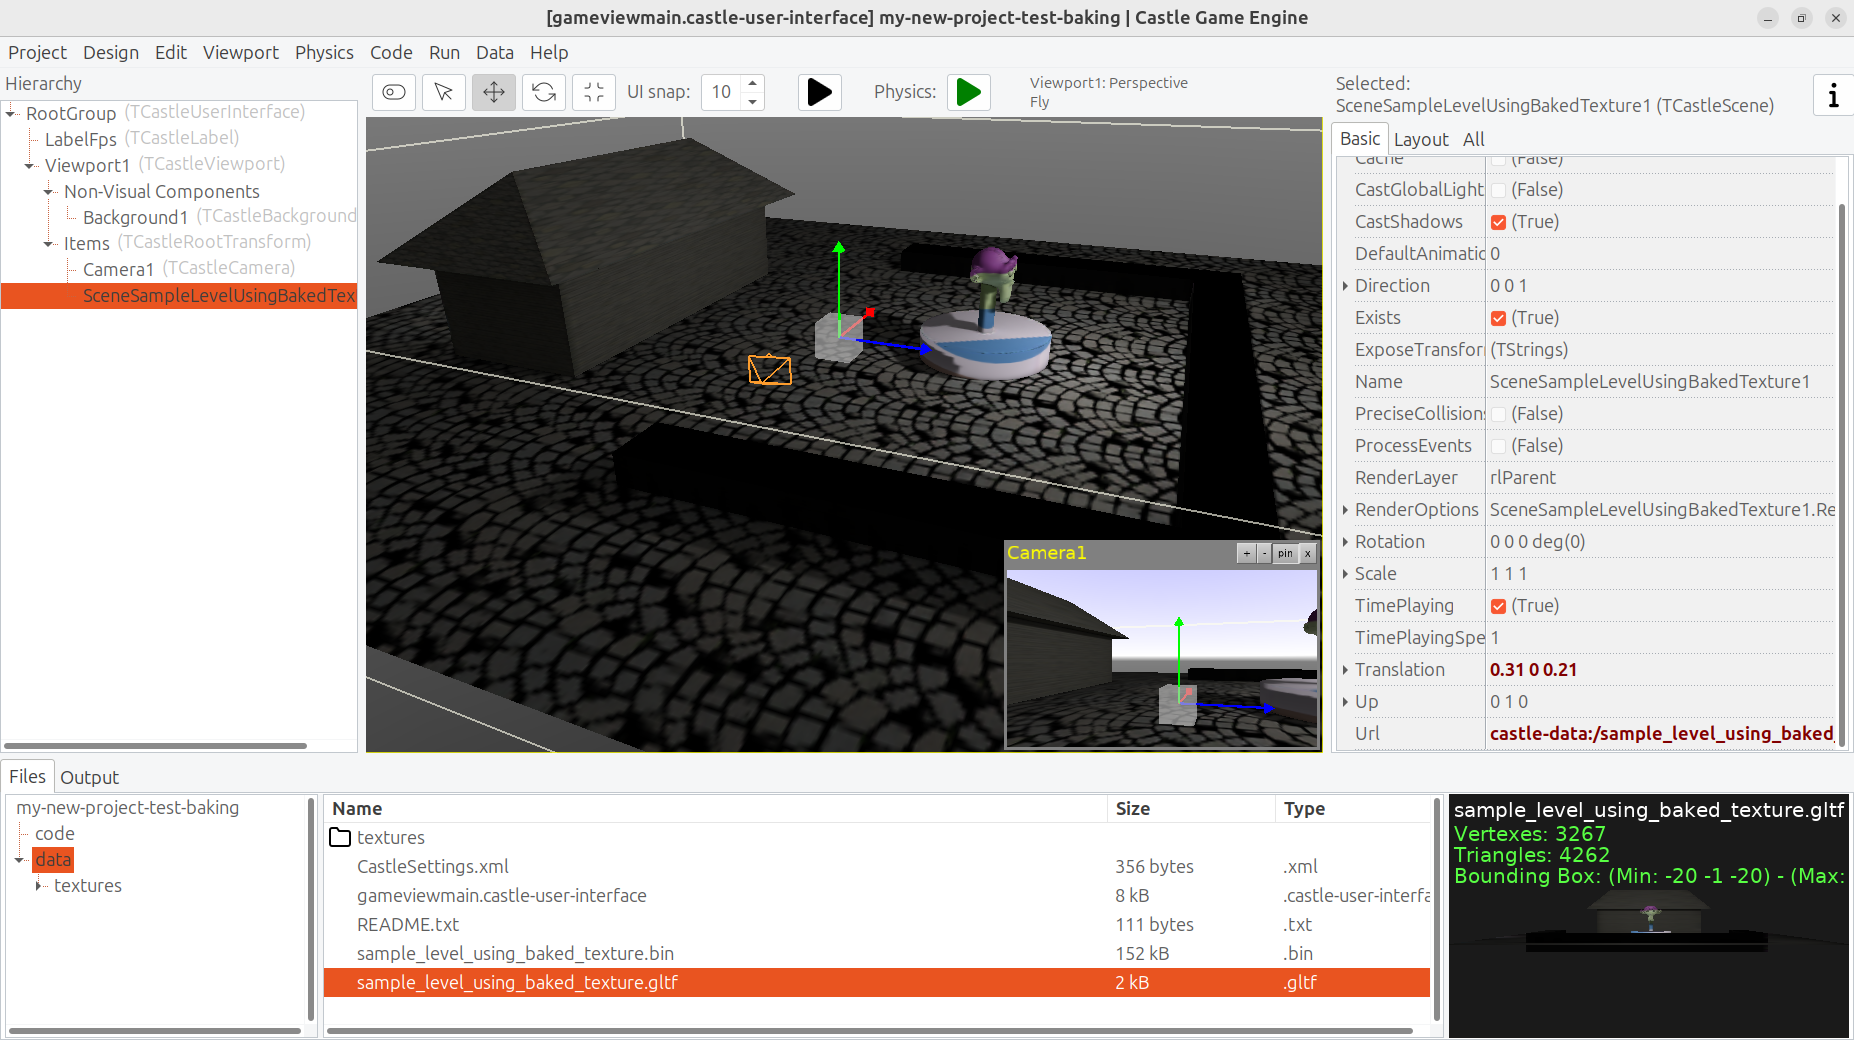
We describe the process in detail below. Follow the description and the screenshots. The files used in this example (input textures, baked texture, Blender files before and after using the baked texture) in the blender/baking_lighting subdirectory of our demo models.
The process to bake lights looks like this:
-
Set up your scene as usual, using regular materials, UVs for textures (possibly using texture as repeatable, e.g. use repeatable bricks texture as usual), lights, colors.
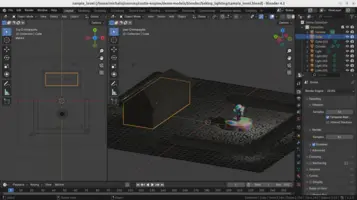

-
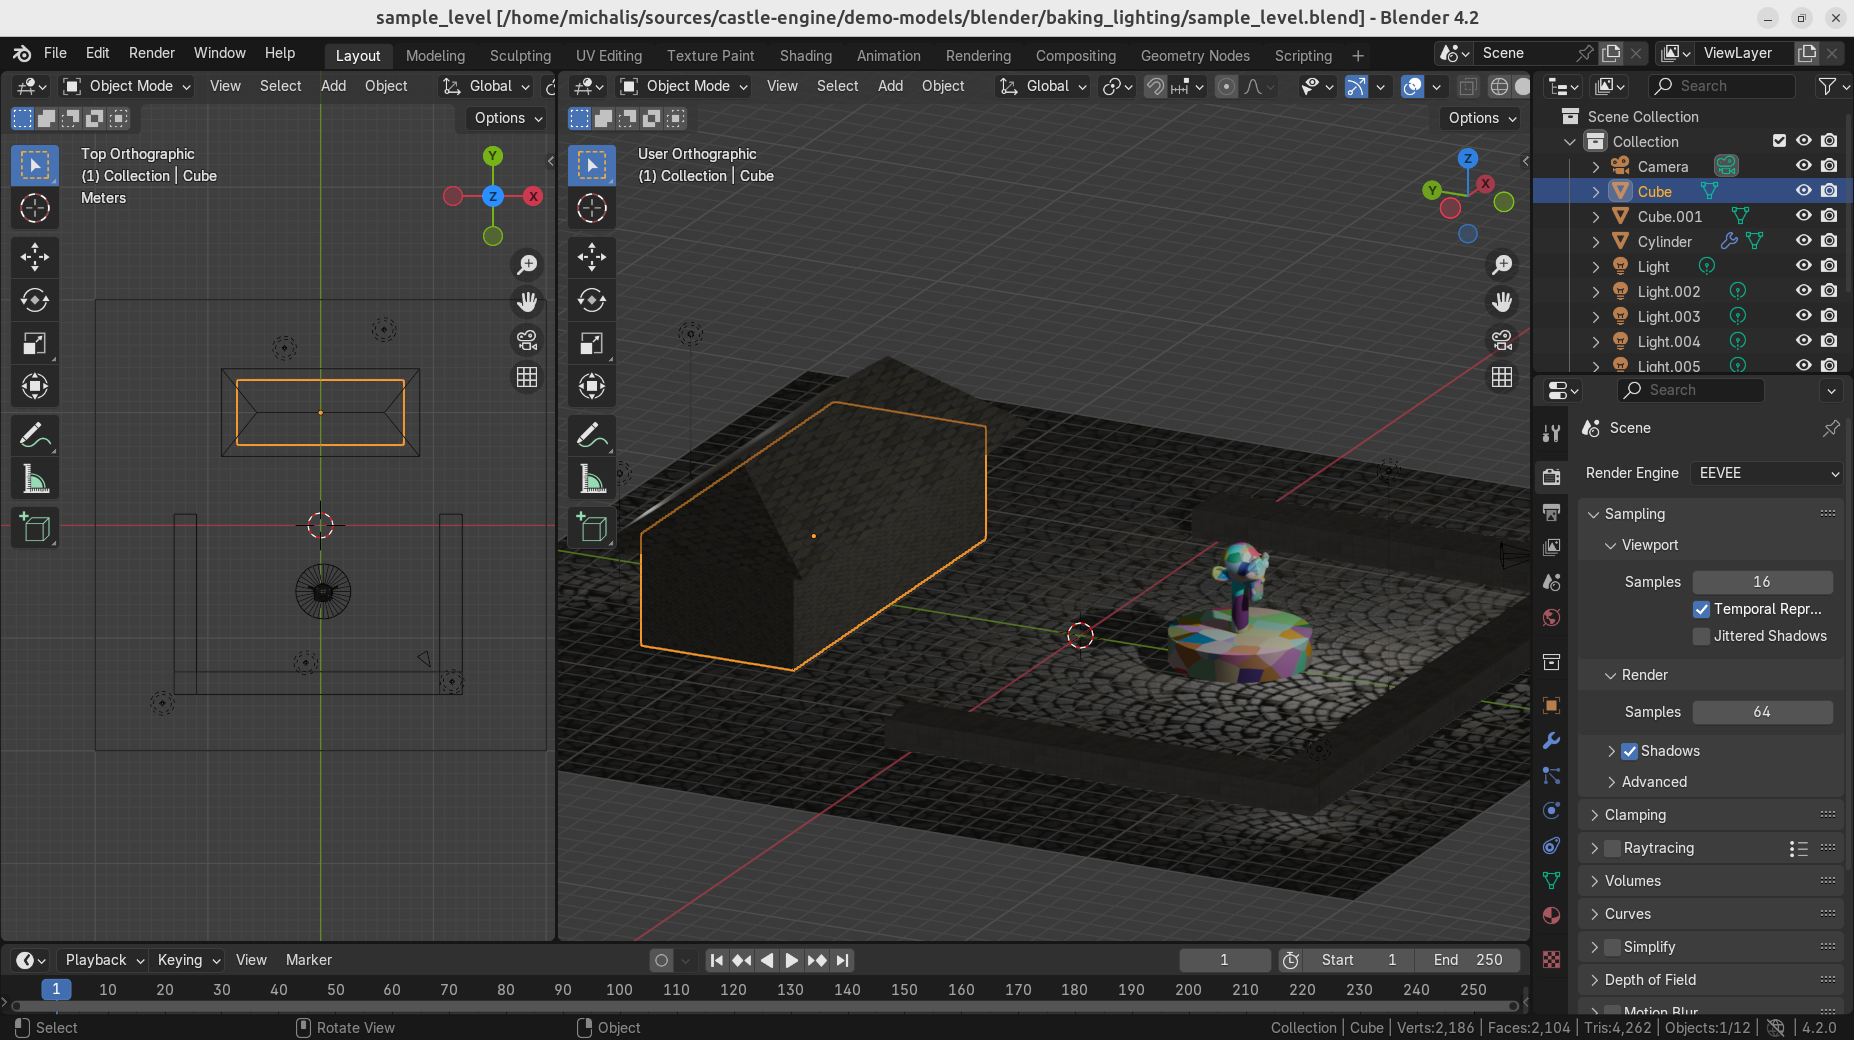
For the easiest setup, everything you want to bake should be in one Blender object (it can still have different materials, so also different textures, for various faces). You can just join (Ctrl + J) all meshes.
-
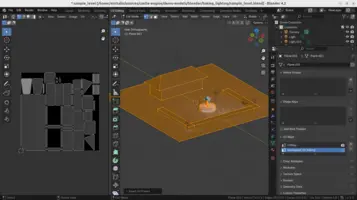
Create a new texture (image) in Blender as a target for baking. I call this texture
bakedon the screenshot below.Initial color doesn’t really matter (just black is OK).
Use a sufficiently large resolution (like 2048x2048 or 4096x4096).
During baking, this texture will be filled with the result of rendering the scene. Do not use this texture in any material (yet) — it is the output of the baking process, not an input.

-
Setup new UV mapping (aka "texture coordinates") for the
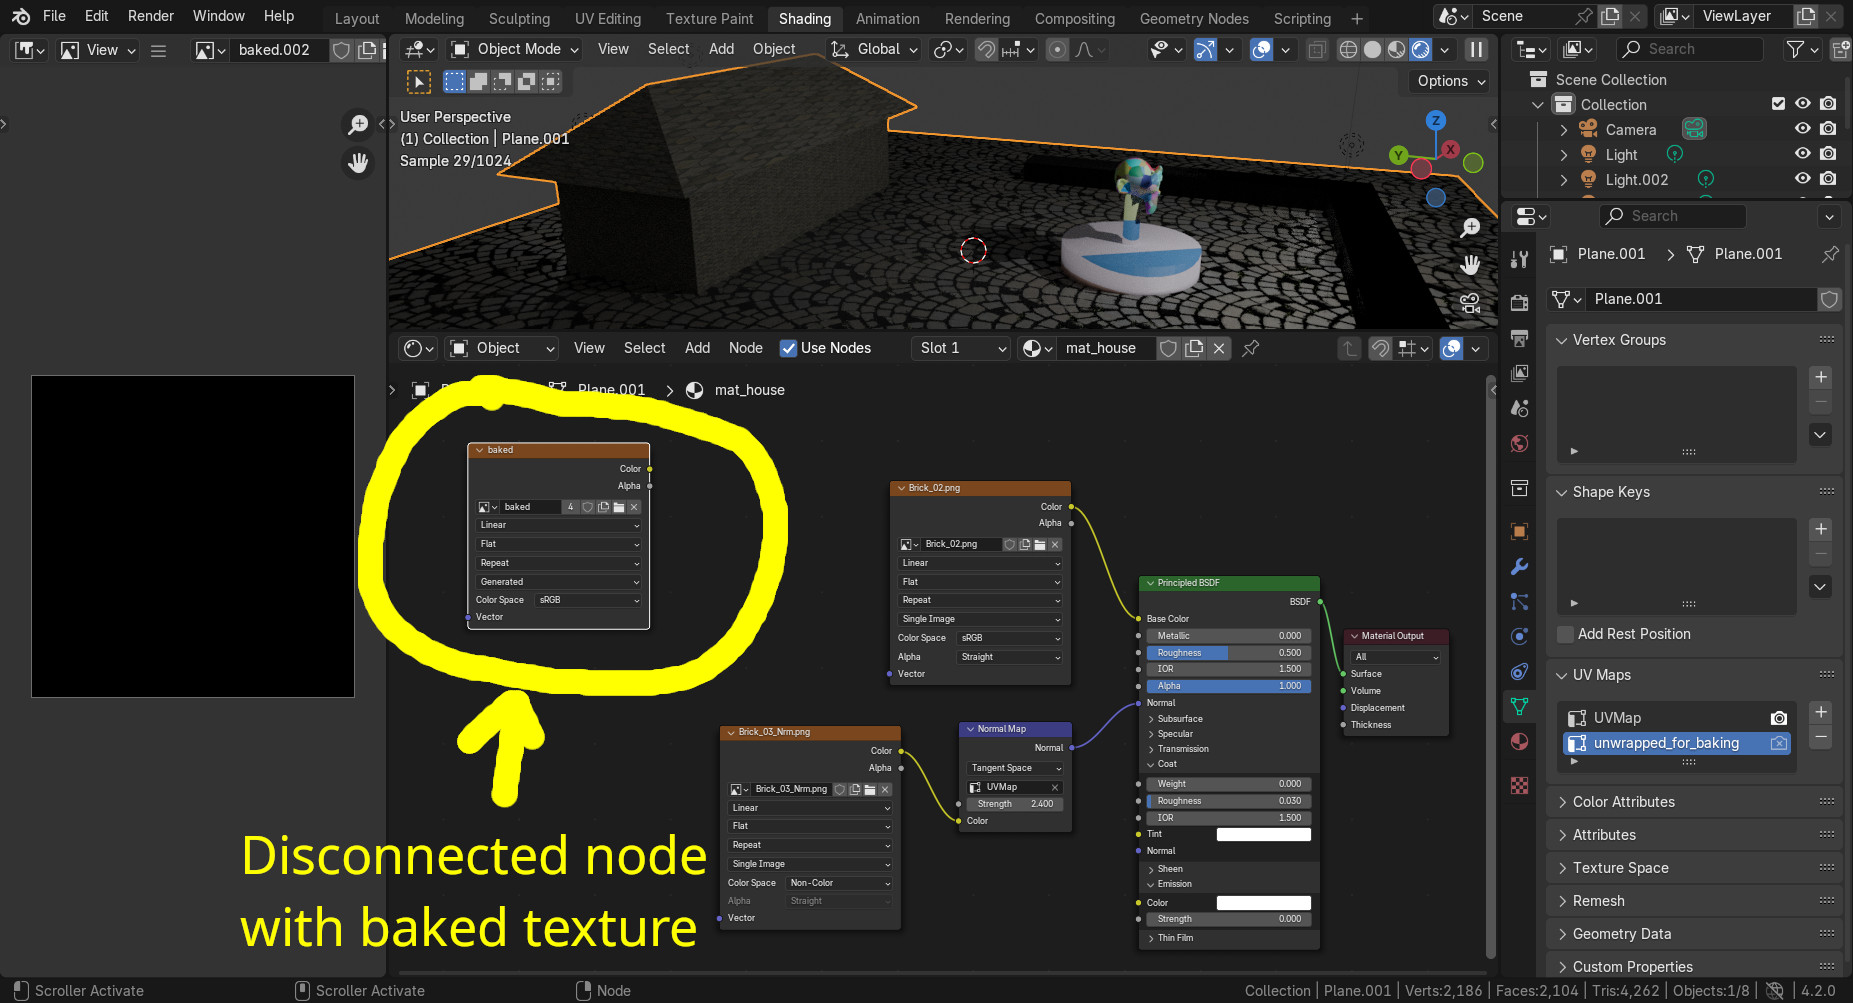
bakedtexture.If your object already has some UV map, add a new one (called
unwrapped_for_bakingin the screenshot below).Generate the UV by unwrapping (press U). It is easiest to use "Smart UV Project" algorithm for this, but you can also do it by regular "Unwrap" after you created some seams to guide Blender’s unwrapping process. Be sure to separate islands a bit (with "Smart UV Project", set "Island Margin" to something non-zero like 0.01).
Make these new texture coordinates selected, but not used for rendering.
-
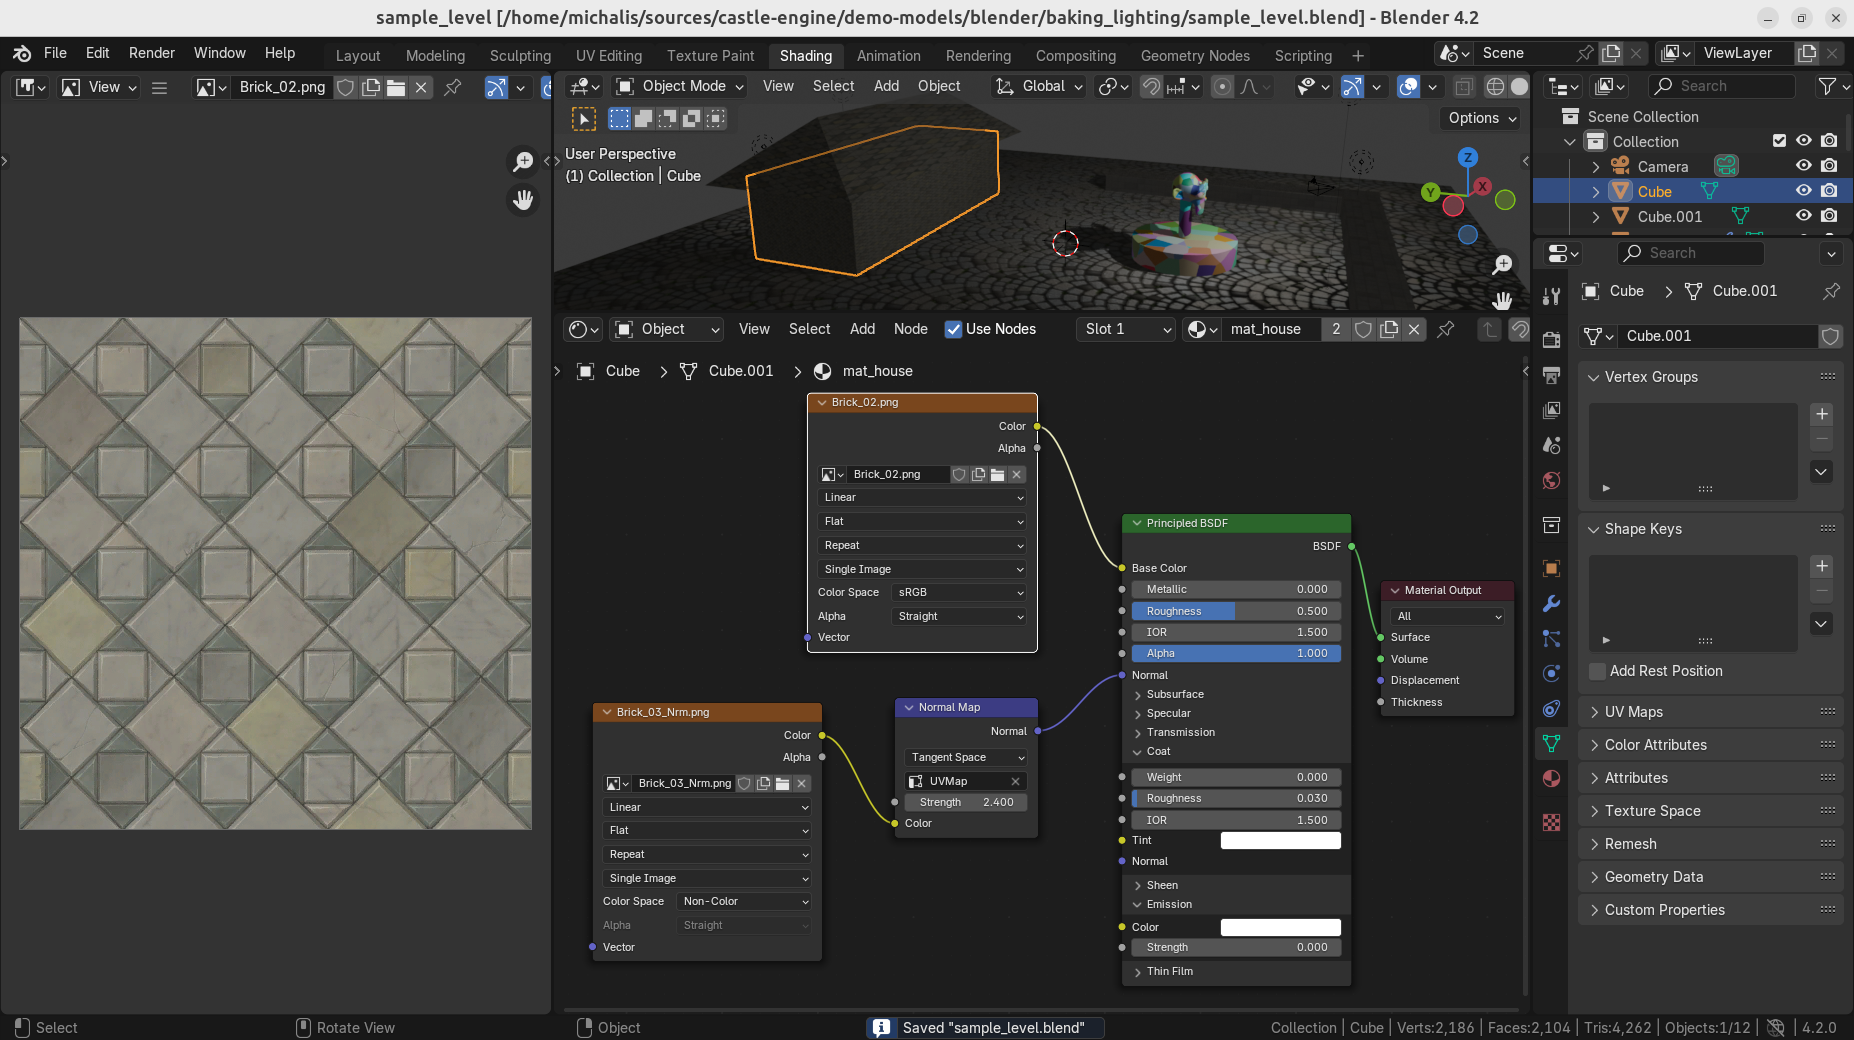
To every material in your object, add an "Image Texture" node that uses the
bakedtexture. Make this node the only selected (active) node. But do not connect it to anything. It has to be like this, for every material, as Blender uses as target Active Image Texture node for baking.
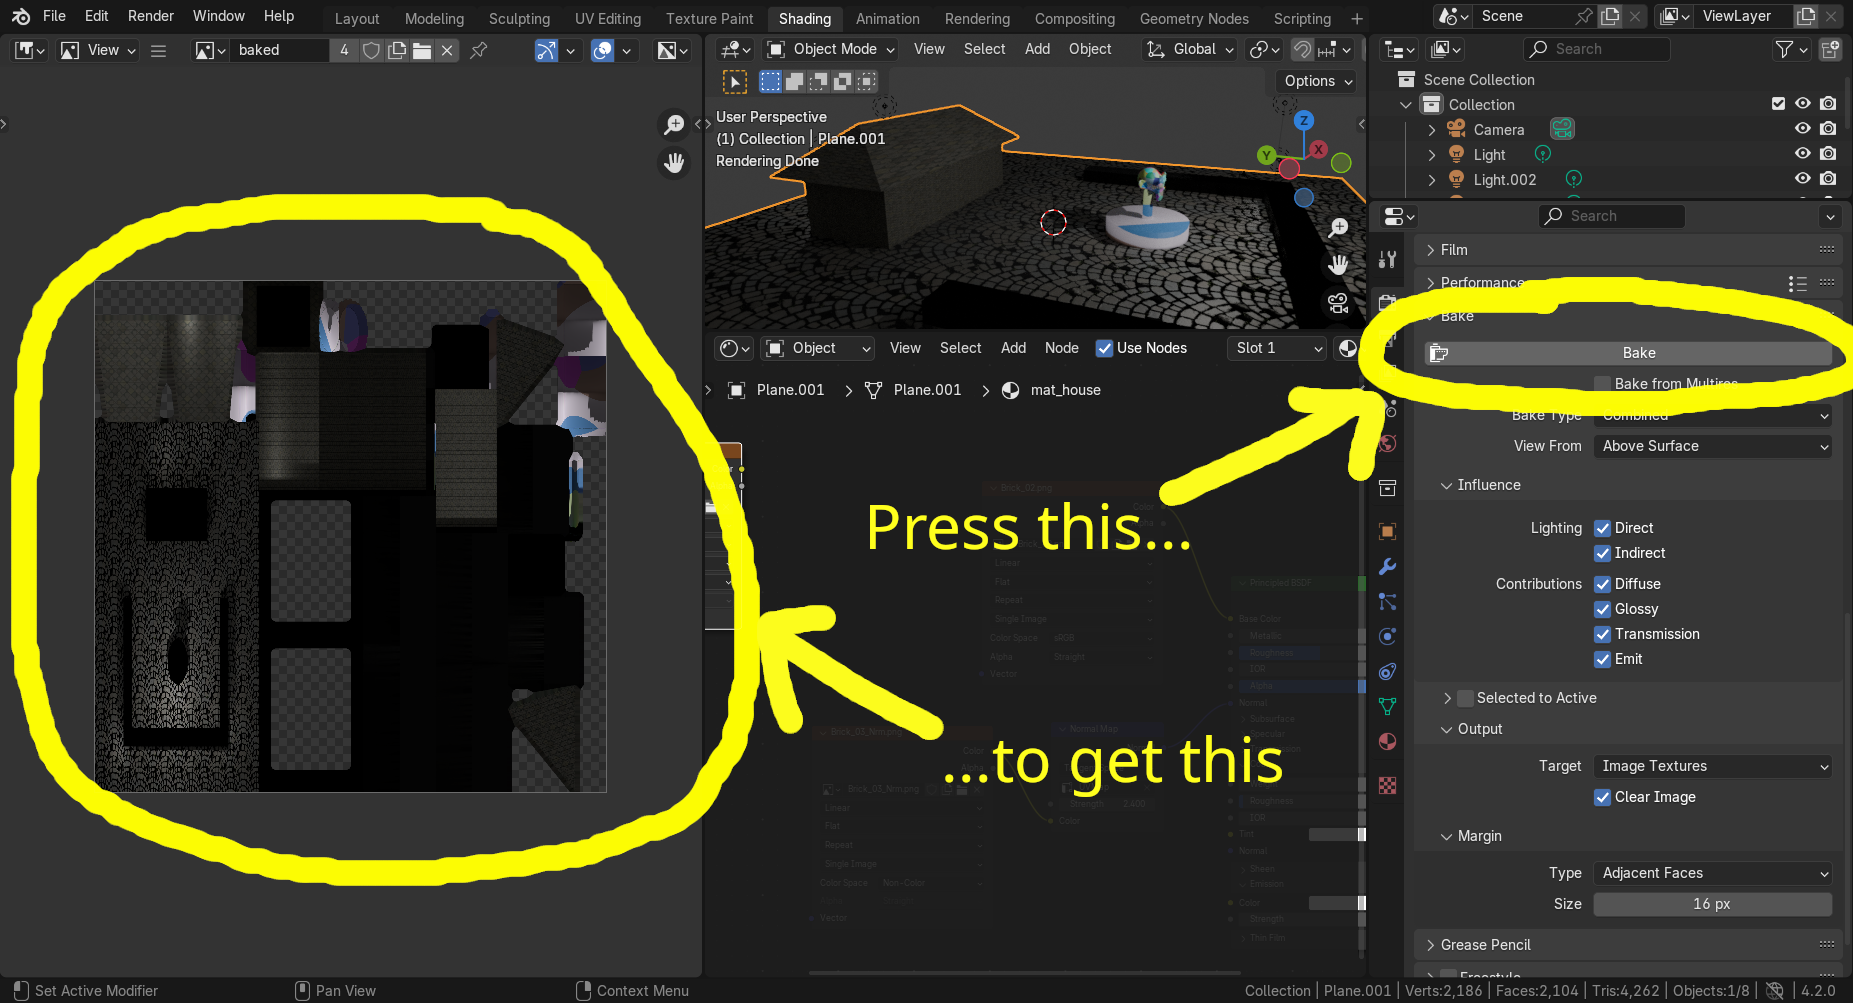
-
On the "Render" properties, switch "Render Engine" to "Cycles Render" and scroll down to find the "Bake" section. To bake everything, use "Bake Type" = "Combined".
-
Press "Bake" button, and wait for Blender to render the scene into the texture. Observe the output
bakedtexture — all areas that corresponded to some faces should now be nicely rendered, and reflect the surface lighting, input textures, shadows.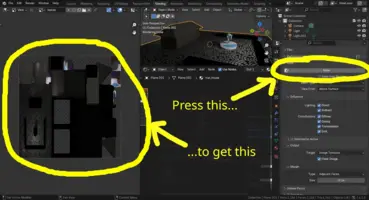
-
Save the
bakedtexture to a file (e.g. asbaked.png). Use the Blender "Image → Save As…" menu item to save the image. -
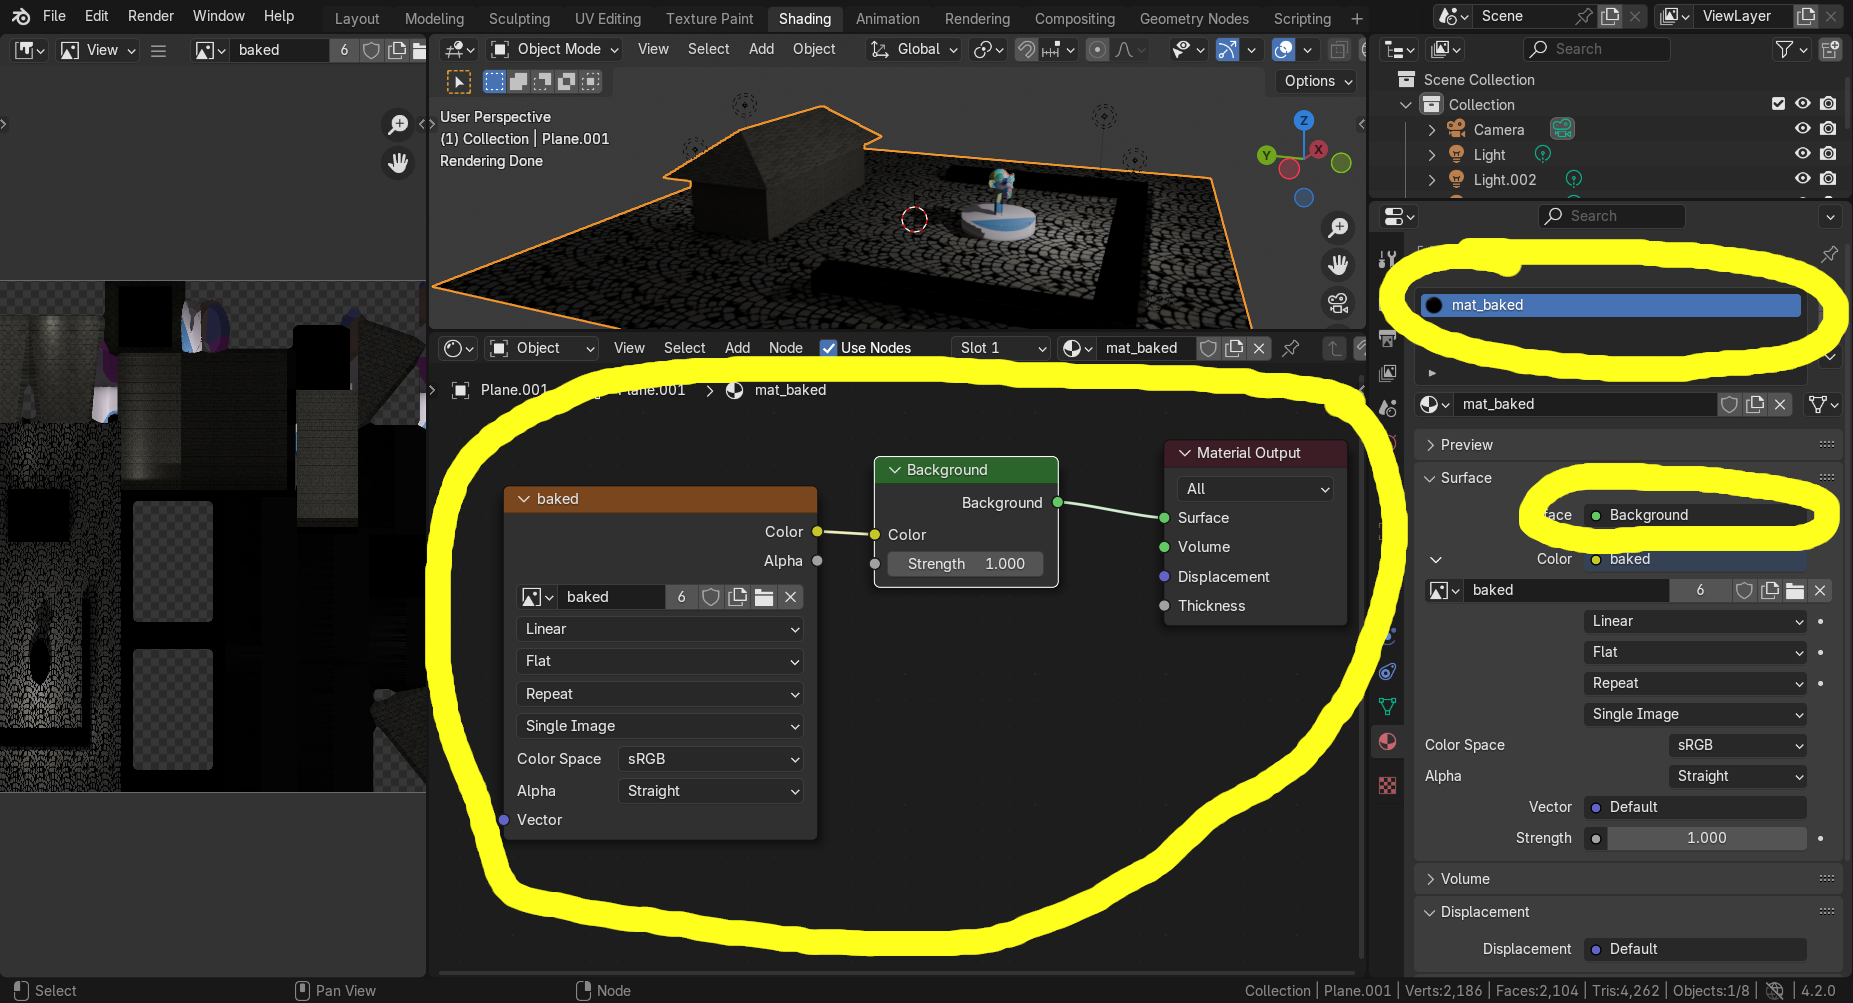
Change your model to use the baked texture, instead of the original textures.
Since this is a somewhat destructive process, we recommend to save the Blender file under a new name, and keep the original file with all the materials intact. In our example on demo-models/blender/baking_lighting we saved the resulting file (with only new baked material) as
sample_level_using_baked_texture.blend. It is not supposed to be further edited. Instead, you should edit the originalsample_level.blend, where materials are intact, and bake again after any edit.To use the baked texture, add a new material (called
mat_bakedbelow) and make it use thebaked.pngtexture. Make this material used by all faces of the object.If your object had multiple materials (and you’re working in a copy of the file, like
sample_level_using_baked_texture.blendas we recommend above), it is easiest to just remove all other materials, and keep onlymat_bakedon this object. This way you can be sure that the baked texture is used everywhere.If you don’t want any other lights than what you baked, then you can make the new material unlit (that is, use "Background" shader in Blender). If you want to add other lights, then keep the material physical (called "Principled BSDF" in Blender), just assign the baked texture to the "Base Color" (this is not really correct, since your baked texture is now a combination of base color + some lighting, but it may look reasonable in some cases).

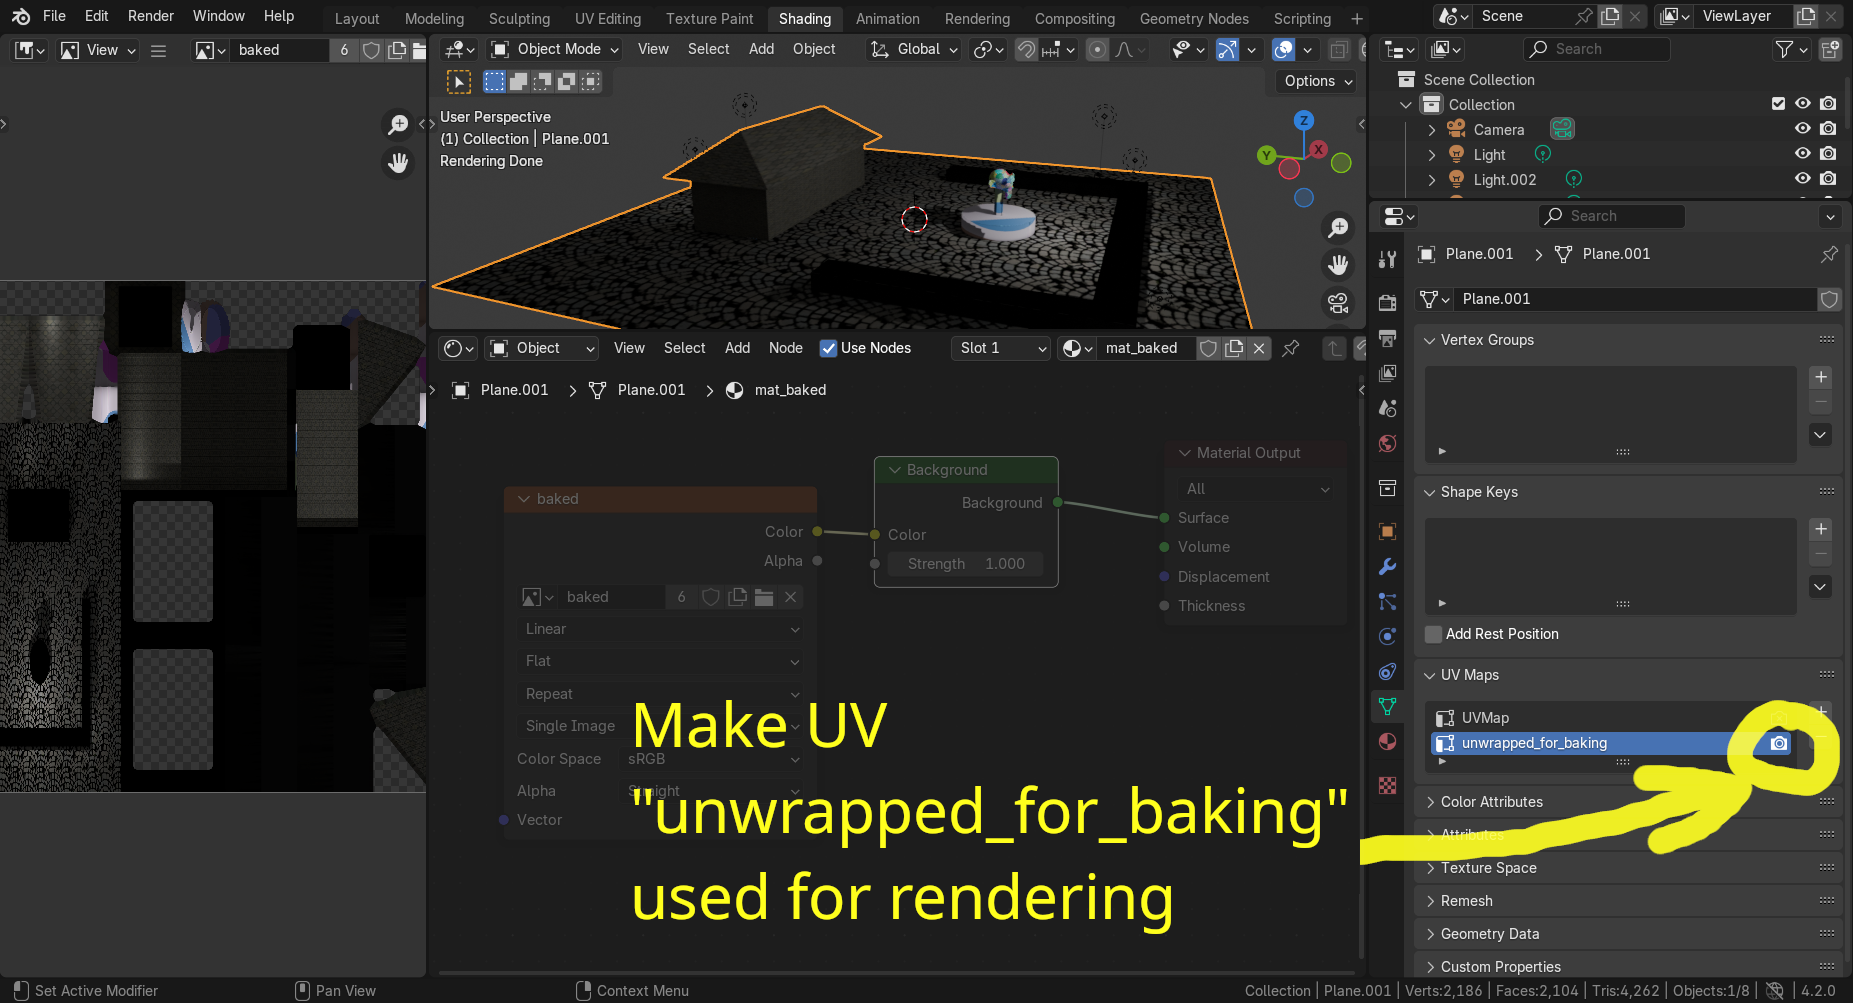
-
Make the UV called
unwrapped_for_bakingthe rendered UV of the object (select the camera icon at theunwrapped_for_bakingname).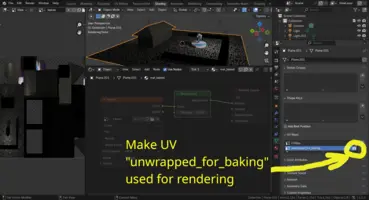
-
Export to glTF as usual.
Remember (at glTF export settings) that you most likely want to use "Keep Original" (so that glTF exporter just refers to existing texture files) and not select "Punctual Lights" (since you already baked the lights).
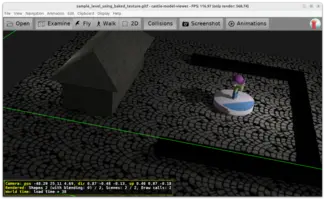
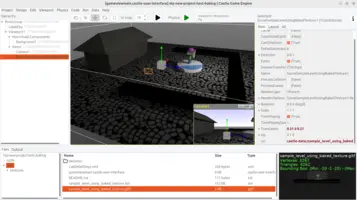
Test it looks as expected in our engine tools, like Castle Model Viewer and editor.


|
Note
|
You can also choose to bake only some things into the texture (like ambient occlusion) and then choose to mix this newly baked texture with your regular texture in the engine. This means that the engine will use multi-texturing, which is fully supported across everything: Blender → X3D exporter can save material with multiple textures if you set up nodes correctly and gllTF and Castle Game Engine support it. |
See also:
-
The baking process is similar to baking a normal map which we show here, but here you want to choose something else than only baking "normals".
The description here has been tested with Blender 4.2.
To improve this documentation just edit this page and create a pull request to cge-www repository.