$ git log master..physics > physics-log.txt
commit 00030ed4a969a9145f9219fb8aa93e60722f9fa4
Author: Michalis Kamburelis <michalis.kambi@gmail.com>
Date: Thu Dec 8 19:58:34 2022 +0100
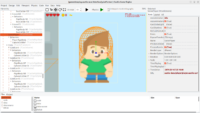
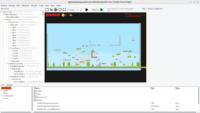
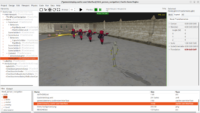
New examples/physics/physics_2d_collisions, using new components and
designed almost entirely in CGE editor
commit 24bbf2ffcb819d5a245850e8b8fc0b03bfb25bf9
Author: Michalis Kamburelis <michalis.kambi@gmail.com>
Date: Thu Dec 8 19:34:06 2022 +0100
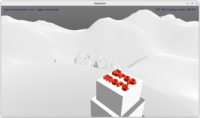
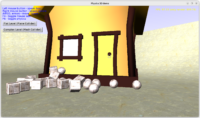
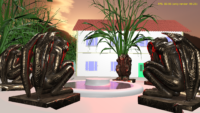
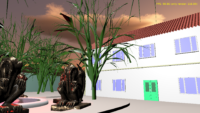
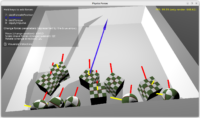
New examples/physics/physics_3d_demo, using new components and
designed almost entirely in CGE editor
commit f1accd6d24288ede91746b1e0bad4927d7c71900
Author: Michalis Kamburelis <michalis.kambi@gmail.com>
Date: Thu Dec 8 18:04:41 2022 +0100
Adjust platformer to use new PhysicsRayCast API
commit 588fe0c81c67486e2274d5f15db7373e0fc8759a
Author: Michalis Kamburelis <michalis.kambi@gmail.com>
Date: Thu Dec 8 15:28:24 2022 +0100
Nicer color of visualize angular and linear velocities
commit 32ead988cf8ed1898055e172c80c8da1f77ba84d
Author: Michalis Kamburelis <michalis.kambi@gmail.com>
Date: Thu Dec 8 15:23:56 2022 +0100
Visualize angular and linear velocities
commit ce31d887cbb31ad74d481e75ecd264a799fd22b8
Author: Michalis Kamburelis <michalis.kambi@gmail.com>
Date: Thu Dec 8 06:50:32 2022 +0100
Show currently applied force
commit 742de9452bf6737c65becae752968b1dddbcde41
Author: Michalis Kamburelis <michalis.kambi@gmail.com>
Date: Thu Dec 8 06:49:49 2022 +0100
published higher, that's our convention
commit ea7d25123400a52623632983cf1970855e70c5bb
Author: Michalis Kamburelis <michalis.kambi@gmail.com>
Date: Thu Dec 8 06:31:57 2022 +0100
Improve forces docs, demo lines in physics_3d_shooter how to use them
commit 7390ea954178bb7f1c374196ff10f44b0bbd45fd
Author: Michalis Kamburelis <michalis.kambi@gmail.com>
Date: Thu Dec 8 06:20:02 2022 +0100
Upgrade deprecated in physics_asteroids
commit 3d419d16545f2c441645ab4b27d910958d7fdfb3
Author: Michalis Kamburelis <michalis.kambi@gmail.com>
Date: Thu Dec 8 06:14:22 2022 +0100
Fix physics_persistent_forces_components AddForce call
commit 28673a08bee1cbace62c9d887b99fd4c6e9a6f61
Author: Michalis Kamburelis <michalis.kambi@gmail.com>
Date: Thu Dec 8 06:12:20 2022 +0100
Fix AddForce call
commit c1e813b1372239fc25c4ebe7ec82749d42f698c2
Author: Michalis Kamburelis <michalis.kambi@gmail.com>
Date: Thu Dec 8 06:08:53 2022 +0100
Finalize forces API, various renames
- old AddForce -> AddForceAtPosition (like Unity, like Kraft)
- old AddCentralForce -> you can do this now by AddForce with ForceInLocalCoordinates=true param
- to do something like Unity AddForce -- use our AddForce with ForceInLocalCoordinates=false
commit dc87dd90af3de3aa0d057b7ba69a6b8abfd93508
Author: Michalis Kamburelis <michalis.kambi@gmail.com>
Date: Thu Dec 8 05:05:59 2022 +0100
Recalculate mesh collider when mesh changed
commit ffa43591cb1f4b869916b3fc21130faa2c47f6a3
Author: Michalis Kamburelis <michalis.kambi@gmail.com>
Date: Thu Dec 8 04:13:17 2022 +0100
UpdateColliderAutoSize better case and docs
commit 3adaf965893ce010fad9c5a5febefb5f96ac8a62
Author: Michalis Kamburelis <michalis.kambi@gmail.com>
Date: Thu Dec 8 03:57:48 2022 +0100
Cast rays using physics in third_person_navigation
commit 7dec33798b0b48fc01714b2497b6b5971829e553
Author: Michalis Kamburelis <michalis.kambi@gmail.com>
Date: Thu Dec 8 03:57:08 2022 +0100
New TAbstractRootTransform.PhysicsRayCast, returns richer TPhysicsRayCastResult
commit fe71fc2ccbe3d29df40991360a4d492ce8dadfa8
Author: Michalis Kamburelis <michalis.kambi@gmail.com>
Date: Thu Dec 8 02:36:15 2022 +0100
Look and change TCastleRigidBody.Exists to toggle between new and old physics
commit 583d4260b5392998ced2605c12c74dc90b6e3747
Author: Michalis Kamburelis <michalis.kambi@gmail.com>
Date: Thu Dec 8 02:00:44 2022 +0100
ChangeTransformation forces also the way we do collisions
commit 66618579c8a4f2d56095784069b46b3cd64023ed
Author: Michalis Kamburelis <michalis.kambi@gmail.com>
Date: Thu Dec 8 01:44:31 2022 +0100
Hide ctForce option, unfinished, not functional for normal usage
commit 77efa67dbdcca44ae71e224772d0ee677c9d8030
Author: Michalis Kamburelis <michalis.kambi@gmail.com>
Date: Thu Dec 8 01:40:16 2022 +0100
UI to test TCastleThirdPersonNavigation air control, various ChangeTransformation
commit 2f838c972c6dc35808b347b4dea2f930c11d0db5
Author: Michalis Kamburelis <michalis.kambi@gmail.com>
Date: Thu Dec 8 01:39:57 2022 +0100
Show some sliders properties in "Basic"
commit 4c421cd940e8113ffe1d943d78e4c2a993fa5930
Author: Michalis Kamburelis <michalis.kambi@gmail.com>
Date: Thu Dec 8 00:50:29 2022 +0100
Rely on Rotating to change animation in case of ctVelocity and AD keys
commit 2d28052c03eab706ff805abd5b1c092c7237c6bf
Author: Michalis Kamburelis <michalis.kambi@gmail.com>
Date: Thu Dec 8 00:34:17 2022 +0100
TChangeTransformation, with ctAuto default, to have good (automatic, but also controllable) transformation way in TCastleThirdPersonNavigation
Also fix UpdateAimAvatar in all movement types.
commit a1344182be0ffee89304441450696b45e9fefb73
Author: Michalis Kamburelis <michalis.kambi@gmail.com>
Date: Thu Dec 8 00:31:22 2022 +0100
Update deprecated
commit 8b2b78d9e23e2b5eab5c71825af3379f3451621a
Author: Michalis Kamburelis <michalis.kambi@gmail.com>
Date: Wed Dec 7 15:00:06 2022 +0100
Minor comments fixes
commit 0549e571da58c6639ffa035d1ad4437b5e8f40b4
Author: Michalis Kamburelis <michalis.kambi@gmail.com>
Date: Wed Dec 7 12:56:43 2022 +0100
There should be no need for World.IsPhysicsRunning check
commit 715daef2d03a463050555812ec0c4a6fcc2c7487
Author: Michalis Kamburelis <michalis.kambi@gmail.com>
Date: Wed Dec 7 07:27:31 2022 +0100
Better whitespace
commit 430df065dda7aed9fdb279f416c4e8f658414b8a
Author: Michalis Kamburelis <michalis.kambi@gmail.com>
Date: Wed Dec 7 07:27:10 2022 +0100
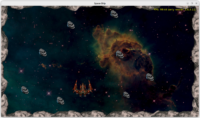
physics_2d_game_sopwith example upgraded to use new physics
commit ee657f2dbeac2600f717106e90b7196734c86257
Author: Michalis Kamburelis <michalis.kambi@gmail.com>
Date: Wed Dec 7 06:29:42 2022 +0100
Consolidate MatrixDecompose, ScaleFromMatrix, TranslationFromMatrix
- move to one include
- make it in CastleVectors (more natural than CastleQuaternions, and
CastleVectors now uses CastleQuaternions)
- change ScaleFromMatrix to be function
commit 1deeed48c87f97f169d068fff2d377e21b2ab0b8
Author: Michalis Kamburelis <michalis.kambi@gmail.com>
Date: Wed Dec 7 06:23:15 2022 +0100
Add MainUnit to help code tools
commit 1052fb4175359e2e7683c1d8eef6b912a2285af5
Author: Michalis Kamburelis <michalis.kambi@gmail.com>
Date: Wed Dec 7 05:43:35 2022 +0100
Reliably stop process started by "castle-engine run" on Windows too,
added StopProcess cross-platform function
commit 541acf00c3055e023bc834fbf22eb49eec653959
Author: Michalis Kamburelis <michalis.kambi@gmail.com>
Date: Wed Dec 7 03:01:48 2022 +0100
Test reparenting behaviors causing proper events
commit aec6a84ec77506d7a0b66ba046ed8bb6f475d25c
Author: Michalis Kamburelis <michalis.kambi@gmail.com>
Date: Wed Dec 7 02:52:12 2022 +0100
Remove confusing unused parameter from NotifyWorldXxx
commit 1fb50d7c05b258b01c55602d576b42feee48d265
Author: Michalis Kamburelis <michalis.kambi@gmail.com>
Date: Wed Dec 7 02:49:35 2022 +0100
When reparenting behaviors, call ParentBeforeDetach correctly
commit 107377bd25ccd4a485eacd52c654b0f5fed68a15
Author: Michalis Kamburelis <michalis.kambi@gmail.com>
Date: Wed Dec 7 02:14:46 2022 +0100
Forcefully Kill External Process -> Stop External Process
Less alarming name, because we routinely do it.
commit 6577286e034a6c20cb3ea92e6e8d9873924d5f30
Author: Michalis Kamburelis <michalis.kambi@gmail.com>
Date: Wed Dec 7 02:12:32 2022 +0100
Improve comments
commit 30909908130beb3b198c4eafe83ca156e39fe415
Author: Michalis Kamburelis <michalis.kambi@gmail.com>
Date: Wed Dec 7 02:12:06 2022 +0100
Improve comments, make GetCastleColliderFromParent a nested routine
commit 4bc4ac9490b32eba5eb53cedd06aeedf3f01a9c2
Author: Michalis Kamburelis <michalis.kambi@gmail.com>
Date: Wed Dec 7 02:11:22 2022 +0100
Check UpdatePhysicsTransform earlier
commit ac46e6fb791b744c34ab4d3ba3168af1aef7af83
Author: Michalis Kamburelis <michalis.kambi@gmail.com>
Date: Wed Dec 7 01:17:40 2022 +0100
Setter TCastleBehavior.SetListenWorldChange does nothing if already set
commit 0e15ebfe21659e5478eeba6139768ca5baf9319e
Author: Michalis Kamburelis <michalis.kambi@gmail.com>
Date: Wed Dec 7 01:13:23 2022 +0100
Rename NeedWorldChangeNotification->ListenWorldChange and document better
commit fa4555d96a4756af7d4c904f52afe008cb875502
Author: Michalis Kamburelis <michalis.kambi@gmail.com>
Date: Wed Dec 7 00:58:48 2022 +0100
IsPhysicsRunning to strict private
commit dae8fb41de5f37f2ff0f7ae810327aa044cfd4a9
Author: Michalis Kamburelis <michalis.kambi@gmail.com>
Date: Wed Dec 7 00:58:41 2022 +0100
Whitespace
commit 781a5472ffefa60203d20b0744eef5b29ccd7ae1
Author: Michalis Kamburelis <michalis.kambi@gmail.com>
Date: Tue Dec 6 05:24:11 2022 +0100
Fix PasDoc, do not interpret these -- as long dash, this is a long
command-line option
commit 5b508fe61e20b4c581b120eab34109a6c7300c8f
Author: Michalis Kamburelis <michalis.kambi@gmail.com>
Date: Tue Dec 6 03:10:16 2022 +0100
Account for new PasDoc: hide p.nodescription
commit 1c224518c301555b48700963e4e5a08bbe3c4336
Author: Michalis Kamburelis <michalis.kambi@gmail.com>
Date: Tue Dec 6 02:00:28 2022 +0100
Override parameterless ChangedTransform
This hides "UpdatePhysicsTransform: Boolean" as implementation detail,
and keeps backward compat (nice for
https://forum.castle-engine.io/t/how-to-know-if-a-component-is-selected-in-the-editor/690/6
), and makes it secure in case someone forgets to call "inherited"
from overridden ChangedTransform.
commit becb7913095eecdc4d98eb33306868a34813220e
Author: Michalis Kamburelis <michalis.kambi@gmail.com>
Date: Mon Dec 5 18:52:48 2022 +0100
Fix indent
commit f87a1aa7f6cc92a2cb9153f111973e4f70870710
Author: Michalis Kamburelis <michalis.kambi@gmail.com>
Date: Mon Dec 5 18:52:00 2022 +0100
Minor docs improvements
commit cbec346a766d38e5f3618411fec5d8a5dcb589d7
Author: Michalis Kamburelis <michalis.kambi@gmail.com>
Date: Mon Dec 5 17:26:27 2022 +0100
Register TCastleMeshCollider in CastleTransform, where it is defined
commit 5e9c33c9483c7681595e3e01031fe436bc7f5307
Author: Michalis Kamburelis <michalis.kambi@gmail.com>
Date: Mon Dec 5 16:39:40 2022 +0100
Don't use deprecated SceneAvatar.RigidBody
commit 6d228c3ed18f232420541c43dcce41138a53997c
Author: Michalis Kamburelis <michalis.kambi@gmail.com>
Date: Mon Dec 5 16:36:45 2022 +0100
Make MouseLook and related props published also for third-person
navigation component
commit 2f95f0445fa5ba42bb4229d2e5a5644e0e247208
Author: Michalis Kamburelis <michalis.kambi@gmail.com>
Date: Mon Dec 5 16:17:42 2022 +0100
Avoid usage of deprecated TCastleTransform.RigidBody
commit 446d6cfa1fcb798236645936c3626b353cef2895
Author: Michalis Kamburelis <michalis.kambi@gmail.com>
Date: Mon Dec 5 16:16:01 2022 +0100
Fix usage of various deprecated stuff
commit 84c4742e11594c45a509ce2d6b6d08d96be4eb8f
Author: Michalis Kamburelis <michalis.kambi@gmail.com>
Date: Mon Dec 5 15:54:18 2022 +0100
Formatting improve
commit 76d00542bff5c7b3c4d9347bb90f763ada0af4c8
Merge: e59dd4a90 4430f78e0
Author: Michalis Kamburelis <michalis.kambi@gmail.com>
Date: Mon Dec 5 15:32:23 2022 +0100
Merge branch 'master' into physics
commit e59dd4a90f5a373b61a824ebe066d6d23d8e56b2
Author: Michalis Kamburelis <michalis.kambi@gmail.com>
Date: Mon Dec 5 15:31:02 2022 +0100
Document TRigidBody.Collider deprecated
commit c49cad02779670b68092e83ad4ab5d9f8ad7ef31
Author: Michalis Kamburelis <michalis.kambi@gmail.com>
Date: Mon Dec 5 13:38:47 2022 +0100
Fix example qualified id
commit e07a9eaaa8f9e6f5e8042f43231a17805174ac9d
Author: Michalis Kamburelis <michalis.kambi@gmail.com>
Date: Sat Dec 3 07:15:18 2022 +0100
Fix API docs, deprecate TCastleTransform.RigidBody
commit f20db630f3d93b68b3e009b9197b98565eed8ce9
Author: Michalis Kamburelis <michalis.kambi@gmail.com>
Date: Sat Dec 3 07:03:06 2022 +0100
Convert CursorCastleToLCL into function, also fix PasDoc BTW
commit e478dc8c163832cd454b69c65b37f1536b75b587
Merge: d41593737 083389be7
Author: Michalis Kamburelis <michalis.kambi@gmail.com>
Date: Sat Dec 3 06:44:21 2022 +0100
Merge branch 'master' into physics
commit d41593737a6c8f9ea1abb096f75165c15107578c
Author: Michalis Kamburelis <michalis.kambi@gmail.com>
Date: Sat Dec 3 06:36:13 2022 +0100
Never "capture" the motion of the mouse when MouseLook
General fix, instead of workaround in fps_game,physics_3d_shooter. The
same problem was affecting third_person_navigation example.
commit fb976f9edd63a0e6a2733152a5ab24990a39f764
Merge: c55ea5f57 64e38c07d
Author: Michalis Kamburelis <michalis.kambi@gmail.com>
Date: Sat Dec 3 02:20:49 2022 +0100
Merge branch 'master' into physics
commit c55ea5f578ca7a9e3dcd8a2f7645f49ca145cabb
Author: Michalis Kamburelis <michalis.kambi@gmail.com>
Date: Thu Dec 1 03:55:37 2022 +0100
Document reason behind custom T3DCoords serialization
commit c21b11a77b2346d4af6cb5be333b9962cdfab2bc
Author: Michalis Kamburelis <michalis.kambi@gmail.com>
Date: Thu Dec 1 03:43:07 2022 +0100
Common code for T3DCoord serialization on FPC/Delphi
commit 750b9d8f1fea49ec4504f502cd7a1e92d9037ac9
Author: Michalis Kamburelis <michalis.kambi@gmail.com>
Date: Thu Dec 1 03:32:34 2022 +0100
Removed serializedvectors.pas from physics_persistent_forces_components
This was making an exception how we expose vectors as published. Removed now -- the benefit over TCastleVector3Persistent is only that you don't need getter/setter boilerplate, but at the cost of now being able to define any setter for vector (and worse syntax for access). This is not good enough for CGE purposes.
commit a2104c6bea6e07d2ff9719ae5c4d1fcf93a3bbf8
Author: Michalis Kamburelis <michalis.kambi@gmail.com>
Date: Thu Dec 1 03:16:19 2022 +0100
Assign default values to LockRotation/LockTranslation, to not store
empty sets
commit 87508b9d580bf93419df292336f638086eee572f
Author: Michalis Kamburelis <michalis.kambi@gmail.com>
Date: Thu Dec 1 03:09:33 2022 +0100
Small improvements to T3DCoordsRangeSetPropertyEditor code, use SAppendPart
commit b1250a87754a601a962daef9e3c2a7adafd43e0b
Author: Michalis Kamburelis <michalis.kambi@gmail.com>
Date: Thu Dec 1 02:53:01 2022 +0100
Use GrayscaleValue(ColorToVector3... to calculate luminance of LCL background
commit a00eb2a3abb4967ae7e7611b492d567c921f227b
Author: Michalis Kamburelis <michalis.kambi@gmail.com>
Date: Thu Dec 1 02:32:06 2022 +0100
License moved to https://castle-engine.io/license, only link + summary from GitHub repo
commit a6858c1cdb2f15c0d105486ca70a263dd1663c9e
Author: Michalis Kamburelis <michalis.kambi@gmail.com>
Date: Thu Dec 1 00:06:40 2022 +0100
Fix pasls packaging on macOS
commit ca1093f8507c87fdecee14efb0ee0761fb2d6933
Author: Michalis Kamburelis <michalis.kambi@gmail.com>
Date: Wed Nov 30 18:00:32 2022 +0100
physics_2d_collisions.dpr -> physics_2d_collisions_standalone.dpr
commit d533a67044e3916a2d063d81954b91ac09632cbe
Author: Michalis Kamburelis <michalis.kambi@gmail.com>
Date: Wed Nov 30 05:22:40 2022 +0100
Add missing README and rename to _standalone for consistency in physics
commit 6994a7d9a6a552f9fa6dcc1270551259b93af7ad
Author: Michalis Kamburelis <michalis.kambi@gmail.com>
Date: Wed Nov 30 05:15:08 2022 +0100
physics_3d_in_editor -> physics_simple_3d_bullet
commit fdd5e50c329df80198fd732a313d68454418a645
Author: Michalis Kamburelis <michalis.kambi@gmail.com>
Date: Wed Nov 30 05:08:19 2022 +0100
physics_animated -> physics_test_changing_transformation
commit 5411af4b90d5cd79a1ac3172aed52fe7bfa47e22
Author: Michalis Kamburelis <michalis.kambi@gmail.com>
Date: Wed Nov 30 05:06:12 2022 +0100
physics_animated better UI and README
commit ed2e516b5092d67c36e85599bda2ffc86e62fcb0
Author: Michalis Kamburelis <michalis.kambi@gmail.com>
Date: Wed Nov 30 05:05:47 2022 +0100
Update docs: Dynamic bodies can still have transformation changed
commit d275583e5ee7e881d124786eeea19036c6c0aace
Author: Michalis Kamburelis <michalis.kambi@gmail.com>
Date: Wed Nov 30 04:24:12 2022 +0100
Background assets for physics_asteroids
commit 8d7082376b0cab3ff2670f7054f96cd89d970b91
Author: Michalis Kamburelis <michalis.kambi@gmail.com>
Date: Wed Nov 30 04:08:47 2022 +0100
Published components are automatically initialized
commit baa0e42fca1ce8d2c911ce91ec0e277adfa8fa8a
Author: Michalis Kamburelis <michalis.kambi@gmail.com>
Date: Wed Nov 30 04:01:38 2022 +0100
Improve physics_asteroids
- TCastleImageTransform for bullets
- borders around map
commit 8714e2efb67ea5a89ea297907a0526dc13f6de37
Author: Michalis Kamburelis <michalis.kambi@gmail.com>
Date: Wed Nov 30 03:39:56 2022 +0100
Renames to physics_asteroids, physics_test_scale_colliders
commit 14c86e14c2008aa356e728e6c9cc3bd704c97bf8
Author: Michalis Kamburelis <michalis.kambi@gmail.com>
Date: Wed Nov 30 03:10:58 2022 +0100
physics_test_transformation_sync README and rename
commit ebfa30e783d0fc2c7633b599a929a3b6719f0a30
Author: Michalis Kamburelis <michalis.kambi@gmail.com>
Date: Wed Nov 30 03:03:21 2022 +0100
Rename physics_simulation_in_editor ->
physics_persistent_forces_components and improve README
commit 33685b4ac1c68cdbf48b2a31520cf0f048b0bf23
Author: Michalis Kamburelis <michalis.kambi@gmail.com>
Date: Mon Nov 28 08:34:00 2022 +0100
More reliably kill the process started by "castle-engine run"
commit 9796ec8e176e8ec17b63cb42681a42e6441c91c9
Author: Michalis Kamburelis <michalis.kambi@gmail.com>
Date: Mon Nov 28 07:32:16 2022 +0100
Fix accidentaly typo
commit d954f814ac3122bc711ac6eeb55c3c89853471b0
Author: Michalis Kamburelis <michalis.kambi@gmail.com>
Date: Mon Nov 28 06:50:53 2022 +0100
Update Design.ActionPlayStop to reflect that you may already be
running when design is open
commit 230bb930c6287845ecc18716f875aea078c238af
Author: Michalis Kamburelis <michalis.kambi@gmail.com>
Date: Mon Nov 28 06:38:16 2022 +0100
TCastleCollider.Translation should be multiplied by WorldScale but not
SizeScale, test in physics_scale_colliders
commit 5e0b72e258a8797604c0c5d59aa5e533212c0adf
Author: Michalis Kamburelis <michalis.kambi@gmail.com>
Date: Mon Nov 28 03:58:49 2022 +0100
Improve physics_scale_colliders demo
commit 8cba5942b4995250320c4fc6194d00eab02b3054
Author: Michalis Kamburelis <michalis.kambi@gmail.com>
Date: Sun Nov 27 16:56:48 2022 +0100
Fix deprecated hlOn in third_person_navigation example
commit c81131f4e1365ade22a14d6d30143db7b5ad31d8
Author: Michalis Kamburelis <michalis.kambi@gmail.com>
Date: Sun Nov 27 16:52:41 2022 +0100
Post-merge compilation fix
commit 4abee849d6738ff30558b37da300ea324c0b03fb
Author: Michalis Kamburelis <michalis.kambi@gmail.com>
Date: Sun Nov 27 16:51:26 2022 +0100
Fix more qualified_name
commit 6b57526132e4904509e0505aac86462d245500ac
Merge: d39e36634 ae34e9010
Author: Michalis Kamburelis <michalis.kambi@gmail.com>
Date: Sun Nov 27 16:49:46 2022 +0100
Merge branch 'master' into physics
commit d39e36634aa72e83195ec1c6c9e30e56a91a4c50
Author: Michalis Kamburelis <michalis.kambi@gmail.com>
Date: Sun Nov 27 16:03:43 2022 +0100
Fix tests compilation after InternalCastleApplicationMode change
commit d44aead9e9f2fc354964b8358006e4da0791ff3e
Author: Michalis Kamburelis <michalis.kambi@gmail.com>
Date: Sun Nov 27 04:57:50 2022 +0100
Indicate that vector is "rotation" by token, not by guessing from
property name
commit e791a9a6bbabef20d09f3dba53dc2ac4f687a7ae
Author: Michalis Kamburelis <michalis.kambi@gmail.com>
Date: Sun Nov 27 04:15:41 2022 +0100
Fix deprecated usage in image-to-pascal.lpr
commit f902e41bf53a8e0e9cb9b41a4718574045842b24
Author: Michalis Kamburelis <michalis.kambi@gmail.com>
Date: Sun Nov 27 04:14:11 2022 +0100
Fix point/line sizes in castle-curves rendering
commit 296f72f02dcc1e1d450b9ee96eced2ab7141e29e
Author: Michalis Kamburelis <michalis.kambi@gmail.com>
Date: Sun Nov 27 04:06:17 2022 +0100
Upgrade deprecated CGE usage
commit 02cdcc48e4e27ebf70649310194c1b91d0e4262b
Author: Michalis Kamburelis <michalis.kambi@gmail.com>
Date: Sun Nov 27 03:57:25 2022 +0100
Remove non-uniform scale on physics body in physics_2d_collisions
commit eae65c62e7822a81dfd94d0e0f51fcc2a445a77c
Author: Michalis Kamburelis <michalis.kambi@gmail.com>
Date: Sun Nov 27 03:52:50 2022 +0100
CastleApplicationMode, enum with 4 options, replaces CastleDesignMode
and CastleDesignPhysicsMode
This makes it simpler to check (no need to check 2 vars in
constructions like "CastleDesignMode and CastleDesignPhysicsMode in
[...]").
And the name is more future-proof, it's "simulation" not just "physics".
commit c501f383a845f0b44eb12978fc7c3bffbcd8020e
Author: Michalis Kamburelis <michalis.kambi@gmail.com>
Date: Thu Nov 24 10:54:53 2022 +0100
Collider SizeScale -> simple scalar and require WorldScale to be uniform
Because our support for 3D SizeScale and 3D WorldScale was not reliable / obvious.
- Each collider had specialized logic how 3D sizes map to particular
collider size, and even which dimensions apply to e.g. capsule height
or radius. This was smart, but not obvious for user at all, as it's
not known what is really the "correct" way to interpret such scale.
- The coordinate space was not certain. 3D SizeScale was in local
collider space.
3D WorldScale was queried in world scale, but applied in local space.
It's more future-proof to just support scale as scalar. When this is not enough, just don't use AutoSize.
Also adds a warning when FWorldScale is non-uniform.
commit dd5a6459118ad1a6538fe5984e943b51739aca11
Author: Michalis Kamburelis <michalis.kambi@gmail.com>
Date: Thu Nov 24 05:20:53 2022 +0100
Add play/stop for application, alternative for play/stop for physics
commit 238041c4c3bd78fae30f7b03d96ac80c69754f15
Author: Michalis Kamburelis <michalis.kambi@gmail.com>
Date: Thu Nov 24 04:40:05 2022 +0100
Move anchors.png where it should too
commit 14198a687e83041156f7884db378ff0842cf63e6
Author: Michalis Kamburelis <michalis.kambi@gmail.com>
Date: Thu Nov 24 04:36:59 2022 +0100
Autogenerate all PNG from SVG using Makefile
commit c9319ec8b1396c67c162a7dfdeea4896252131db
Author: Michalis Kamburelis <michalis.kambi@gmail.com>
Date: Thu Nov 24 03:42:09 2022 +0100
Rename PNGs to consistenly show size in filename
commit fc3f41da306680043dd9743df7dab8bd8e6f3110
Author: Michalis Kamburelis <michalis.kambi@gmail.com>
Date: Thu Nov 24 03:29:16 2022 +0100
Rearrange icons into icons_on_forms, merge fontawesome/ and
feathericons/ into this
Also move out old stuff to old/
Also move out auto-generated PNGs to exported/
Also remove unneeded multiple versions of SVG for various sizes
Also added some missing SVGs from https://feathericons.com/
commit 171bf2b4f50c058b11c080240118180bae692c23
Author: Michalis Kamburelis <michalis.kambi@gmail.com>
Date: Thu Nov 24 03:15:54 2022 +0100
anchors to subdir
commit 8751c7f3f9ec8707f6de317a2a3c41912e6b798a
Author: Michalis Kamburelis <michalis.kambi@gmail.com>
Date: Thu Nov 24 03:14:37 2022 +0100
Cleanup icons somewhat: exported PNGs to exported/ subdir
commit a59a7490236feaf9b63678e11315bf8157d39e84
Merge: 13b382f97 5fbe97864
Author: Michalis Kamburelis <michalis.kambi@gmail.com>
Date: Fri Nov 18 04:05:02 2022 +0100
Merge branch 'master' into physics
commit 13b382f9792afe7738a72c87d96f81403601c5b7
Merge: 056d5931e bf8745ca2
Author: Michalis Kamburelis <michalis.kambi@gmail.com>
Date: Tue Nov 8 05:17:01 2022 +0100
Merge branch 'master' into physics
commit 056d5931e537a90e57c7b5664dcd2708b85ff3dd
Author: Michalis Kamburelis <michalis.kambi@gmail.com>
Date: Tue Nov 8 03:38:55 2022 +0100
Remove physics from respecting TCastleTransform.Collides boolean, it
was inconsistent and so a trap
- It was looking at TCastleTransform.Collides, but
- not at TCastleTransform.Collides of parents
- not at TCastleTransform.Pickable, in case of raycasting
It seems better to just ignore this property completely with physics engine. This opens us to future physics layer implementation that would be just independent from these Collides/Pickable properties.
Makes plane collider on physics_forces work reliably.
commit e0393c780996151e1f72b1c313712cee2ea98d49
Author: Michalis Kamburelis <michalis.kambi@gmail.com>
Date: Tue Nov 8 02:45:56 2022 +0100
Change TCastlePlane docs, it's more than an infinite plane, it's half of 3D space
commit 0807ff46642c9234036201cd75e87fbc83287c42
Author: and3md <and3md@gmail.com>
Date: Mon Nov 7 12:44:41 2022 +0100
TCastleRigidBody: Fix setting angular velocity.
commit f823d463aa61147d48faa33a035dbd51224051ce
Author: Michalis Kamburelis <michalis.kambi@gmail.com>
Date: Mon Nov 7 03:04:41 2022 +0100
Warning "Mesh not set, so it will not collide" was too eager, silence
commit b5caadd5ab9645fd23355bfad6b1924dfb10d8dd
Author: Michalis Kamburelis <michalis.kambi@gmail.com>
Date: Mon Nov 7 03:04:28 2022 +0100
SetMesh private
commit 50ce842fbc96afa6c1c302109f062d067ffc560b
Merge: d1946ab9c 7690d9bb9
Author: Michalis Kamburelis <michalis.kambi@gmail.com>
Date: Sun Nov 6 22:10:45 2022 +0100
Merge branch 'master' into physics
commit d1946ab9c0f3bc70b674a2b3e0643ff53b94c6a4
Author: Michalis Kamburelis <michalis.kambi@gmail.com>
Date: Sun Nov 6 22:09:10 2022 +0100
Code cleanup in physics:
- InitializeKraft a procedure, TryInitializeColliders->InitializeCollider a procedure (we prefer to not signal failure by return value)
- no need for stateMissingFinalization (InitializeCollider can just do
the necessary finalization explicitly)
- CreateKraftShape should never return nil
commit 91e35eee8055451682bfdf915a28998d954717a3
Author: Michalis Kamburelis <michalis.kambi@gmail.com>
Date: Sun Nov 6 05:44:16 2022 +0100
FState in [stateNone] -> FState = stateNone
commit c6aeb556212ba61bdaf337d55905fb169763fb1c
Author: Michalis Kamburelis <michalis.kambi@gmail.com>
Date: Sun Nov 6 05:43:09 2022 +0100
Fix mesh and plane forcing rigid body to be static, this can be
simpler and more reliable (not dependent on the order of adding rigid body/collider)
commit ed1fefec90353db620eb44d73cec9744f7008366
Author: Michalis Kamburelis <michalis.kambi@gmail.com>
Date: Mon Oct 31 03:32:47 2022 +0100
Rename to InternalDesigningBegin/End, make XxxEnd called from ParentBeforeDetach
commit 3f577bd9e85c2356c4785003618e781205d2f3ab
Author: Michalis Kamburelis <michalis.kambi@gmail.com>
Date: Mon Oct 31 03:15:25 2022 +0100
Menu items and key shortcuts to play/stop/pause/resume physics
commit 303a8743c7adfe19727909622d8988cb8160314d
Author: Michalis Kamburelis <michalis.kambi@gmail.com>
Date: Mon Oct 31 02:29:55 2022 +0100
Better TCastlePlaneCollider Distance calculation
commit 7bdbda368dfc45afe3e9c416176fdb48c296f23f
Author: Michalis Kamburelis <michalis.kambi@gmail.com>
Date: Mon Oct 31 02:20:57 2022 +0100
Use CalculateScaledDistance for proper plane display
commit 8caa37e9ef2fa2587bbb44d4d36abd517b70bdde
Author: Michalis Kamburelis <michalis.kambi@gmail.com>
Date: Mon Oct 31 02:14:35 2022 +0100
"Show Colliders" is now a checkbox and tries to stay persistent
commit ccbd4252dee7dc419349cec90d78a61068c3a06f
Author: Michalis Kamburelis <michalis.kambi@gmail.com>
Date: Mon Oct 31 01:50:25 2022 +0100
Naming prepared to extend "Simulation" to other things in the future
commit 575f30450108a2a078ccb126ff3e519902222cdf
Author: Michalis Kamburelis <michalis.kambi@gmail.com>
Date: Mon Oct 31 01:16:55 2022 +0100
Use TSavedSelection when changing component class
commit 0dde1555a2cfea897937c43c4fdea7d565882202
Author: Michalis Kamburelis <michalis.kambi@gmail.com>
Date: Mon Oct 31 01:08:47 2022 +0100
Use TInternalComponentLoadInfo with InternalStringToComponent (after
merge fix)
commit a15d87843d5d9bd43ad1447801ccb0fe22ca54d9
Merge: 80ec8ddb4 8cfe79c1a
Author: Michalis Kamburelis <michalis.kambi@gmail.com>
Date: Mon Oct 31 00:57:27 2022 +0100
Merge branch 'master' into physics
commit 80ec8ddb4b733d37730202409c3a08bcbbf7305d
Author: Michalis Kamburelis <michalis.kambi@gmail.com>
Date: Sat Oct 29 03:02:33 2022 +0200
Also disable scale on light gizmo
commit f172881d83f56a5467556aa7dc037f42103a895c
Author: Michalis Kamburelis <michalis.kambi@gmail.com>
Date: Sat Oct 29 02:39:34 2022 +0200
Use InternalIgnoreParentScale for cameras
commit e19f4506e0e7db9d1be9e10ea0322b4c2b2544d8
Author: Michalis Kamburelis <michalis.kambi@gmail.com>
Date: Sat Oct 29 02:39:25 2022 +0200
Optimize TTransformation.ScaleToIdentity for often case
commit 465fa38d75754e5c4874221ef02589f92f9f7236
Author: Michalis Kamburelis <michalis.kambi@gmail.com>
Date: Sat Oct 29 02:31:49 2022 +0200
InternalIgnoreParentScale useful for collider visualization
commit f280f591bb210bb7da44068a941a0f0baf1d6e3c
Author: Michalis Kamburelis <michalis.kambi@gmail.com>
Date: Sat Oct 29 02:11:59 2022 +0200
Fix and simplify visualization code
- TCastleCollider.UpdateVisualization can easier initialize visualization of Translation,Rotation
- also fix box overriding Size
- Visualisation -> Visualization (British -> American)
commit b6ce62f898813d4241e99693353ecce79312ffe5
Author: Michalis Kamburelis <michalis.kambi@gmail.com>
Date: Sat Oct 29 02:11:52 2022 +0200
Fix BigChange assigned
commit 849cabd2ea2178da2fa8c3e5e6da7a7101516b02
Author: Michalis Kamburelis <michalis.kambi@gmail.com>
Date: Sat Oct 29 01:21:44 2022 +0200
Code conventions cleanups - use TVector3/4.Zero, use PerfectlyEquals
as class method
commit aa878fcbe4322e1d1e8af2453e9e0df4bef08817
Author: Michalis Kamburelis <michalis.kambi@gmail.com>
Date: Sat Oct 29 01:21:10 2022 +0200
Menu items to show/hide all behaviors
commit 86b1ecc8227e15fed7b651954f8eb642cda5fff7
Author: Michalis Kamburelis <michalis.kambi@gmail.com>
Date: Fri Oct 28 23:40:01 2022 +0200
Fix SameValue comparison in setters to just <>, also fix
SetRestitution setter
commit e4245cb9f1b8c2b46a6eaa76f24398d2db66f516
Author: Michalis Kamburelis <michalis.kambi@gmail.com>
Date: Fri Oct 28 23:26:37 2022 +0200
Backport collider visualization from physics_j branch
commit d360dea277211380ee1de7730a8863e7bdab66ef
Author: Michalis Kamburelis <michalis.kambi@gmail.com>
Date: Fri Oct 28 23:02:04 2022 +0200
Fix examples MaximalLinearVelocity->MaxLinearVelocity
commit ca213d253c13fc5424fa14471b8713ea79c6a68a
Author: Michalis Kamburelis <michalis.kambi@gmail.com>
Date: Fri Oct 28 22:09:03 2022 +0200
Ups, fix back 2 cases (when using Kraft API) back Max->Maximal
commit d8ed16abade077f4cd10a6e89e241532ae1c4cab
Author: Michalis Kamburelis <michalis.kambi@gmail.com>
Date: Fri Oct 28 22:08:07 2022 +0200
Maximal-Max
commit 0658730a1dd42fb189b77d6971f6b814c9e7b86d
Author: Michalis Kamburelis <michalis.kambi@gmail.com>
Date: Fri Oct 28 22:51:16 2022 +0200
Check previous value at transform setters, as ChangedTransform updates
physics and may be more costly now
Also it follows my own
https://castle-engine.io/coding_conventions#_start_a_property_setter_with_if_fxxx_value_then :)
commit 0dc65c49b0f22ccb765ec636f1ad06f70e30d34d
Author: Michalis Kamburelis <michalis.kambi@gmail.com>
Date: Fri Oct 28 22:25:01 2022 +0200
Fixed SizeScale treatment on TCastleCapsuleCollider, to make
platformer capsule correct
commit b19935547779c2ae2c8a36765dada90d39e6e16e
Author: Michalis Kamburelis <michalis.kambi@gmail.com>
Date: Fri Oct 28 22:23:48 2022 +0200
No point in calling ChangedTransform when Scale.Abs didn't change,
fixes platformer performance
commit 7c83f555e4ea0b96d829e79982afd2d3b0e0ea58
Author: Michalis Kamburelis <michalis.kambi@gmail.com>
Date: Fri Oct 28 22:02:35 2022 +0200
Better Mode2D docs
commit 232c26dad1ad22c49fd63131cbc9b106ed4b003a
Author: Michalis Kamburelis <michalis.kambi@gmail.com>
Date: Fri Oct 28 16:23:22 2022 +0200
Fix tests after Scale->SizeScale rename
commit 42045b1cb0bf44cb2868e93a1f5d9e726277ab1f
Author: Michalis Kamburelis <michalis.kambi@gmail.com>
Date: Fri Oct 28 15:45:11 2022 +0200
Better Mode2D docs, and Minimal->Min
commit 83547e591b1feabac6231d9db2f60a61e745ac17
Author: Michalis Kamburelis <michalis.kambi@gmail.com>
Date: Fri Oct 28 15:34:10 2022 +0200
Restore in TCastleCapsuleCollider to look at TotalScale.Y for height scale
commit 78d6ca223db9bfe997964dea3156e025e6981ab8
Author: Michalis Kamburelis <michalis.kambi@gmail.com>
Date: Fri Oct 28 15:23:04 2022 +0200
Let platformer just use automatic projection calculation
commit df8af53746447a2bc9532fe312941ef388851931
Author: Michalis Kamburelis <michalis.kambi@gmail.com>
Date: Fri Oct 28 15:21:16 2022 +0200
Update in designs collider Scale -> SizeScale
commit 0c9a6d5c5f459be409c461595902a6a38c5a87f9
Author: Michalis Kamburelis <michalis.kambi@gmail.com>
Date: Fri Oct 28 15:10:35 2022 +0200
Simplifications and fixes to scaling in physics
- FLastUsedWorldScale -> FWorldScale, rename various things to make it clear they operate on WorldScale
- collider Scale -> SizeScale, and do not reset it by auto-sizing
- TotalScale that connects FWorldScale and FSizeScale
- use Approximate3D/2DScale instead of manually-invented approaches to simplify scale in ...physics.inc
Also move more private to strict private.
Also add prop editors to allow to input 1 float for 3D.
commit 3b7cd992183c0205258d5b9c504ba170b3973d6c
Author: Michalis Kamburelis <michalis.kambi@gmail.com>
Date: Fri Oct 28 11:09:10 2022 +0200
Simplify: remove UpdateCollidersAtRuntime (always true makes sense),
remove ShouldUpdatePhysicsObjects (bad idea - we can introduce
negative scale in many ways, this safeguard was not good enough)
commit 0a76a487a6b9fc0d10a58b01cd0ccd99baa2e526
Author: Michalis Kamburelis <michalis.kambi@gmail.com>
Date: Thu Oct 27 14:39:01 2022 +0200
Visualize when physics simulation is in progress
commit b824757171769ec968a7377fefc7ad6d38af4fcc
Merge: 3d6de7897 f191272da
Author: Michalis Kamburelis <michalis.kambi@gmail.com>
Date: Thu Oct 27 03:26:56 2022 +0200
Merge branch 'master' into physics
commit 3d6de78975784933438d69ab2af8f34ebf22fbda
Merge: 93b902155 e825c3275
Author: Michalis Kamburelis <michalis.kambi@gmail.com>
Date: Thu Oct 27 00:15:11 2022 +0200
Merge branch 'master' into physics
commit 93b9021558f9e3a5a74cdd63036924a5c490c0b4
Author: Michalis Kamburelis <michalis.kambi@gmail.com>
Date: Tue Oct 25 15:04:26 2022 +0200
Delphi fix (255 string literals)
commit 698f16b489fdb69acfc1c7f2d82832788a2594ae
Merge: 232bc81be 806d3e264
Author: Michalis Kamburelis <michalis.kambi@gmail.com>
Date: Mon Oct 24 17:22:21 2022 +0200
Merge branch 'master' into physics
commit 232bc81be60b071c9adcfaf3a9351de16da139eb
Merge: 123dfd21f c7c324b21
Author: Michalis Kamburelis <michalis.kambi@gmail.com>
Date: Mon Oct 24 06:28:37 2022 +0200
Merge branch 'master' into physics
commit 123dfd21f1b914ec26594457d65b0ed9ecfbbe81
Merge: 8b4929eb3 47f26ca5f
Author: Michalis Kamburelis <michalis.kambi@gmail.com>
Date: Mon Oct 24 05:35:14 2022 +0200
Merge branch 'master' into physics
commit 8b4929eb3c1282ef563bd31b230947c1fe637a76
Author: Michalis Kamburelis <michalis.kambi@gmail.com>
Date: Sun Oct 23 02:25:50 2022 +0200
physics_forces add shadows to demo
commit e54f978f6e8f16fe133a3fc08e0da3d4340e85e7
Author: Michalis Kamburelis <michalis.kambi@gmail.com>
Date: Sun Oct 23 02:19:08 2022 +0200
Warn at non-identity transformation of Viewport.Items
commit 197c327f9f16c29ca064c75957989c219d005299
Author: Michalis Kamburelis <michalis.kambi@gmail.com>
Date: Sun Oct 23 02:11:04 2022 +0200
Dropping more boxes button, TCastleTransform.FindAllBehaviors utility
commit 7abb7873b75e65f093c87104c28bc2faae3a0150
Author: Michalis Kamburelis <michalis.kambi@gmail.com>
Date: Sat Oct 22 23:53:34 2022 +0200
Improve code in UpdateLockRotation/Translation: lookup table for
flags, utility KraftForceUpdatingReadyBody
commit 9969b3380e4868062fa97d41c37ed2553b2d167c
Author: Michalis Kamburelis <michalis.kambi@gmail.com>
Date: Sat Oct 22 23:31:36 2022 +0200
TSavedSelection also saves/restores CurrentViewport
commit 5b9093fb54905803c59ca6c7f69f9243c6b20c68
Author: Michalis Kamburelis <michalis.kambi@gmail.com>
Date: Sat Oct 22 05:29:34 2022 +0200
Drag TCastleTransform with Ctrl to preserve world transform
commit 447b0c2af1f50644ee8f581b8c864b3d8fa2947c
Author: Michalis Kamburelis <michalis.kambi@gmail.com>
Date: Sat Oct 22 05:29:08 2022 +0200
Improve physics_explosion - better terrain, boxes layout
commit 16ee1cd202f2323e917e33ded53f9cbebb338191
Author: Michalis Kamburelis <michalis.kambi@gmail.com>
Date: Sat Oct 22 05:03:27 2022 +0200
Explosion demo - use ApplyImpulse to throw stuff around, and show
collisions on terrain
commit ed1fb5f5901788c5062bff0adec9db56562ffa45
Author: Michalis Kamburelis <michalis.kambi@gmail.com>
Date: Sat Oct 22 04:50:20 2022 +0200
Make TCastleTerrain collide using TCastleMeshCollider
commit 579199da1fcb15a3938fc31ccce8b8fc17940a09
Author: Michalis Kamburelis <michalis.kambi@gmail.com>
Date: Sat Oct 22 04:49:33 2022 +0200
"Cannot restore selection" can happen in valid cases, demote to just WritelnLog
commit 6c8210a13ab93700a7a5e9f47de25a1be14d1eba
Author: Michalis Kamburelis <michalis.kambi@gmail.com>
Date: Sat Oct 22 03:00:16 2022 +0200
CASTLE_LOG_PHYSICS_DROPS_FRAMES define, to remove log and related
local var
commit 7b01dbb662f115b517143855fc3d97feffbd6cb0
Author: Michalis Kamburelis <michalis.kambi@gmail.com>
Date: Sat Oct 22 02:57:07 2022 +0200
Move constructor/destructor to be first in implementation
commit 4434d0d594b1533bd12b39065778b7c6094a3b7c
Author: Michalis Kamburelis <michalis.kambi@gmail.com>
Date: Sat Oct 22 01:38:35 2022 +0200
Comment out "Max physics ticks..." log
commit e7671de94ed98aeb84f02699cfc038fa39f20acc
Author: Michalis Kamburelis <michalis.kambi@gmail.com>
Date: Sat Oct 22 01:36:24 2022 +0200
Fix using RayCast in examples/third_person_navigation
commit 5a88be6fc0c0bcb76c37e8aab63cf5a14d6901f3
Author: Michalis Kamburelis <michalis.kambi@gmail.com>
Date: Sat Oct 22 01:06:37 2022 +0200
Last ParentChanged->ParentAfterAttach
commit 9d5a778837f672a65c0ff5f401bade56b794a54b
Author: Michalis Kamburelis <michalis.kambi@gmail.com>
Date: Sat Oct 22 00:46:10 2022 +0200
Fix third_person_navigation avatar being too high
( I accindetally committed design with AutoSize=false on
TCastleCapsuleCollider due to a bug I made (and
already fixed) on TCastleCapsuleCollider that set AutoSize to false on
it in constructor. )
This AutoSize was changed to false in
https://github.com/castle-engine/castle-engine/commit/c0590bce2da41684e8b42aff72337ef1dd6dfe8a
, and I caught and fixed the bug in next commit
https://github.com/castle-engine/castle-engine/commit/598cf67f474045107a876c8e6f803950548d9291 .
commit 12cf680318e8b753af6724388cb63b36c64c1e51
Author: Michalis Kamburelis <michalis.kambi@gmail.com>
Date: Fri Oct 21 12:47:51 2022 +0200
For now restore Scale reset in TCastleCollider.CalculateSizeCore
commit 6b156c6c72f1b03331201ee0a141047700b114a0
Author: Michalis Kamburelis <michalis.kambi@gmail.com>
Date: Fri Oct 21 10:59:20 2022 +0200
Restore camera after physics stop
commit 17d7d16cd42b4a3f94546183fe14326b5ad21dbf
Author: Michalis Kamburelis <michalis.kambi@gmail.com>
Date: Fri Oct 21 10:53:36 2022 +0200
More docs
commit a4d9b2f8287043542ba82394b31d94a5db3e1a4a
Author: Michalis Kamburelis <michalis.kambi@gmail.com>
Date: Fri Oct 21 10:53:16 2022 +0200
Fix Mass and Density being applied immediately
commit 2dd960cd25fd9a8c0c4475b3846d4a6b7f3eb696
Author: Michalis Kamburelis <michalis.kambi@gmail.com>
Date: Fri Oct 21 09:49:41 2022 +0200
Save/restore selection around physics stop, generalizing previous undo logic
commit 20a98d93a51c75df4ac9f09f14da8c2e2031e860
Author: Michalis Kamburelis <michalis.kambi@gmail.com>
Date: Fri Oct 21 09:48:52 2022 +0200
FShouldUpdatePhysicsObjects is a bad idea, mark with TODO
commit 598cf67f474045107a876c8e6f803950548d9291
Author: Michalis Kamburelis <michalis.kambi@gmail.com>
Date: Thu Oct 20 13:48:19 2022 +0200
Fix resetting AutoSize in constructor of sphere/capsule collider
commit c0590bce2da41684e8b42aff72337ef1dd6dfe8a
Author: Michalis Kamburelis <michalis.kambi@gmail.com>
Date: Thu Oct 20 04:22:34 2022 +0200
Show again enemies
commit f61512d394a7ec105b7b12721855720b6dd46286
Author: Michalis Kamburelis <michalis.kambi@gmail.com>
Date: Thu Oct 20 04:22:15 2022 +0200
Improve castlethirdpersonnavigation.pas: do not block navigation at design-time
commit 5c3e49f2e4a4820c46a27b3dd9d46a1084eec98f
Author: Michalis Kamburelis <michalis.kambi@gmail.com>
Date: Thu Oct 20 04:04:55 2022 +0200
Autotest that we don't make unnecessary warning when resolving Mesh
property from design
commit f2e7b7b41aa21ca770c04b52be25a5242ef6c40c
Author: Michalis Kamburelis <michalis.kambi@gmail.com>
Date: Thu Oct 20 04:00:06 2022 +0200
Remove accidental 2nd copy of castle-data:/level.gltf
commit 7466818a26cc1f2859a313befce5e64c9b928340
Author: Michalis Kamburelis <michalis.kambi@gmail.com>
Date: Thu Oct 20 03:58:33 2022 +0200
Better warnings when assigning TCastleMeshCollider.Mesh
commit 72b16dcc75f9ad0d17b9156df08d6afab47731ea
Author: Michalis Kamburelis <michalis.kambi@gmail.com>
Date: Thu Oct 20 03:48:22 2022 +0200
Remove TRigidBodyList, causes warnings and is useless now
commit eb84804991c4e0db1f88c6357f0dd47793d12ae1
Author: Michalis Kamburelis <michalis.kambi@gmail.com>
Date: Thu Oct 20 03:21:15 2022 +0200
Rename and reattach TMeshColliderScenePropertyEditor -> TMeshColliderMeshPropertyEditor
commit d8f3b94d03aced1e4019713e7f08f14b2e737a1d
Author: Michalis Kamburelis <michalis.kambi@gmail.com>
Date: Thu Oct 20 03:06:19 2022 +0200
Add TCastleMeshCollider.DoubleSided, default false, for speed
commit 3ad2f632b61bf61694710b5c9597f80c254c93f2
Author: Michalis Kamburelis <michalis.kambi@gmail.com>
Date: Thu Oct 20 02:57:26 2022 +0200
Fix implementation order to be similar to interface,
TCastleCapsuleCollider and mesh were too high
commit 72dadd47917f6e489cd517168a41994e41cb483e
Author: Michalis Kamburelis <michalis.kambi@gmail.com>
Date: Thu Oct 20 02:53:46 2022 +0200
Various sizing fixes and improvements
- Autotests for auto-sizing,
- expose CalculateSize,
- document AutoSize not too eager, document
- and fix defaults for various colliders,
- reset Scale at CalculateSize
commit 32ddda68055d68c5a16852d428b906de6fa05959
Author: Michalis Kamburelis <michalis.kambi@gmail.com>
Date: Wed Oct 19 12:44:42 2022 +0200
Use and document better ParentAfterAttach
commit b517821ff0559d0c93c058a756c1febb5a32c86f
Author: Michalis Kamburelis <michalis.kambi@gmail.com>
Date: Wed Oct 19 11:53:52 2022 +0200
Fix using TCastleMeshCollider.Mesh, not Scene
commit a58b273a2de47cf8586f3347867a8a64cf9ac57e
Author: Michalis Kamburelis <michalis.kambi@gmail.com>
Date: Wed Oct 19 11:50:22 2022 +0200
MinAbsVectorCoord for plane collider
commit 8f1fe35712afc2cb6b6bbaf12ecd85b1eb7ce300
Author: Michalis Kamburelis <michalis.kambi@gmail.com>
Date: Wed Oct 19 11:41:46 2022 +0200
protected virtual ForceStaticBody, use ArrayContainsString for PropertySections
commit 623bf2d9278f0571caceb7f9db275952e4e9b79c
Author: Michalis Kamburelis <michalis.kambi@gmail.com>
Date: Wed Oct 19 10:59:38 2022 +0200
Many formatting and renames to make API a bit better
- Move deprecated colliders to castletransform_physics_deprecated.inc
- ContinuousCD -> ContinuousCollisionDetection (longer but more obvious, and connects with CollisionDetection)
- TCastleMeshCollider.Scene -> Mesh (connects with HasColliderMesh etc., makes it more obvious it's not just for TCastleScene)
Old TCastleMeshCollider.Mesh -> FKraftMesh
- Check FMesh.HasColliderMesh
- CollisionDetectionType->CollisionDetection, cdtDiscrete/Continuous -> cdDiscrete/Continuous
- Consistent empty lines: 1 empty line before public/published item with component, otherwise none
- Remove TConvexHullCollider comment (not maintained anymore, presents old colliders approach)
- Improve Mode2D and colliders comments, WakeUp
- TCastleRigidBodyState->TState, simple stateXxx enums
- Comment out Sleep
- TCastlePlaneCollider uses LocalBoundingBox (consistent) and MaxAbsVectorCoord
commit 7dab1b89fac274e158872ccef38bcfcdff09b506
Merge: dc41a8ee2 3098197de
Author: Michalis Kamburelis <michalis.kambi@gmail.com>
Date: Wed Oct 19 09:19:19 2022 +0200
Merge branch 'master' into physics
commit dc41a8ee2e99138442dfc2a4929e6652313f5c0f
Author: Michalis Kamburelis <michalis.kambi@gmail.com>
Date: Thu Oct 13 06:01:42 2022 +0200
Workaround capturing mouse look after shoot - in physics_3d_shooter too
commit 13210473f70a67b6dfcf2570efcb6400c4f42c7e
Merge: e27d2225f 9047e2010
Author: Michalis Kamburelis <michalis.kambi@gmail.com>
Date: Thu Oct 13 05:58:57 2022 +0200
Merge branch 'master' into physics
commit e27d2225fbd0c24f5d1df473199abe9690bfac5d
Author: Michalis Kamburelis <michalis.kambi@gmail.com>
Date: Sat Oct 8 02:02:24 2022 +0200
Update collider size when changing properties like TCastleSphere.Radius
commit 470cba49b727fce1caf45bbb50b6fd456420ffa7
Author: Michalis Kamburelis <michalis.kambi@gmail.com>
Date: Sat Oct 8 02:01:51 2022 +0200
Fix indent
commit 00bf21b6019225d984b683089282720c56badf54
Author: Michalis Kamburelis <michalis.kambi@gmail.com>
Date: Sat Oct 8 01:29:43 2022 +0200
Durring->During
commit d13e2e902e7cce74f89ec7bc6891a7f1315f78b8
Merge: c03854379 124738ef7
Author: Michalis Kamburelis <michalis.kambi@gmail.com>
Date: Sat Oct 8 01:28:46 2022 +0200
Merge branch 'master' into physics
commit c0385437903b7a1f7b5747f8ad86598666a5741b
Author: Michalis Kamburelis <michalis.kambi@gmail.com>
Date: Fri Oct 7 17:49:15 2022 +0200
Forcefully create with krbtStatic if collider doesn't support dynamic
commit e5ebb3e5665fcfff612f219ce79a9dbde9ef4a74
Author: Michalis Kamburelis <michalis.kambi@gmail.com>
Date: Fri Oct 7 17:49:08 2022 +0200
Improve comment
commit 066b2ecd2f27bae4b8594c778b58d7dc33d3265e
Merge: 0d426f51a ff239dbbd
Author: Michalis Kamburelis <michalis.kambi@gmail.com>
Date: Fri Oct 7 15:41:56 2022 +0200
Merge branch 'master' into physics
commit 0d426f51a5db68142c0cb1bc4c9ae0d7c91194ee
Merge: f5be5dd72 941cab5bc
Author: Michalis Kamburelis <michalis.kambi@gmail.com>
Date: Fri Oct 7 03:24:04 2022 +0200
Merge branch 'master' into physics
commit f5be5dd72fe4e4b47f72d06f0bb06e0a4c7180b3
Merge: 31b4d85e6 5c6e8bb8d
Author: Michalis Kamburelis <michalis.kambi@gmail.com>
Date: Thu Oct 6 16:16:29 2022 +0200
Merge branch 'master' into physics
commit 31b4d85e6f5ecd2dbbeb2e0049d7d9482472ffaf
Merge: a92512a8a 71a8b63ba
Author: Michalis Kamburelis <michalis.kambi@gmail.com>
Date: Thu Oct 6 03:27:10 2022 +0200
Merge branch 'master' into physics
commit a92512a8a0d20c14e1d650ba88fb6bd4cb9a8d3d
Merge: 6998109a9 343fb757c
Author: Michalis Kamburelis <michalis.kambi@gmail.com>
Date: Tue Oct 4 02:42:16 2022 +0200
Merge branch 'master' into physics
commit 6998109a963900863a6e0c04b26e54b40dae02b3
Merge: 8f6b05daf 08f10a18a
Author: Michalis Kamburelis <michalis.kambi@gmail.com>
Date: Mon Oct 3 22:39:42 2022 +0200
Merge branch 'master' into physics
commit 8f6b05dafca6c447e6b01e7b8e386b25f21e1a43
Merge: 110105533 7e66ebac6
Author: Michalis Kamburelis <michalis.kambi@gmail.com>
Date: Mon Oct 3 16:03:51 2022 +0200
Merge branch 'master' into physics
commit 110105533fa1f5c3770ba51bd938a738d4821f2e
Author: and3md <and3md@gmail.com>
Date: Mon Oct 3 15:20:15 2022 +0200
Editor: Fix opening another design while physics simulation.
commit 0c89d2c72bd050135331d6f54ef638450e48a529
Author: and3md <and3md@gmail.com>
Date: Mon Oct 3 14:30:29 2022 +0200
One more missed identation bug in basic physics classes.
commit 2953026f373c50e576e6787e6461e91dd06d2ff0
Author: and3md <and3md@gmail.com>
Date: Mon Oct 3 14:12:17 2022 +0200
Fixed indentation of basic physics classes.
commit 893b167470cc7c98a4c9a62ed5a8f6f13596ba2c
Merge: 25ef9798c 0339d44b9
Author: Michalis Kamburelis <michalis.kambi@gmail.com>
Date: Mon Oct 3 12:28:03 2022 +0200
Merge branch 'master' into physics
commit 25ef9798c3b9e8b12e54b4189819252be27b05ed
Merge: 4a2898fd9 fc3ef5e8f
Author: Michalis Kamburelis <michalis.kambi@gmail.com>
Date: Mon Oct 3 05:39:33 2022 +0200
Merge branch 'master' into physics
commit 4a2898fd9695fe6ef8a8ddf14966093dcfa687d3
Merge: 016737f71 4cc0f7d86
Author: Michalis Kamburelis <michalis.kambi@gmail.com>
Date: Mon Oct 3 05:04:15 2022 +0200
Merge branch 'master' into physics
commit 016737f715c62bbdf44bef9581aa073af72efc58
Merge: 734e131df 575452f57
Author: Michalis Kamburelis <michalis.kambi@gmail.com>
Date: Sun Oct 2 04:36:10 2022 +0200
Merge branch 'master' into physics
commit 734e131df97e487cf912277ebf1cd85940996fe3
Merge: caf80f898 93f5ff5a6
Author: Michalis Kamburelis <michalis.kambi@gmail.com>
Date: Sun Oct 2 03:48:11 2022 +0200
Merge branch 'master' into physics
commit caf80f8980782e0895a59f77af859cf76ff35c47
Author: Michalis Kamburelis <michalis.kambi@gmail.com>
Date: Fri Sep 30 18:04:39 2022 +0200
Forgot rigid body on 1 box
commit 75b9407feb031f2615d105b7989eb06b16b16eef
Merge: f76cf8cea 5636ef20f
Author: Michalis Kamburelis <michalis.kambi@gmail.com>
Date: Thu Sep 29 12:38:48 2022 +0200
Merge branch 'master' into physics
commit f76cf8cea116acc9ee522f51baaa2880cff85294
Author: Michalis Kamburelis <michalis.kambi@gmail.com>
Date: Thu Sep 29 10:55:48 2022 +0200
Fix after merge, actions were missing
commit f6e0c459e5976ae6f59f8d2c0e74076309566a3c
Merge: 604048a86 e028f5529
Author: Michalis Kamburelis <michalis.kambi@gmail.com>
Date: Thu Sep 29 10:34:19 2022 +0200
Merge branch 'master' into physics
commit 604048a867d07f2949c09d776f01482645149fef
Merge: d55acdde5 8a8956428
Author: Michalis Kamburelis <michalis.kambi@gmail.com>
Date: Tue Sep 27 23:44:48 2022 +0200
Merge branch 'master' into physics
commit d55acdde5aff4ae77ae07b4369b858e8078d97bf
Author: and3md <and3md@gmail.com>
Date: Tue Sep 27 13:43:20 2022 +0200
Fixed changing locked rotation/translation axes.
commit 86fd22824c91cb9dee0732e21c24348d24a6a89c
Author: Michalis Kamburelis <michalis.kambi@gmail.com>
Date: Tue Sep 27 14:02:39 2022 +0200
Improve docs of AddTorque, AngularVelocity and friends
Use AddTorque in Update in physics_forces.
commit ea9febdbffe94c4d57507453cc72b28dfe69543b
Author: Michalis Kamburelis <michalis.kambi@gmail.com>
Date: Tue Sep 27 04:35:05 2022 +0200
Demo to interactively test AddForce and friends
commit 89030e6a2a9a0e86b02ed5260e24720387b2e658
Author: Michalis Kamburelis <michalis.kambi@gmail.com>
Date: Tue Sep 27 03:25:17 2022 +0200
Fix tab order for edit commands
commit a693b4d71c6e94d2559f12e659d9b077e4691474
Author: Michalis Kamburelis <michalis.kambi@gmail.com>
Date: Tue Sep 27 03:25:08 2022 +0200
Fix parenthesis
commit c6758ca81b7739fa3d2ed6d906b45918fbc3615e
Author: Michalis Kamburelis <michalis.kambi@gmail.com>
Date: Tue Sep 27 02:54:17 2022 +0200
"CastleDesignMode = false" -> "not CastleDesignMode"
commit 039bf60f089b3f9a6e097ff37a3fcf367eb67dc3
Author: Michalis Kamburelis <michalis.kambi@gmail.com>
Date: Tue Sep 27 02:43:36 2022 +0200
Fix indentation
commit 3ba87014507228e5e8191a159f1a911c19ad8b77
Author: Michalis Kamburelis <michalis.kambi@gmail.com>
Date: Tue Sep 27 02:42:46 2022 +0200
Improve docs of AddForce and friends (and add many TODOs to make it
better)
commit 00fd306ed036ba261cbe9405019843058a1a3cf0
Author: Michalis Kamburelis <michalis.kambi@gmail.com>
Date: Mon Sep 26 13:50:47 2022 +0200
Testing CollisionDetectionType = cdtContinuous
commit 1619fa5aaf092d1fa055395655e045388003cde6
Author: and3md <and3md@gmail.com>
Date: Tue Aug 2 16:04:00 2022 +0200
Fix typos.
commit 2039df77fc78d54d41c7a222184d7b48a3538019
Author: and3md <and3md@gmail.com>
Date: Tue Aug 2 15:54:44 2022 +0200
Editor physics simulation: added info to stop simulation before creating new design.
commit 1c5b041ec5d5a088d7e1133d274651cc858d919e
Author: and3md <and3md@gmail.com>
Date: Tue Aug 2 15:41:06 2022 +0200
Editor physics simulation: warning before save when simulation is not stoped.
commit 0aa121af385b89e0e2fe909c4c086c9cbbd4d370
Author: and3md <and3md@gmail.com>
Date: Tue Aug 2 15:17:53 2022 +0200
Editor physics simulation: added info to stop simulation before close editor by Quit menu item.
commit 39dab76a437734e284d0a907bc72814ab1b92fbc
Author: and3md <and3md@gmail.com>
Date: Tue Aug 2 15:10:10 2022 +0200
Editor physics simulation: added info to stop simulation before switch project.
commit 30010711917a52dc0b1e991624a0b40b9163da59
Author: and3md <and3md@gmail.com>
Date: Tue Aug 2 15:04:32 2022 +0200
Editor physics simulation: added info to stop simulation before open other design.
commit d412b9607bfe8a1918734085dee91903340f865e
Author: and3md <and3md@gmail.com>
Date: Tue Aug 2 15:01:55 2022 +0200
Editor physics simulation: added info to stop simulation before close design.
commit 2b1b72414666ba5798b5a63966a80ec7d71c10a7
Author: and3md <and3md@gmail.com>
Date: Tue Aug 2 14:53:53 2022 +0200
Editor physics symulation: added info to stop simulation before close the editor.
commit a369e7bf6b08345ecbc4dc8dad01c94f57258868
Author: and3md <and3md@gmail.com>
Date: Tue Aug 2 14:44:08 2022 +0200
Fix comments about CCD.
commit 5bb00caf8857c1a42eb0c2ff472d9b94a7a5cf3c
Author: and3md <and3md@gmail.com>
Date: Tue Aug 2 14:40:32 2022 +0200
Fix continous collision detection.
commit 91d1cbefcd0647e0a677c65f8ef25c6c52ad0f5f
Author: Michalis Kamburelis <michalis.kambi@gmail.com>
Date: Mon Sep 26 12:55:47 2022 +0200
Testing BulletRigidBody.Gravity := false
commit 5b333ca32de608b256ebd2847687c15d3df6ef94
Author: Michalis Kamburelis <michalis.kambi@gmail.com>
Date: Mon Sep 26 12:55:32 2022 +0200
Remove accidental unused rigid body
commit a7ed3225306ae430b67c294d2a8a981e52684d89
Author: Michalis Kamburelis <michalis.kambi@gmail.com>
Date: Mon Sep 26 03:45:43 2022 +0200
Demo of shooting stuff in 3D
commit 05d034e5bd6b84c1261459b0d5b6cfe9f87ca991
Author: Michalis Kamburelis <michalis.kambi@gmail.com>
Date: Mon Sep 26 02:52:19 2022 +0200
More: Upgrade to use new advised 2d projection settings - near and far
at 0, origin at 0.5 0.5
commit 4b2c6b7cefbdd56b76f391b2636c3d9ed4a8e7b2
Author: Michalis Kamburelis <michalis.kambi@gmail.com>
Date: Mon Sep 26 02:47:26 2022 +0200
Upgrade to use new advised projection settings - near and far at 0,
origin at 0.5 0.5
commit 5b6b97f7561bf4d40ea20d6c2673e9f6df66a204
Author: Michalis Kamburelis <michalis.kambi@gmail.com>
Date: Mon Sep 26 02:46:52 2022 +0200
Examples improvements: no .gitignore, better qualified_name, and
copyright and license
commit 4bf81e804ce8d26a64b2604e5c89962088b0e7f9
Author: Michalis Kamburelis <michalis.kambi@gmail.com>
Date: Mon Sep 26 01:22:40 2022 +0200
Fix after merge: we remove OverTriangulate param from Triangulate on master
commit 335edbe49a231bbc5ac359aa039f07ba84e91932
Author: Michalis Kamburelis <michalis.kambi@gmail.com>
Date: Mon Sep 26 01:22:30 2022 +0200
Fix after merge: readd files to lpk
commit 69700b56f6e06508a40e457c96e04491b0f9afe7
Merge: 6324c9401 1eada6aa5
Author: Michalis Kamburelis <michalis.kambi@gmail.com>
Date: Mon Sep 26 01:16:57 2022 +0200
Merge branch 'master' into physics
commit 6324c9401468ac74302a1fd3166d087fcea2cd31
Author: and3md <and3md@gmail.com>
Date: Tue Jul 12 12:22:55 2022 +0200
Space Ship Example: Set Mode2D for BoxCollider.
commit 40675f83dd321de0e8c0f10b60b902de39a0b921
Author: and3md <and3md@gmail.com>
Date: Tue Jul 12 12:11:53 2022 +0200
Automatically set Scene property in TCastleMeshColider to parent when added to transform in editor.
commit fabb2fedc303a8617d984c63a8aa08ad60f100c9
Author: and3md <and3md@gmail.com>
Date: Tue Jul 12 10:32:11 2022 +0200
CastleMeshCollider Scene: Filter only transforms that: CastleTransform.HasColliderMesh.
commit 917f7a93b9804312c620248a671843440d82c0b0
Author: and3md <and3md@gmail.com>
Date: Mon Jul 11 16:27:19 2022 +0200
Property editor skeleton for Castle Mesh Collider.
commit 2e348a7ea16eaddb771610e1ada08650f1527af3
Author: and3md <and3md@gmail.com>
Date: Mon Jul 11 15:19:17 2022 +0200
Move TCastleMeshCollider to CastleTransform.
commit 070557ab5733903ee7eaf938251197a08a328b11
Author: and3md <and3md@gmail.com>
Date: Mon Jul 11 15:18:27 2022 +0200
Move TTrianbleEvent to CastleTriangles.
commit 13a45e9b9bfe8e97af9e5a1adf6f3a3457d8a23f
Author: and3md <and3md@gmail.com>
Date: Mon Jul 11 15:17:45 2022 +0200
Ability to add primitive mesh to TCastleMeshCollider.
commit 6f57fcd335b2cc37b3b2b2eb1da06882569458e3
Author: and3md <and3md@gmail.com>
Date: Mon Jul 11 14:11:58 2022 +0200
Physics animated add dynamic sphere settings, fix animated collisions.
commit 6dc957838f17cc8f3feb4b1009c607d0c3bcc9ef
Author: and3md <and3md@gmail.com>
Date: Mon Jul 11 13:34:30 2022 +0200
physics_2d_game_sopwith - set Mode2D.
commit 4759d156dad1ccd1e4ba28b035a2f64ee6035845
Author: and3md <and3md@gmail.com>
Date: Mon Jul 11 13:26:59 2022 +0200
Platformer: added missing box collider.
commit 183b1bc2b3adee76bb089ee4e37e27ab8044f0d4
Author: and3md <and3md@gmail.com>
Date: Mon Jul 11 13:03:19 2022 +0200
Fix autosize recalculation after changing Mode2D.
commit ee881b9394eac097190239cc5d83b7c94dc7a235
Author: and3md <and3md@gmail.com>
Date: Mon Jul 11 13:02:36 2022 +0200
Fix for adding Box Collider 2D in editor.
commit 018180a51dcd53e56c9ba0791c4d7448d0705b95
Author: and3md <and3md@gmail.com>
Date: Mon Jul 11 13:01:54 2022 +0200
Platformer: use Mode2D for box colliders.
commit 5c0d0ce73161c2dfdf507f85fe0aa307334f5b9a
Author: and3md <and3md@gmail.com>
Date: Mon Jul 11 13:00:41 2022 +0200
Platformer: Use Continuous collision detection for bullets.
commit 92866e208f9a326d95c930f00c17b1ebfaf6db32
Author: and3md <and3md@gmail.com>
Date: Mon Jul 11 11:52:36 2022 +0200
Added AutoSizeMinimalThickness, AutoSizeMinimalThickness2D and Mode 2D for CastleBoxCollider.
commit 9cf796258649f5e0c3d34fa6aa7aa7e70c7ddc2d
Author: and3md <and3md@gmail.com>
Date: Tue Jul 5 16:11:05 2022 +0200
Fix CastlePlaneCollider autosize.
commit f40dc994d61b23c4ea489bf1e6fadf4e803fd8ca
Author: and3md <and3md@gmail.com>
Date: Tue Jul 5 14:30:58 2022 +0200
Fixed persistent vectors.
commit bfff44bae2f19e6f50bc40f898cf72b2377f48c0
Author: and3md <and3md@gmail.com>
Date: Tue Jul 5 14:17:28 2022 +0200
Fixed editor transform buttons.
commit d61e434e647f7906c12eac1abe0ddfb234082453
Merge: cb28ca8e5 13cf48fb3
Author: and3md <and3md@gmail.com>
Date: Mon Jul 4 08:50:53 2022 +0200
Merge remote-tracking branch 'origin/master' into physics
commit cb28ca8e5cf8ef986942c25b6a3c860f6d145158
Author: and3md <and3md@gmail.com>
Date: Tue Jun 28 12:27:49 2022 +0200
Fix TCastleVector4RotationPersistent default value after rebase.
commit 49343d0a061c42d8c20105dd596430e7a3c97de1
Author: and3md <and3md@gmail.com>
Date: Tue Jun 28 12:27:20 2022 +0200
Fix editor after rebase.
commit a6dd43cf66c5c1edee9063920f4719776b15402f
Author: and3md <and3md@gmail.com>
Date: Tue Jun 28 12:26:56 2022 +0200
Fix serialization after rebase.
commit 96127c52168b6bbfc586b01cf09e2708bbd8b2e0
Author: and3md <and3md@gmail.com>
Date: Tue Jun 28 12:26:35 2022 +0200
Fixed packages after rebase.
commit 5ce4d76bfe547b5032d581f17f5147e9d11204ab
Author: and3md <info@digitalkarabela.com>
Date: Tue Jun 21 15:12:44 2022 +0200
Fixed Physics simulation in editor for delphi.
commit 38ec14bc2e01ae13e3c48e27384120b5ccae91e9
Author: and3md <info@digitalkarabela.com>
Date: Tue Jun 21 15:11:41 2022 +0200
Space ship example fixed paths for delphi.
commit 85619bc3493580056b168516b69d3023be42bb46
Author: and3md <info@digitalkarabela.com>
Date: Tue Jun 21 15:10:48 2022 +0200
Physics fixes for Delphi.
commit 8392d22afe812b510d061517a15684b5414f8530
Author: and3md <info@digitalkarabela.com>
Date: Tue Jun 21 15:10:18 2022 +0200
Fix T3DCoords serialization for delphi.
commit e88a30f45e3667e6b6d08a31fea0d7b8044c66eb
Author: and3md <info@digitalkarabela.com>
Date: Tue Jun 21 15:09:34 2022 +0200
Fix engine source paths for delphi.
commit dd91e41773a6b56d22b7cedffc551868a5e55503
Author: and3md <info@digitalkarabela.com>
Date: Tue Jun 21 15:07:45 2022 +0200
Fix physics_2d_transformation_sync for delphi.
commit 1a867bb8892c71d56dbad43baa09093455d237b4
Author: and3md <and3md@gmail.com>
Date: Tue Jun 21 14:28:22 2022 +0200
Third Person Navigaton: Remove unneeded WakeUp.
commit 964218e11f6a71fbaaf8a67d6eeff0d3a164e4bc
Author: and3md <and3md@gmail.com>
Date: Tue Jun 21 14:25:04 2022 +0200
Space Ship Example: WakeUp no need to call WakeUp directly.
commit 637a7d9cabba046ae7506362635a9a68e2849c14
Author: and3md <and3md@gmail.com>
Date: Tue Jun 21 14:23:07 2022 +0200
Add WakeUp to forces and impulses by default.
commit 31e1519d81acf08668bdd80d109e44229fdf4ed6
Author: and3md <and3md@gmail.com>
Date: Tue Jun 21 14:18:31 2022 +0200
Physics 3D demo - more new physics.
commit 73f87dace0886508d322f6408c19dafc7ea156fb
Author: and3md <and3md@gmail.com>
Date: Tue Jun 21 14:08:03 2022 +0200
Physics 3D Demo: use new physics
commit 79f40b44f54ee49826bf697f241c36da1fc85f93
Author: and3md <and3md@gmail.com>
Date: Tue Jun 21 14:00:06 2022 +0200
Physics 2D Game Example: Use new physics.
commit bd09bc5ec47ec9f2b6435e7669a3cf23905558ca
Author: and3md <and3md@gmail.com>
Date: Tue Jun 21 13:52:28 2022 +0200
Physics 2D collison example: use new physics.
commit 177024a9ef4d4111e2630f3185e7f856114ef388
Author: and3md <and3md@gmail.com>
Date: Tue Jun 21 13:28:33 2022 +0200
Silence of deprecated warnings used to keep old API working.
commit ff6f4aed8c3b7104c1fbe0a9fa0ff674413cb7ef
Author: and3md <and3md@gmail.com>
Date: Tue Jun 21 12:37:54 2022 +0200
Remove exists in root problem workaround.
commit 1fcf9563aaf37269723bcbf7df5f8f6b4c700c06
Author: and3md <and3md@gmail.com>
Date: Tue Jun 21 12:33:42 2022 +0200
Make sure moving platform Restitution is 0.
commit ea8e80eb92fbe612a0ff9cd4fb6e20b7cbc66c2b
Author: and3md <and3md@gmail.com>
Date: Tue Jun 21 12:31:55 2022 +0200
Remove some debuging code.
commit 31e1adfa1ab6ea0af8380f63662389fc6ad4269e
Author: and3md <and3md@gmail.com>
Date: Tue Jun 21 12:26:16 2022 +0200
Better moving platforms support.
commit d4752c1dec879dfaa661c63e2fb7052061f06755
Author: and3md <and3md@gmail.com>
Date: Mon Jun 20 15:27:14 2022 +0200
Design clean up.
commit ea3029d13dccb0b5be193192874f7ea513ae83ac
Author: and3md <and3md@gmail.com>
Date: Mon Jun 20 15:25:36 2022 +0200
Removed unused variables.
commit faba52c5299665756ed728a7c017be2a6c4f2ad6
Author: and3md <and3md@gmail.com>
Date: Mon Jun 20 15:20:53 2022 +0200
Move power ups physics configuration to design (to editor).
commit 9a91df64dfe3752ff2c226ec5dc629b52de02735
Author: and3md <and3md@gmail.com>
Date: Mon Jun 20 15:15:43 2022 +0200
Coins physics configuration moved to design.
commit 877a2fe58937454b8671007a9260ed928d0e5d6d
Author: and3md <and3md@gmail.com>
Date: Mon Jun 20 14:58:23 2022 +0200
Player physics configuration moved to editor.
commit c7df38d3256c91366736c8e9c0a3f9170c20a878
Author: and3md <and3md@gmail.com>
Date: Mon Jun 20 14:53:46 2022 +0200
Ground physics moved to editor.
commit fb2d181ed26b75beded8ebdecae95e3431361bf8
Author: and3md <and3md@gmail.com>
Date: Mon Jun 20 13:36:38 2022 +0200
Stone physics moved to editor.
commit 7d0c98fd5dd952a62f641e184c535c89abe6d1e8
Author: and3md <and3md@gmail.com>
Date: Mon Jun 20 13:09:03 2022 +0200
Platform physics config moved to editor.
commit 3802d94c3952804029fef1dfb32219c8e7e32479
Author: and3md <and3md@gmail.com>
Date: Mon Jun 20 12:14:48 2022 +0200
Enemy physics moved to editor.
commit 4d9db16937e6f79da5f1a99e65745e604bfca5c9
Author: and3md <and3md@gmail.com>
Date: Mon Jun 20 11:18:25 2022 +0200
Falling obstacle physics moved to editor.
commit b87d8f48b19e0394764f4001378c78dc9bbcbf1d
Author: and3md <and3md@gmail.com>
Date: Mon Jun 20 11:17:47 2022 +0200
Removed door physics configuration from code.
commit 99e34f8c1b8e9dd4705933c7a2a1c789d2874d08
Author: and3md <and3md@gmail.com>
Date: Tue Jun 14 16:03:49 2022 +0200
More physics config in design in editor.
commit 58bd36dc00053bde7f2b464734d8b09c3f65153e
Author: and3md <and3md@gmail.com>
Date: Tue Jun 14 16:03:17 2022 +0200
Removed doors physics configuration from code.
commit 499ba53da4dd5015aa156fa31f33b52b15024b8d
Author: and3md <and3md@gmail.com>
Date: Tue Jun 14 16:02:35 2022 +0200
Removed keys physics config from code.
commit f6a5ea65b3dd9bf1c08a904d9e1113dc391e5616
Author: and3md <and3md@gmail.com>
Date: Tue Jun 14 15:19:02 2022 +0200
Remove old physics from TDeadlyObstacle behavior.
commit aa9244df1f878d647be5981681609febb0944456
Author: and3md <and3md@gmail.com>
Date: Tue Jun 14 15:16:24 2022 +0200
More physics objects configured in editor (deadlyobstacle).
commit 4ed95fc67f23cff9df009070c1e2d230f912dcfd
Author: and3md <and3md@gmail.com>
Date: Tue Jun 14 14:59:41 2022 +0200
Fix scale in old 2d collision example.
commit d14d8f18d3672ff335633344eb4db9282d0d47f5
Author: and3md <and3md@gmail.com>
Date: Tue Jun 14 14:06:31 2022 +0200
Fixed crash in collisions in new physics behaviors.
commit 3e21de4005fd517b929a2b31b38bbd5060d97255
Author: and3md <and3md@gmail.com>
Date: Mon Jun 13 13:43:39 2022 +0200
TRigidBody -> TCastleRigidBody in RemoveSelfFromOtherRigidBodiesCollisionLists
commit b43b3253a588fcd15e4e84fa88eb20496a785a89
Author: and3md <and3md@gmail.com>
Date: Mon Jun 13 12:51:36 2022 +0200
Editor: Ability to paste copied behavior.
commit fe0c555e4ddb5e4f7c3c5fc4a2cff380203e91fa
Author: and3md <and3md@gmail.com>
Date: Mon Jun 13 12:33:28 2022 +0200
Platformer: Use new physics in bullets.
commit 27a4b7c1d4b008a6a69af0d2c1af254bfb87750c
Author: and3md <and3md@gmail.com>
Date: Mon Jun 13 12:22:47 2022 +0200
Platformer: Fix a bug in player movment when we jump to the side of an obstacle, the player sometimes hangs in air instead of falling.
commit 7beeb577f9f05b7f9ff93c99d7054a86d7f3ab23
Author: and3md <and3md@gmail.com>
Date: Mon Jun 13 11:44:41 2022 +0200
Scale in TCastleCollider not depend of Autosize.
commit 7edd6b795c2256ff699015b96d92082330deae23
Author: and3md <and3md@gmail.com>
Date: Mon Jun 13 11:42:48 2022 +0200
Don't reset scale in CalculateAutoSize.
commit 04eb044da41c1b25239e6e7547d1068f1286dbc1
Author: and3md <and3md@gmail.com>
Date: Mon Jun 13 11:11:56 2022 +0200
Setting local collider scale should not change auto size to false.
commit 095f04866b865a1b54c4a3376180b1b4362bb666
Author: and3md <and3md@gmail.com>
Date: Mon Jun 13 11:04:41 2022 +0200
Fix compilation after TRigidBody -> TCastleRigidBody.
commit c7fe606fc3dd5ec0f41bbadfa678232885021cc0
Author: and3md <and3md@gmail.com>
Date: Mon Jun 13 11:03:03 2022 +0200
Fix TCastleRigidBody section comment.
commit bf161ad41135c8f9b3e79f07d04237c24bdd228a
Author: and3md <and3md@gmail.com>
Date: Mon Jun 13 11:02:00 2022 +0200
Fix comment.
commit 81581c6de2bd448c8f1827f288cb6273d6f21d41
Author: and3md <and3md@gmail.com>
Date: Mon Jun 13 11:01:44 2022 +0200
Cast To TCastleRigidBody in PhysicsRayCast.
commit 20b22b85fe449bb60e2ee486fd47b720e473e11a
Author: and3md <and3md@gmail.com>
Date: Mon Jun 13 11:01:06 2022 +0200
Cast to TCastleRigidBody in collision detection + comments update.
commit ed42c3adf93c46af2ca92f4c8660a2fe196d79f8
Author: and3md <and3md@gmail.com>
Date: Tue Jun 7 15:25:18 2022 +0200
Fix animated example compilation after change properties names.
commit 0d21cb41730ae39c72935ae7ff9a41810aee9e7d
Author: and3md <and3md@gmail.com>
Date: Tue Jun 7 15:15:49 2022 +0200
Add CollisionDetectionType to Basic tab.
commit 487457aea8122e2da9efe7ff19eba4c3c108389c
Author: and3md <and3md@gmail.com>
Date: Tue Jun 7 15:07:28 2022 +0200
ContinousCD changed to CollisionDetectionType.
commit 7b383dc5f44722c5b7893c23d2b46e41cef3f174
Author: and3md <and3md@gmail.com>
Date: Tue Jun 7 14:36:49 2022 +0200
Behaviors: ParentChanged restored prevoius behavior - do not call it when CastleTransform is destroyed because a lot of existing code don't check Parent <> nil..
commit 269009a8dc8868a3ca3d2e2f9dd63556f2897ff0
Author: and3md <and3md@gmail.com>
Date: Tue Jun 7 14:31:09 2022 +0200
Make TCastleBehavior deprecated.
commit a6a744bb20e0783faa2b71368b176b2512a143f4
Author: and3md <and3md@gmail.com>
Date: Tue Jun 7 13:39:37 2022 +0200
Update gitignore
commit 77f014324b5b8c4a5112fc2f0f67f689c9572b88
Author: and3md <and3md@gmail.com>
Date: Tue Jun 7 13:36:13 2022 +0200
Place avatar in better position.
commit fcec7250a40177880ba9e3c34e59d62f87245115
Author: and3md <and3md@gmail.com>
Date: Tue Jun 7 13:33:32 2022 +0200
Third person navigation: Add more properties to basic tab.
commit 7eaa4e4ce0b74edacd2d668ee3b3e714ceefd0ce
Author: and3md <and3md@gmail.com>
Date: Tue Jun 7 13:22:20 2022 +0200
Added physics 2D transformation sync both side example/test.
commit c92c6a61b7acb678f3af9a50578f9bc9a32c3443
Author: and3md <and3md@gmail.com>
Date: Tue Jun 7 13:02:09 2022 +0200
Comment about bullets in space ship example.
commit bbecc44615cee4a754703ac8f80e05b59fa316e7
Author: and3md <and3md@gmail.com>
Date: Tue Jun 7 12:51:44 2022 +0200
3D Physics In Editor example: missing files.
commit 97deb19205d42bb55c2e3d9e2cff8b9feac52f6d
Author: and3md <and3md@gmail.com>
Date: Tue Jun 7 12:50:28 2022 +0200
Add simple "3D Physics In Editor" example.
commit c5e7030bd9ea16d957ba5a9a1cfbf3d82454219e
Author: and3md <and3md@gmail.com>
Date: Tue Jun 7 12:31:44 2022 +0200
Fix comments.
commit 5776ebfd0f48198deaf5441299c1f82758ebb8da
Author: and3md <and3md@gmail.com>
Date: Tue Jun 7 12:25:35 2022 +0200
Add AirMovement/RotationControl.
commit 0ea82ba4229f561a1412457c8a9a27b0526e3e09
Author: and3md <and3md@gmail.com>
Date: Tue Jun 7 12:04:50 2022 +0200
Configurable jump speed.
commit e04ca6bffb24bddc2de3cc87fb5ff96fdb0b1082
Author: and3md <and3md@gmail.com>
Date: Tue Jun 7 11:57:22 2022 +0200
Better DefaultAirMovement/RotateControl value.
commit ac5487384c1fb40a45c7c409fd35584a6d778efb
Author: and3md <and3md@gmail.com>
Date: Tue Jun 7 11:54:40 2022 +0200
Better avatar speed.
commit 49426a3cbcc6153f70106268d0e806fcf6704d6d
Author: and3md <and3md@gmail.com>
Date: Tue Jun 7 11:54:19 2022 +0200
Add comment where is rigid body created.
commit fccbc648ded6e4ea93866f49f9924e0b112fce3c
Author: and3md <and3md@gmail.com>
Date: Tue Jun 7 11:49:32 2022 +0200
Third person example: move physics things to editor.
commit fcdeb1f1cc1c4e48a92cd295a76c20a8d2a6c3da
Author: and3md <and3md@gmail.com>
Date: Tue Jun 7 11:09:23 2022 +0200
Third person navigation: better minimal value for jump animation.
commit cff4892e00150eb5cb9ddac1517b96ff4d80ad9a
Author: and3md <and3md@gmail.com>
Date: Tue Jun 7 11:08:00 2022 +0200
Fix checking ground in third person navigation.
commit aa726b26795d81d175c8557241eea8cc62489f83
Author: and3md <and3md@gmail.com>
Date: Tue Jun 7 11:06:25 2022 +0200
Third person navigation: velocity movement by default.
commit 3720c19d8e2373cd1e11309132e90cc4a9aa87e4
Author: and3md <and3md@gmail.com>
Date: Tue Jun 7 11:04:56 2022 +0200
Fix multiple collider recreation when using physics with collider autosize.
commit f3a2bb4d57bf2782413cdecd49ea288dec8dc8c9
Author: and3md <and3md@gmail.com>
Date: Tue Jun 7 11:03:37 2022 +0200
Fix for Kraft RayCast with meshes.
commit 8520f3615b69d9350e1045fc4a6476165083d7cf
Author: and3md <and3md@gmail.com>
Date: Tue Jun 7 11:02:12 2022 +0200
Warn of changing the existence of CastleTransform with RigidBody multiple times per frame
commit cfa6f631c9a4f4ef16ee36887ee64264d6fb3575
Author: and3md <and3md@gmail.com>
Date: Tue May 31 16:11:17 2022 +0200
Space Ship Example: Add bullets by ApplyImpulse().
commit 31a40cc8c812360880f7f54fcef6661a340da014
Author: and3md <and3md@gmail.com>
Date: Tue May 31 14:03:49 2022 +0200
Platformer small fixes in physics settings.
commit 51b56715c50311c4ca3dcb2d9bd40543eac57eb0
Author: and3md <and3md@gmail.com>
Date: Tue May 31 13:47:47 2022 +0200
Fixed setting scale for colliders when scale is negative.
commit ec0a6ca2defb7f38c4e218cf69109c829b4afeda
Author: and3md <and3md@gmail.com>
Date: Tue May 31 10:15:50 2022 +0200
Fix LinearVelocityDamp and AngularVelocityDamp default value.
commit ec53cdd1b900f9657a2a935a0ec0d5b213bd05e8
Author: and3md <and3md@gmail.com>
Date: Mon May 30 15:26:20 2022 +0200
Platformer: Fixed ParentChanged in behaviors because it's also called before destroying behavior.
commit a820e69c8a9972aa5d747abd6860891e42e190f8
Author: and3md <and3md@gmail.com>
Date: Mon May 30 15:05:04 2022 +0200
Simple Physics Animated Test/Example.
commit f0f6058a3192b380298863c41c98ad330787865b
Author: and3md <and3md@gmail.com>
Date: Mon May 30 15:02:28 2022 +0200
ContinuousCollisionDetection -> ContinuousCD
commit e2e332daf08f7daa9a594ac55ecea892ae62bcb8
Author: and3md <and3md@gmail.com>
Date: Mon May 30 14:54:44 2022 +0200
Add continuous collision detection to rigid body.
commit 3c8d038d2201e0b38dfe7c8b2da79a64d1811481
Author: and3md <and3md@gmail.com>
Date: Mon May 30 14:43:27 2022 +0200
Add ContinuousCollisionDetection to TPhysicsProperties.
commit f10b40eef4479822c771eb5a3fbc4f0fa4e6d86e
Author: and3md <and3md@gmail.com>
Date: Mon May 30 12:48:56 2022 +0200
Fix comment.
commit bc5c5c11753ec93710ab0fab5ecaa9f10aff6506
Author: and3md <and3md@gmail.com>
Date: Mon May 30 12:47:09 2022 +0200
Workaround a bug in Kraft - rigid body doesn't work after type change.
commit 77ff813cce432a22ba9ad0facf149ed83a2b66b4
Author: and3md <and3md@gmail.com>
Date: Tue May 24 15:00:46 2022 +0200
Remove uneeded world transformation set in Animated.
commit 995465588b9b1c76d5aff37995195d5f3e96a09b
Author: and3md <and3md@gmail.com>
Date: Tue May 24 09:31:23 2022 +0200
Resaved space ship example design
commit 22bad8f4057c90a91eba12238227837b57860473
Author: and3md <and3md@gmail.com>
Date: Tue May 24 09:21:50 2022 +0200
Change Setup2D to Mode2D.
commit 68fbe563122bd89164795dd26950b987e9ddc482
Author: and3md <and3md@gmail.com>
Date: Mon May 23 15:01:04 2022 +0200
Physics Scale Example: Added button to change collider local scale.
commit ab8475331a87a2ed6db1e929306b06239c4f7872
Author: and3md <and3md@gmail.com>
Date: Mon May 23 14:48:27 2022 +0200
Fix colliders local scale.
commit ee73d3c849bc6951f0723417144f096b67dbc2fb
Author: and3md <and3md@gmail.com>
Date: Mon May 23 14:14:49 2022 +0200
FLastScale -> FLastUsedWorldScale.
commit 2a5b2e0e56bbc1870a998a84d03c18a7078e4417
Author: and3md <and3md@gmail.com>
Date: Mon May 23 14:10:15 2022 +0200
Code clean.
commit f31e4ae369de292c657d41894dcb81a8fc990883
Author: and3md <and3md@gmail.com>
Date: Mon May 23 14:08:46 2022 +0200
TCastleCapsuleCollider - Setup2D to make auto size works better for 2D.
commit 2d973ed1e92e0b2d6245cb914430537108a5ed02
Author: and3md <and3md@gmail.com>
Date: Mon May 23 13:44:43 2022 +0200
Missed component registration.
commit baeb92ae351154c407d89abac59526c344d57a7f
Author: and3md <and3md@gmail.com>
Date: Mon May 23 13:44:03 2022 +0200
2d physics: space ship example: Better physics values.
commit 758aedfc8c21bc9159845d1bdce7b6a4ce7d95c4
Author: and3md <and3md@gmail.com>
Date: Mon May 23 13:42:29 2022 +0200
TCastleSphere - Setup2D to make auto size works better for 2D.
commit 7081ad8e94972c6016f4ada86b1957a9200a0aaa
Author: and3md <and3md@gmail.com>
Date: Mon May 23 13:05:32 2022 +0200
Add AverageSize2D to TBox3D.
commit 1afe54b78cad6a0d848c88b93e085a49d7bb3982
Author: and3md <and3md@gmail.com>
Date: Mon May 23 12:33:08 2022 +0200
Fix TCastleBoxCollider auto size for 2D objects.
commit 6c149bd8b6d1996a5b322657936fcb3106c413f3
Author: and3md <and3md@gmail.com>
Date: Mon May 23 10:32:48 2022 +0200
Add rotation and more scale tests.
commit a8eff5b35b0d5d8c6f546550b56808f5f8dfdfa4
Author: and3md <and3md@gmail.com>
Date: Tue May 17 15:32:27 2022 +0200
Fix rotation bug when recreate kraft shape with scale.
commit 09be8a9bbde68ff4fe8f9fb7cfe7e73653fd7c99
Author: and3md <and3md@gmail.com>
Date: Mon May 16 11:32:50 2022 +0200
Update scale after set UpdateCollidersScaleAtRuntime to true.
commit 79334d6d15fd90c19fcc038f34a1919fa50b9b0a
Author: and3md <and3md@gmail.com>
Date: Tue May 10 16:27:01 2022 +0200
Remove unused variable from TCastleTransform.Notification().
commit fb482bf73593928be915dd777d66373bf180bb37
Author: and3md <and3md@gmail.com>
Date: Tue May 10 16:26:00 2022 +0200
Use ScaleFromMatrix() instead of MatrixDecompose().
commit 44e960ce197ba0325194edee98efd47f09ad589f
Author: and3md <and3md@gmail.com>
Date: Tue May 10 16:23:42 2022 +0200
Implement ScaleFromMatrix() based on code from DecomposeMatrix.
commit ddee8ff5a239449adf00e72b53f5f31ec9d23161
Author: and3md <and3md@gmail.com>
Date: Tue May 10 16:14:43 2022 +0200
Fix TCollider.UpdateScale().
commit da07208acbf730124e6e0cb92a78386ff5700116
Author: and3md <and3md@gmail.com>
Date: Tue May 10 16:08:10 2022 +0200
Fix Sphere collider autosize.
commit 13cac0c8fb3a36d3b96c392823b786d5fd8d2604
Author: and3md <and3md@gmail.com>
Date: Tue May 10 15:43:29 2022 +0200
Physics scale colliders example.
commit 0dd5beb5979162e2b23faa89beef488623f07518
Author: and3md <and3md@gmail.com>
Date: Tue May 10 14:41:54 2022 +0200
Fix editor crash when trying translate castle transform with rigid body but without collider.
commit 344aa17c4573c6affd72109e6da9fb980cf456ff
Author: and3md <and3md@gmail.com>
Date: Tue May 10 13:36:59 2022 +0200
Update colliders after change scale on runtime.
commit 0cd7c28b592a11deb5f22ba2f0cb8929ce11ac59
Author: and3md <and3md@gmail.com>
Date: Tue May 10 12:12:05 2022 +0200
TCastleBoxCollider.CalculateAutoSize: code cleaning.
commit 6f6c87d7f01fe723bf4837774c39a8d020db09db
Author: and3md <and3md@gmail.com>
Date: Tue May 10 12:10:37 2022 +0200
Remove unused function LocalBoundingBoxWithScale().
commit 67af04e4ce7bef8e2a1dc7b615f28eb0c82be3db
Author: and3md <and3md@gmail.com>
Date: Tue May 10 12:07:55 2022 +0200
Support scaling colliders according to the scale of the world and parent.
commit badb16c9e649f748bfa3daaf90b1e6e174338ea3
Author: and3md <and3md@gmail.com>
Date: Tue Apr 26 21:05:46 2022 +0200
Fix example compilation after fix typo in TCastleRigidBody.
commit db5bd2ff3a8b5fed52c60c426c4f865c4df40336
Author: and3md <and3md@gmail.com>
Date: Tue Apr 26 19:05:39 2022 +0200
tcastlerigidbody_persistent_vectors.inc added to castle_base.
commit a49616dbe28f558d55d277c08da926c80a7bfe9a
Author: and3md <and3md@gmail.com>
Date: Tue Apr 26 15:43:48 2022 +0200
Physics space ship example WIP.
commit 3500e353f6d7ff17677d62aa5bd6ef0ba6bf1514
Author: and3md <and3md@gmail.com>
Date: Tue Apr 26 15:40:55 2022 +0200
Regenerated colliders vectors.
commit bec1100c1c290d0b68e52809f05c4b272245b660
Author: and3md <and3md@gmail.com>
Date: Tue Apr 26 15:40:21 2022 +0200
Rotation, Translation and Scale should not be stored with auto size enabled.
commit f0d2cead040fe92c300d27c0eb28fbfada75d81e
Author: and3md <and3md@gmail.com>
Date: Tue Apr 26 11:48:52 2022 +0200
Fix typo.
commit 614a093b6ba8140e272d80792b53687886f4e4f1
Author: and3md <and3md@gmail.com>
Date: Tue Apr 26 10:49:48 2022 +0200
Add Linear/Angular Velocity to Basic tab.
commit 409cd4daacd9cd07f5daea1d1adb5a56bcf5b365
Author: and3md <and3md@gmail.com>
Date: Tue Apr 26 10:42:04 2022 +0200
Add persistent vectors to TCastleRigidBody.
commit 2ee810746cbfb3ffbc7888e35cb52a439601df74
Author: and3md <and3md@gmail.com>
Date: Tue Apr 26 10:30:51 2022 +0200
Generate persistent vectors for TCastleRigidBody.
commit 3423340b10d1d8e45936397155b4b99860334b65
Author: and3md <and3md@gmail.com>
Date: Tue Apr 26 10:30:08 2022 +0200
Add Angular and Linear Velocity persistent vectors.
commit f5ba3eb73f0457d47ce6a42003a3be9bec99f65d
Author: and3md <and3md@gmail.com>
Date: Tue Apr 26 10:24:55 2022 +0200
Move MaximalVelocity and Damp properties to published.
commit a5ac029c2ae234411580472a7442b5ded8a8268a
Author: and3md <and3md@gmail.com>
Date: Mon Apr 25 15:54:09 2022 +0200
Resaved designs without saved auto size properties.
commit e4c27774110ae0fe01c58bb4e5fd9080870cc3a1
Author: and3md <and3md@gmail.com>
Date: Mon Apr 25 15:53:03 2022 +0200
Regenerated collider vectors with stored option.
commit d8d108b1ee2e8e6b54cf5642de73697906559194
Author: and3md <and3md@gmail.com>
Date: Mon Apr 25 15:51:42 2022 +0200
Ability to add stored function in autogenerated vectors.
commit 9de4c29221c4d27ec8676d7f1b7a8b36374c3f74
Author: and3md <and3md@gmail.com>
Date: Mon Apr 25 14:02:31 2022 +0200
Restore modified state after physics simulation stops.
commit 88fb1c95aec4d24991d1af456d93c26a22f0ec92
Author: and3md <and3md@gmail.com>
Date: Mon Apr 25 13:39:11 2022 +0200
Ability to update CastleRigidBody transformation after change CastleTranform transformation.
commit 6101ecf8e6237e575f4843b2a61dd6ae08d12899
Author: and3md <and3md@gmail.com>
Date: Tue Apr 19 22:05:20 2022 +0200
Add warning when trying to add force/impulse and physics engine is not ready.
commit dfac90e701851d12d0d54b76893c54849ec300b1
Author: and3md <and3md@gmail.com>
Date: Tue Apr 19 21:42:29 2022 +0200
Editor Physics Behaviors Example: Design resaved after stored changes.
commit f402f8cb6134d463f8c52ab638e69e42643eb4e0
Author: and3md <and3md@gmail.com>
Date: Tue Apr 19 21:40:52 2022 +0200
CastleColliders: Don't store some values with AutoSize = true.
commit 65f04c86442c69224fb57292521ebef485911cd9
Author: and3md <and3md@gmail.com>
Date: Tue Apr 19 21:30:55 2022 +0200
Editor Physics Behaviors Example: Add transforms in transforms.
commit 0bc6d9c43aea0de1e2a38d3c6f8d22b480c5f028
Author: and3md <and3md@gmail.com>
Date: Tue Apr 19 16:15:58 2022 +0200
Added solid icons.
commit f62caf1a4e43bf77f7785238db899383ca4dd526
Author: and3md <and3md@gmail.com>
Date: Tue Apr 19 16:11:34 2022 +0200
Solid icons for physics simulation.
commit 42500c94414f90dedd9b421309251160e8faf607
Author: and3md <and3md@gmail.com>
Date: Tue Apr 19 15:47:31 2022 +0200
Use UpdateTransform directly in Update().
commit 200180c345de076ee76fb91a571142a0baab6205
Author: and3md <and3md@gmail.com>
Date: Tue Apr 19 14:54:41 2022 +0200
Editor Physics Behaviors Example: Search for rigidbodies recursively in children
commit c3ed0bb3ec74c8ea1a614a88b6c07ddc5b61b93c
Author: and3md <and3md@gmail.com>
Date: Tue Apr 19 11:47:47 2022 +0200
Update TCastleCollider auto size after URL change.
commit 021459d5de3a3f2b986191c7caa00eb429cd0d0c
Author: and3md <and3md@gmail.com>
Date: Tue Apr 19 11:46:41 2022 +0200
Missed change for last commit.
commit 16d289399b868a53e8b0331bd99f2591e39585de
Author: and3md <and3md@gmail.com>
Date: Tue Apr 19 10:45:24 2022 +0200
Move T3DCoord to CastleRenderOptions because CastleTransform is not allowed to be used in CastleComponentSerialize.
commit 1e446f4a049abb01f5d99d79443afe445cc83bbc
Author: and3md <and3md@gmail.com>
Date: Tue Apr 19 10:38:59 2022 +0200
Check if CastleTransform has only one collider/rigid body.
commit 7518ddd00a9cf139f5ce114e425f2c7193d92cb2
Author: and3md <and3md@gmail.com>
Date: Tue Apr 12 16:12:44 2022 +0200
Physics simulation in editor example: add simple 3D design.
commit 83e1f582b782c29acaf5a95427550040cdbbc897
Author: and3md <and3md@gmail.com>
Date: Tue Apr 12 14:31:29 2022 +0200
Changed physics simulation icons to no-circle versions.
commit 4d90ab5b3b84b4cfc5fdd28aba31232eaa4076b1
Author: and3md <and3md@gmail.com>
Date: Tue Apr 12 14:25:33 2022 +0200
Icons without circle.
commit f0ca936c6a17e764540b72e6e6a1e38e195b1c9d
Author: and3md <and3md@gmail.com>
Date: Tue Apr 12 13:53:01 2022 +0200
Physics in editor example: Add properties to Basic tab.
commit 89eb17fd72758afa9fec6fefbaa1cb8fd8bf007f
Author: and3md <and3md@gmail.com>
Date: Tue Apr 12 12:53:42 2022 +0200
Fixed FTransform comment.
commit 08a565bf8b55af879498dfb828c54e73c0144c39
Author: and3md <and3md@gmail.com>
Date: Tue Apr 12 12:51:43 2022 +0200
Fixed physics initialization bug when TCastleTransform does not exist.
commit 973e042f1e2d6b26966a9669d894258617cbcda8
Author: and3md <and3md@gmail.com>
Date: Tue Apr 12 11:12:32 2022 +0200
Use ExistsInRoot in TCastleCollider.
commit 6d126cf7d5cf47ea8d1efa18a9183cff45163218
Author: and3md <and3md@gmail.com>
Date: Mon Apr 11 13:50:19 2022 +0200
Example physics simulation: Use ExistsInRoot in all behaviors.
commit 601cfa3f0afb31ab7c92739b9612882b9842659b
Author: and3md <and3md@gmail.com>
Date: Mon Apr 11 13:36:51 2022 +0200
TAbstractTimeDurationBehavior - use ExistsInRoot and docs.
commit d6fd05c13c1f6170251d5b04ac5725b4e81e782f
Author: and3md <and3md@gmail.com>
Date: Mon Apr 11 13:26:00 2022 +0200
Remove Transform parameter from physics engine objects initialization methods.
commit 344683aa97ef9041db001393b5bdc56a40f2f757
Author: and3md <and3md@gmail.com>
Date: Mon Apr 11 12:59:10 2022 +0200
Checking Parent in WorldBeforeDetach is redundant.
commit ab1c7a6565b8248471c59b6d50ea2d1f890a8550
Author: and3md <and3md@gmail.com>
Date: Mon Apr 11 12:55:58 2022 +0200
Use ExistsInRoot in old colliders.
commit fa37f1ba7d3048f4ed48dea98f311d2b372c98b6
Author: and3md <and3md@gmail.com>
Date: Mon Apr 11 12:55:11 2022 +0200
Move FTransform to strict private, deinitialize physics objects without parameters.
commit 23ce812a3359833c29818652b3a4fda2bad95d03
Author: and3md <and3md@gmail.com>
Date: Mon Apr 11 12:24:42 2022 +0200
UpdateExistBody, UpdateExist without parameters.
commit 29df355e114a5abad127dbf40cd5449d66c7dc1f
Author: and3md <and3md@gmail.com>
Date: Mon Apr 11 12:23:54 2022 +0200
InitializeTransform -> InitializePhysicsEngineObjects, DeinitializeTransform -> DeinitializePhysicsEngineObjects.
commit aa21810ad3b79e805ef071fbcac05d80c7844541
Author: and3md <and3md@gmail.com>
Date: Mon Apr 11 12:17:34 2022 +0200
TCastleRigidBody: ExistsInRoot, api simplifications and a lot of docs.
commit 088fc2eaaa2524d5059bca4262a3d0db4e937f70
Author: and3md <and3md@gmail.com>
Date: Mon Apr 11 12:15:20 2022 +0200
Fix physics deinitialization.
commit 482ba9d2b662c82e2fffc029abb5658015b5a4ae
Author: and3md <and3md@gmail.com>
Date: Wed Apr 6 21:48:27 2022 +0200
Added physics persistent vectors.
commit cd2385814aa89a4bf23264dc3e441846e5c82807
Author: and3md <and3md@gmail.com>
Date: Tue Apr 5 16:29:45 2022 +0200
Use ExistsInRoot in rigid body and colliders.
commit df69da33439bec6c195ba6dad8534e86d03003ac
Author: and3md <and3md@gmail.com>
Date: Tue Apr 5 15:36:51 2022 +0200
Add/RemoveWorldChangeNotification docs.
commit a4d56684be2cde3a7d20f4e3c4e4d85deaf307ea
Author: and3md <and3md@gmail.com>
Date: Tue Apr 5 15:29:49 2022 +0200
Fix ExistsInRoot after rebase.
commit 30cb3674ccd82276b40a24e7871d38dd087cd7e8
Author: and3md <and3md@gmail.com>
Date: Tue Apr 5 15:17:20 2022 +0200
Fix compilation after rebase.
commit 6604cdb44808b75ddffd83ae6ee323bc37966635
Author: and3md <and3md@gmail.com>
Date: Tue Apr 5 14:47:44 2022 +0200
Add physics simulation in editor binary to gitignore.
commit 2e179b5ee9d0f8380b3fa4f5e38104d8517392ec
Author: and3md <and3md@gmail.com>
Date: Tue Apr 5 14:45:55 2022 +0200
Check transform and rigid body existence before add forces.
commit 755f47befedc43b2f8606867067eca0861dad3c7
Author: and3md <and3md@gmail.com>
Date: Tue Apr 5 14:38:05 2022 +0200
Check also Parent existence when initializing kraft shape
commit 5aecefd56c4949ff3c8ca48fab5a3c720b52f32a
Author: and3md <and3md@gmail.com>
Date: Tue Apr 5 14:31:33 2022 +0200
Change editor inspector colors when we will detect dark theme.
commit 6568430c31139fee46490bf16da2d2cf27c6211d
Author: and3md <and3md@gmail.com>
Date: Tue Apr 5 14:24:00 2022 +0200
Added function to check is editor in dark mode - UseIconsAndColorsForDarkTheme
commit aeb3b8278755de90e7c003a63c0661c433e7f887
Author: and3md <and3md@gmail.com>
Date: Mon Apr 4 14:56:33 2022 +0200
Added AddTorqueBehavior.
commit 6dc3fbfc0f332cd21fe4391631ca8eba43030aab
Author: and3md <and3md@gmail.com>
Date: Mon Apr 4 14:55:12 2022 +0200
Make AddTorque() compatible with Bullet Physics.
commit 366dc7c021509dcfc2b61456873dbcc610e4fb92
Author: and3md <and3md@gmail.com>
Date: Mon Apr 4 14:13:43 2022 +0200
Added ApplyImpulseBehavior.
commit e9b14b07d2d49e23f774e6ba5aeab443639c106c
Author: and3md <and3md@gmail.com>
Date: Mon Apr 4 14:01:06 2022 +0200
Added AddCentralForceBehavior.
commit 549ccd917da6b48ebd24d0e556ab285036a149eb
Author: and3md <and3md@gmail.com>
Date: Mon Apr 4 14:00:10 2022 +0200
AddCenterForce -> AddCentralForce.
commit c90610e35a3e401654fc3292e034b84025f473bd
Author: and3md <and3md@gmail.com>
Date: Mon Apr 4 11:28:11 2022 +0200
Added ShouldUpdate() to simplify behavior code.
commit b7f14d298b4e3cb99b806175e8b3c2541d133efb
Author: and3md <and3md@gmail.com>
Date: Mon Apr 4 11:08:07 2022 +0200
Change also name of variable.
commit faeb1955ab036d1a369acd4e2017e9309802aef3
Author: and3md <and3md@gmail.com>
Date: Mon Apr 4 10:48:35 2022 +0200
Shoted -> WasShot.
commit 778c9201288eddcc1160e79ac997b4ecaa290aad
Author: and3md <and3md@gmail.com>
Date: Mon Apr 4 09:55:11 2022 +0200
Add Explosion Behavior to project.
commit 968683729914bf9302277a3146d02fb29dbcbed4
Author: and3md <and3md@gmail.com>
Date: Mon Apr 4 09:54:35 2022 +0200
Updates in example design.
commit c20483ba197a4cf3a0cf2fe0d7b25a75203d3351
Author: and3md <and3md@gmail.com>
Date: Mon Apr 4 09:53:58 2022 +0200
Fix gravity force behavior.
commit 004d98d02dd99bef1eb3fe4814277a9845b30f1f
Author: and3md <and3md@gmail.com>
Date: Tue Mar 29 15:46:03 2022 +0200
PhysicsSymulationInEditor: A lot of new behaviors Gravity, Force, Wind, Explosion.
commit 03f2e3270acbb6f9345ec5a5353ce32dcb1c972f
Author: and3md <and3md@gmail.com>
Date: Tue Mar 29 15:43:59 2022 +0200
Fix typo GetVector - GetPVector.
commit 80d38d203c914ab0320b8d7cb0855a91d479afd1
Author: and3md <and3md@gmail.com>
Date: Tue Mar 29 13:13:02 2022 +0200
An attempt to find an easier way to serialize vectors.
commit 574c6ff1db1e38b1c8bda1abac8b10c696c5d4fa
Author: and3md <and3md@gmail.com>
Date: Tue Mar 29 12:10:23 2022 +0200
Check is physics running before change forces.
commit d8f550f6957edef8c8838735dea97ad77ba5fa5d
Author: and3md <and3md@gmail.com>
Date: Tue Mar 29 12:09:30 2022 +0200
Missed declaration.
commit e40ae3f80def5ddbc12c07df174e33a2a9d2ad0a
Author: and3md <and3md@gmail.com>
Date: Tue Mar 29 12:08:34 2022 +0200
Add IsPhysicsRunning() to check physics should be executed. Unfortunately this is also needed in user code.
commit d1d9f06dcc8b332666933cb38dbe802193008094
Author: and3md <and3md@gmail.com>
Date: Tue Mar 29 11:34:16 2022 +0200
Add Physics Simulation In Editor example.
commit 2b72e980538a73ebdaa2e15585cd6ca72ed2a342
Author: and3md <and3md@gmail.com>
Date: Mon Mar 28 12:12:48 2022 +0200
Comment for direct action update call.
commit e37d87ea22089a841dea6829c8eb7a15e7a1f809
Author: and3md <and3md@gmail.com>
Date: Mon Mar 28 12:12:18 2022 +0200
Small corrections LabelSelectedViewport1 -> LabelPhysicsSimulation.
commit 3e725e8824e8fdb27cfbef4076263feac0579053
Author: and3md <and3md@gmail.com>
Date: Mon Mar 28 12:10:01 2022 +0200
Enumeration for physics mode.
commit 94b99d16f31ce5392ae60845084a8be979f53118
Author: and3md <and3md@gmail.com>
Date: Mon Mar 28 12:08:22 2022 +0200
Add action list and physics actions to start/stop/pause simulation.
commit 71f4b90b062b0d9cd0317b041243ed5073c9d33a
Author: and3md <and3md@gmail.com>
Date: Mon Mar 28 12:05:23 2022 +0200
Add physics icons to our icon list in data module.
commit ea058017afadc9e5933b3a3d2c0a9012028756b4
Author: and3md <and3md@gmail.com>
Date: Mon Mar 28 11:38:33 2022 +0200
Icons for physics simulation in editor.
commit aea911b7e5afe8717581b57d6ab1ead32c40d7f1
Author: and3md <and3md@gmail.com>
Date: Tue Mar 22 13:55:56 2022 +0100
WIP: Run physics in design mode in editor.
commit 59a239e0ea4abfc254466b3d4293327b03d74c98
Author: and3md <and3md@gmail.com>
Date: Tue Mar 22 13:51:28 2022 +0100
Ability to run physics in design mode.
commit c94086f9a29a91b07c18ca221e27d414070515a3
Author: and3md <and3md@gmail.com>
Date: Tue Mar 22 11:50:41 2022 +0100
Use TCastleTransform.BeforeDestruction for removing behaviors.
commit 36f5a8f463bd06a0257b7b52e9eac9cbf61dedf3
Author: and3md <and3md@gmail.com>
Date: Tue Mar 22 11:24:13 2022 +0100
Final behavior events fix: BeforeBehaviorDestroy(Self) should not be called from Destructor becouse this is too late. Moved to BeforeDestruction.
commit 569341f1e732c52ca9989dd8fe4ae3a2ec2dad1e
Author: and3md <and3md@gmail.com>
Date: Mon Mar 21 12:27:40 2022 +0100
Fix typo.
commit cd1d673eed95c26ead703dc9284e72dabc6fefd0
Author: and3md <and3md@gmail.com>
Date: Mon Mar 21 12:25:30 2022 +0100
Fix removing behavior when transform is destroyed also fix calling appropriate events.
commit bddf84a6c899e1cac3d8dd67b90e76b48f6e2c14
Author: and3md <and3md@gmail.com>
Date: Tue Mar 15 16:14:06 2022 +0100
Remove not needed FreeNotification.
commit e8bcee61eff891c08a022549959838980557e4d6
Author: and3md <and3md@gmail.com>
Date: Tue Mar 15 15:01:36 2022 +0100
Document BeforeBehaviorDestroy().
commit b1f54b160bda13d46113d457e7ef49caa6780f1e
Author: and3md <and3md@gmail.com>
Date: Tue Mar 15 14:59:10 2022 +0100
Behavior ParentChanged fix: Change FreeNotification to BeforeBehaviorDestroy procedure.
commit 7db7dd2c86fa96f9e35abbcc436d2b3fe0686809
Author: and3md <and3md@gmail.com>
Date: Tue Mar 15 14:46:05 2022 +0100
Add mass to avatar rigid body.
commit dc9a38a7c4cb3fd9e8549d8cfbcc969ae1c77997
Author: and3md <and3md@gmail.com>
Date: Tue Mar 15 14:44:56 2022 +0100
Fix animation change in GameEnemy behavior.
commit 0309e29a9a44a5d8fa6e6b1759c7cc35f72c21ee
Author: and3md <and3md@gmail.com>
Date: Tue Mar 15 14:44:18 2022 +0100
Third person avatar movement by forces - WIP.
commit 02ec4f9f43555b4b0abce8d8fdb97b5c88140979
Author: and3md <and3md@gmail.com>
Date: Tue Mar 15 14:43:09 2022 +0100
Add WakeUp and Sleep to TCastleRigidBody.
commit e9906e594f3dc729a2c6556dbfa0ac08dba094d2
Author: and3md <and3md@gmail.com>
Date: Tue Mar 15 14:42:44 2022 +0100
Add more physics functions (AddForce, ApplyImpulse, AddTorque, ...) to TCastleRigidBody.
commit 9602349c180b6ea2e72becc4fef3ba73ebf69094
Author: and3md <and3md@gmail.com>
Date: Mon Mar 14 13:39:48 2022 +0100
Fix calling WorldBeforeDetach, ParentBeforeDetach, ParentChanged after simply destroy behavior.
commit de4bfc3533fa5c08c47591c618f9995b37d5414d
Author: and3md <and3md@gmail.com>
Date: Mon Mar 14 13:39:07 2022 +0100
Fix compilation.
commit d04dbd6b80bec7c927e8d7c3af68076c1ee2ba66
Author: and3md <and3md@gmail.com>
Date: Mon Mar 14 12:41:29 2022 +0100
Use idle as jump animation and bored as fall animation.
commit 0e48e470d084b23ac9e7d9d66605c3eb1cd21b03
Author: and3md <and3md@gmail.com>
Date: Mon Mar 14 12:40:28 2022 +0100
Add jump and fall animation, old movement behavior when no rigid body in avatar, Air movement control with rotate and movement factor.
commit 5f41b32125e7bf02a8b6f74101d275416f270b50
Author: and3md <and3md@gmail.com>
Date: Tue Mar 8 16:02:28 2022 +0100
Fixed assertion.
commit b74228534cf108cf0396869dfef4a6ace4e233f1
Author: and3md <and3md@gmail.com>
Date: Tue Mar 8 16:02:11 2022 +0100
Third person navigation movement using physics WIP.
commit a0d22d3b81d1a76985cf35f02457f481f35f99f3
Author: and3md <and3md@gmail.com>
Date: Tue Mar 8 11:42:50 2022 +0100
Fix TCastleCapsuleCollider again Min -> Max.
commit b3836f9bf9348460593666dd33bb80e679ec754c
Author: and3md <and3md@gmail.com>
Date: Mon Mar 7 16:05:19 2022 +0100
Fix typo.
commit 3dbcb7b4229d6d0145e8eb1292484080676efbce
Author: and3md <and3md@gmail.com>
Date: Mon Mar 7 16:05:03 2022 +0100
Autosize for plane collider.
commit 8cb79221e2664241e8f9db07c46f9988a30fb6e9
Author: and3md <and3md@gmail.com>
Date: Mon Mar 7 14:17:17 2022 +0100
Editor for LockRotation and LockTranslation shows also axsis name (X (0), Y (1), Z (2)).
commit 31437f895182236ae1f47e5c8b22c4f1706ef300
Author: and3md <and3md@gmail.com>
Date: Mon Mar 7 13:06:13 2022 +0100
Better capsule collider autosize.
commit 4c67fef5fb39535bf83739e5d89b97a4d8f0311d
Author: and3md <and3md@gmail.com>
Date: Mon Mar 7 12:46:00 2022 +0100
Fix calculating autosize for sphere collider.
commit 44b1eceb1a80db3dceee5b565b0efeb3a31ebd49
Author: and3md <and3md@gmail.com>
Date: Mon Mar 7 12:34:07 2022 +0100
Add autsize and Scene properties to Basic tab in TMeshCollider.
commit 2b9b7126276c6c3fab59de0e0991ce96e95cb32f
Author: and3md <and3md@gmail.com>
Date: Mon Mar 7 12:26:09 2022 +0100
Autosize with TCastleMeshCollider simply remove translation, rotation and scale.
commit bb5d9d696ea17ccc39c55cf57afd56b4986884d8
Author: and3md <and3md@gmail.com>
Date: Mon Mar 7 12:09:52 2022 +0100
Fix crash when using TCastleMesh/PlaneCollider with Dynamic/Animated rigid body.
commit 07c296cb72b33f5bc212d878ee4ff17e14948a20
Author: and3md <and3md@gmail.com>
Date: Mon Mar 7 11:30:30 2022 +0100
Fix changing gravity after kraft body creation
commit e0b4dec050d53b6f379b6bafd2f3fbc5e23cfc75
Author: and3md <and3md@gmail.com>
Date: Mon Mar 7 10:16:28 2022 +0100
More docs in TCastleRigidBody.
commit abcfa5ea810669567b545714f3308a1fa2472fbf
Author: and3md <and3md@gmail.com>
Date: Mon Mar 7 10:03:37 2022 +0100
Document GetKraftShape.
commit 1d1753587e459ced6f758ec0d4ed7a0915c10a33
Author: and3md <and3md@gmail.com>
Date: Mon Mar 7 09:54:32 2022 +0100
Use UpdateKraftRigidBodyType in InitializeEngineRigidBody
commit f6585ae825979b874ea2ff5817b7f1e1a843277d
Author: and3md <and3md@gmail.com>
Date: Mon Mar 7 09:41:18 2022 +0100
Document UpdateKraftRigidBodyType.
commit d2820a8f2aee80180ea52e84c2501274dbec7074
Author: and3md <and3md@gmail.com>
Date: Mon Mar 7 09:35:24 2022 +0100
Fix changing Animated property after KraftRigidBody creation.
commit 5b748ad4a02de0bad9e11c3e1a087f656326387e
Author: and3md <and3md@gmail.com>
Date: Mon Mar 7 09:34:30 2022 +0100
Clean up TCastleMeshCollider code.
commit 41077a096dfa94ec7636a60a962e468273581228
Author: and3md <and3md@gmail.com>
Date: Sat Mar 5 16:14:49 2022 +0100
CastleRigidBody fix changing Dynamic property after creating KraftRigidBody
commit a62c4be4d5d8244a3ffd378d6e8e02d06f4f4221
Author: and3md <and3md@gmail.com>
Date: Sat Mar 5 16:13:37 2022 +0100
Fix CastleMeshCollider for use in editor.
commit f91d79a0ab0832f35e4b756d7d078f85eb37d8ab
Author: and3md <and3md@gmail.com>
Date: Sat Mar 5 16:11:28 2022 +0100
Register Castle Mesh Collider in editor.
commit 648cbfd0645f11fe43963331cbdb7d9f5715bd2f
Author: and3md <and3md@gmail.com>
Date: Tue Mar 1 13:30:47 2022 +0100
Changing local trasform sets AutoSize to false.
commit b93abfbb427cd97d989f1a2b1cd64da5e948d653
Author: and3md <and3md@gmail.com>
Date: Tue Mar 1 13:07:48 2022 +0100
Fix CastleCollider auto sizing when local object center is not in 0,0,0.
commit 46944fe295168ca750eccaad1fec1d1e55295fe0
Author: and3md <and3md@gmail.com>
Date: Tue Mar 1 13:06:04 2022 +0100
Fix setting AutoSize property in TCastleBoxCollider.
commit 3fa8355abd5046ea87e642bc56de14aba8d8372a
Author: and3md <and3md@gmail.com>
Date: Mon Feb 28 14:55:39 2022 +0100
Add AutoSize to basic tab in editor inspector.
commit abf2702bd361771e7292b7dc64c9e3b275562a9d
Author: and3md <and3md@gmail.com>
Date: Mon Feb 28 14:42:44 2022 +0100
First collider autosizing mechanism.
commit 96ff6864bc8ffaf608d0c10308d58c491f42145b
Author: and3md <and3md@gmail.com>
Date: Mon Feb 28 11:11:24 2022 +0100
Platformer physics set/saved in design in editor.
commit 542f9a364c4a30becec8d61e05bbbdf8a9d75dba
Author: and3md <and3md@gmail.com>
Date: Mon Feb 28 11:09:38 2022 +0100
Remove unused variables.
commit fb5b3f9ec43da90ad76c03cb7a5daa769b954b47
Author: and3md <and3md@gmail.com>
Date: Mon Feb 28 10:02:22 2022 +0100
Better code formatting.
commit b5f533db51c9660d20a629f79cacca37a6430323
Author: and3md <and3md@gmail.com>
Date: Mon Feb 28 10:00:47 2022 +0100
Regenerate persistent vectors.
commit 2c3d84c84ee175ba0c62e6b313a4420fbfcb93e2
Author: and3md <and3md@gmail.com>
Date: Mon Feb 28 10:00:12 2022 +0100
Use TCastleVector4RotationPersistent for Rotation property.
commit 37618527ce5ff20a35685fb699ade25a458feed5
Author: and3md <and3md@gmail.com>
Date: Mon Feb 28 09:59:21 2022 +0100
Editor: Change W to Angle (W) for Rotation property by using TCastleVector4RotationPersistent class
commit fbbee93140cd121c743450984d8095bad185283b
Author: and3md <and3md@gmail.com>
Date: Tue Feb 22 12:32:15 2022 +0100
Publish Tranlation, Rotation, Scale in new colliders.
commit 726e028c86f37d8f9dfdc209b2bad499d0e9d5cd
Author: and3md <and3md@gmail.com>
Date: Tue Feb 22 11:52:05 2022 +0100
Collider LocalTransform refactoring.
commit ceb4c0d235e53f60306cec666d72c247bfa8e67b
Author: and3md <and3md@gmail.com>
Date: Tue Feb 22 11:17:00 2022 +0100
Enable USE_PHYSICS_FOR_AVATAR_GRAVITY
commit b4b56bdd4185b00f9efb680e9fdd74c803da67cb
Author: and3md <and3md@gmail.com>
Date: Tue Feb 22 11:16:36 2022 +0100
Third person example - use behaviors for physics.
commit 2f85876298983bf9ef7dced8857b1d33be069b2a
Author: and3md <and3md@gmail.com>
Date: Tue Feb 22 11:14:55 2022 +0100
Local translation moved to Castle Colliders.
commit 6ecedb8e9efbd4b4eb507662b830e1c5a5e082a4
Author: and3md <and3md@gmail.com>
Date: Tue Feb 22 11:14:07 2022 +0100
Added TCastleMeshCollider.
commit d5965dae300f7a9f131c039217447ac36ecca84d
Author: and3md <and3md@gmail.com>
Date: Mon Feb 21 15:12:43 2022 +0100
Remove SingleInstacneOfBehavior from TCastleRigidBody.
commit 293ee38bc467099de04610d163da248944ceceb8
Author: and3md <and3md@gmail.com>
Date: Mon Feb 21 15:08:38 2022 +0100
Correct remove SingleInstanceOfBehavior (fix after rebase).
commit fd81209f5c0ff237298ff46698ddf6f5a95c33d0
Author: and3md <and3md@gmail.com>
Date: Mon Feb 21 15:04:28 2022 +0100
Revert "Removed SingleInstanceOfBehavior (fix after rebase)"
This reverts commit fa7785dd3fb4e93365b3ac62c61d2b6fb633317c.
commit f04d268f6ac9bf64eb96f96756686ce0cf1e7308
Author: and3md <and3md@gmail.com>
Date: Mon Feb 21 15:04:28 2022 +0100
Removed SingleInstanceOfBehavior (fix after rebase)
commit 1cf8853e16578575bde175e605313262db4fcc83
Author: and3md <and3md@gmail.com>
Date: Mon Feb 21 14:42:58 2022 +0100
Support for range sets in editor inspector.
commit 36bedec4d40af8ebcd7e5b530c59115ad50edbbe
Author: and3md <and3md@gmail.com>
Date: Mon Feb 21 14:41:35 2022 +0100
Add physics behaviors properties to Basic tab.
commit b1bdac6ce9d1e57508fae4ad12f8e2f4aaf25ae3
Author: and3md <and3md@gmail.com>
Date: Mon Feb 21 10:41:36 2022 +0100
Fixed confusing name SetValue -> ValueOfSet.
commit 40e12100cdd7e5a7dcd40ae7b9f7ce547de6f49c
Author: and3md <and3md@gmail.com>
Date: Mon Feb 21 10:39:17 2022 +0100
Fixed T3DCoords serialization.
commit d6ff4b6cc7600fe968359bd510f8c108bd09bcbb
Author: and3md <and3md@gmail.com>
Date: Mon Feb 21 09:12:01 2022 +0100
Platformer add collider by K key.
commit 33bdb3175837fb1884a32d88e2cedf5d4395b352
Author: and3md <and3md@gmail.com>
Date: Tue Feb 15 15:49:05 2022 +0100
Platformer: remove collider by key O.
commit 819df51b0f1356e72d01efcf79e489bc485b444f
Author: and3md <and3md@gmail.com>
Date: Tue Feb 15 15:47:37 2022 +0100
The ability to remove colliders.
commit 92b9f704a2305ecac3d5efe61eff42bbb3bcf9d1
Author: and3md <and3md@gmail.com>
Date: Tue Feb 15 14:53:31 2022 +0100
Added ParentAfterAttach and ParentBeforeDetach to Castle Behavior.
commit 96756a051ee6f32f63826b21907f6b0cbf08ada4
Author: and3md <and3md@gmail.com>
Date: Mon Feb 14 16:13:42 2022 +0100
Change player collider size by "-" "=/+" keys during gameplay.
commit 4642419dec0ac355bf45e2bc07d8a931d35dccd6
Author: and3md <and3md@gmail.com>
Date: Mon Feb 14 16:11:32 2022 +0100
Ability to change kraft shape properties after creating kraft shape.
commit 1a0c71ffe382aebb46754ba35fb8a658531eb31d
Author: and3md <and3md@gmail.com>
Date: Mon Feb 14 16:10:25 2022 +0100
Generated persistent vectors for colliders.
commit 379a917789735e0e4c14072cc55f20fb84053d73
Author: and3md <and3md@gmail.com>
Date: Mon Feb 14 16:09:15 2022 +0100
Generate vectors for TCastleBoxCollider and YCastlePlaneCollider.
commit a48b330e9a5d0ec77f43e90618f8eecb186c6a5b
Author: and3md <and3md@gmail.com>
Date: Mon Feb 14 16:08:40 2022 +0100
Register more physics components.
commit bb21681fec21d5c525b5db523f605a4e20dbb803
Author: and3md <and3md@gmail.com>
Date: Tue Feb 8 16:26:55 2022 +0100
Platformer: Use new physics behaviors by default.
commit 3026bc52248e514f2af53486da198e1881574bee
Author: and3md <and3md@gmail.com>
Date: Tue Feb 8 16:25:26 2022 +0100
Physics behaviors: First working version.
commit 562a1ee703afa5befc4fdeba3aeab2e41467b04f
Author: and3md <and3md@gmail.com>
Date: Tue Feb 8 16:24:23 2022 +0100
New behavior events in trasforms.
commit 63e18db2d3ce1c3e7afac3ef2ed23b6e41391911
Author: and3md <and3md@gmail.com>
Date: Tue Feb 8 16:23:20 2022 +0100
Behaviors: WorldAttached -> WorldAfterAttach, WorldDetached->WorldBeforeDetach.
commit 034a8244386dd448656bec4c742d4b1bc1844bd3
Author: and3md <and3md@gmail.com>
Date: Mon Feb 7 16:00:14 2022 +0100
Colliders as behavior WIP.
commit 89a2ecef060201c9880f01bae3f1b561e1194d30
Author: and3md <and3md@gmail.com>
Date: Mon Feb 7 08:58:13 2022 +0100
Remove previous rigid body behavior before changing to new one.
commit 7141e234f83ef24d4dd14ba7827e4fd84da29ed5
Author: and3md <and3md@gmail.com>
Date: Tue Feb 1 17:19:17 2022 +0100
TCastleTransform.RigidBody only add TCastleRigidBody behavior, removed lots of physics functions from transform.
commit 532ff9ee7c6a726a66b29ae0ecff36decbddbb36
Author: and3md <and3md@gmail.com>
Date: Tue Feb 1 17:17:42 2022 +0100
TRigidBody as behavior (TCastleRigidBody), added WorldAttached/Detached to TCastleBehavior.
commit b0f70ae22b21cc0e165ae8304ac0c2bf7f8e77c4
Author: and3md <and3md@gmail.com>
Date: Tue Feb 1 10:48:27 2022 +0100
CastleRigidBody as behavior WIP.
