
-
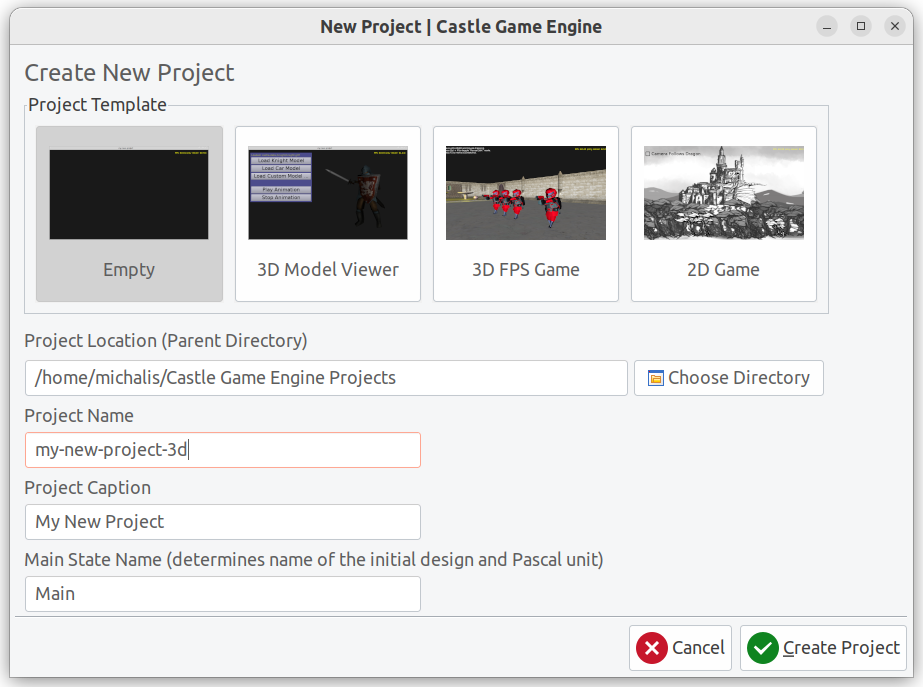
a camera, that determines what is visible (initially) for the user,
-
a light source, so that things are not completely black,
-
a 3D plane,
-
a background (by default just some gradient to simulate ground and sky, and see where the horizon is).
Tutorial: Designing a 3D world
Table of Contents
- 1. Introduction
- 2. Complete tutorial code
- 3. Create empty project, add a viewport
- 4. Add a scene showing the 3D car, adjust camera, lights and navigation
- 5. Run the game
- 6. Play animation
- 7. Add a road and more cars
- 8. Run the game again
- 9. Walk around the level
- 10. Run the game - final test!
- 11. Further things
1. Introduction
In this chapter we show how you can design 3D world using Castle Game Engine editor. We assume you have already read the overview of the viewport and scenes.
You will learn:
-
How to create a project,
-
design 3D contents in a viewport,
-
add scenes to display and animate glTF models,
-
control camera at design-time (in editor) and run-time (determines what the user sees),
-
control navigation at design-time (in editor) and run-time (determines how the user can move in your 3D world),
-
manipulate lights.
2. Complete tutorial code
The complete result of this tutorial is in the Castle Game Engine. Just open the project examples/viewport_and_scenes/viewport_3d_tutorial in the editor. If at any point you get lost, just look there.
3. Create empty project, add a viewport
-
Run Castle Game Engine editor, create a new project using the Empty template.
-
Open the
data/gameviewmain.castle-user-interfacedesign using the Files panel at the bottom of the editor. Enterdatasubdirectory and double-click ongameviewmain.castle-user-interface.
-
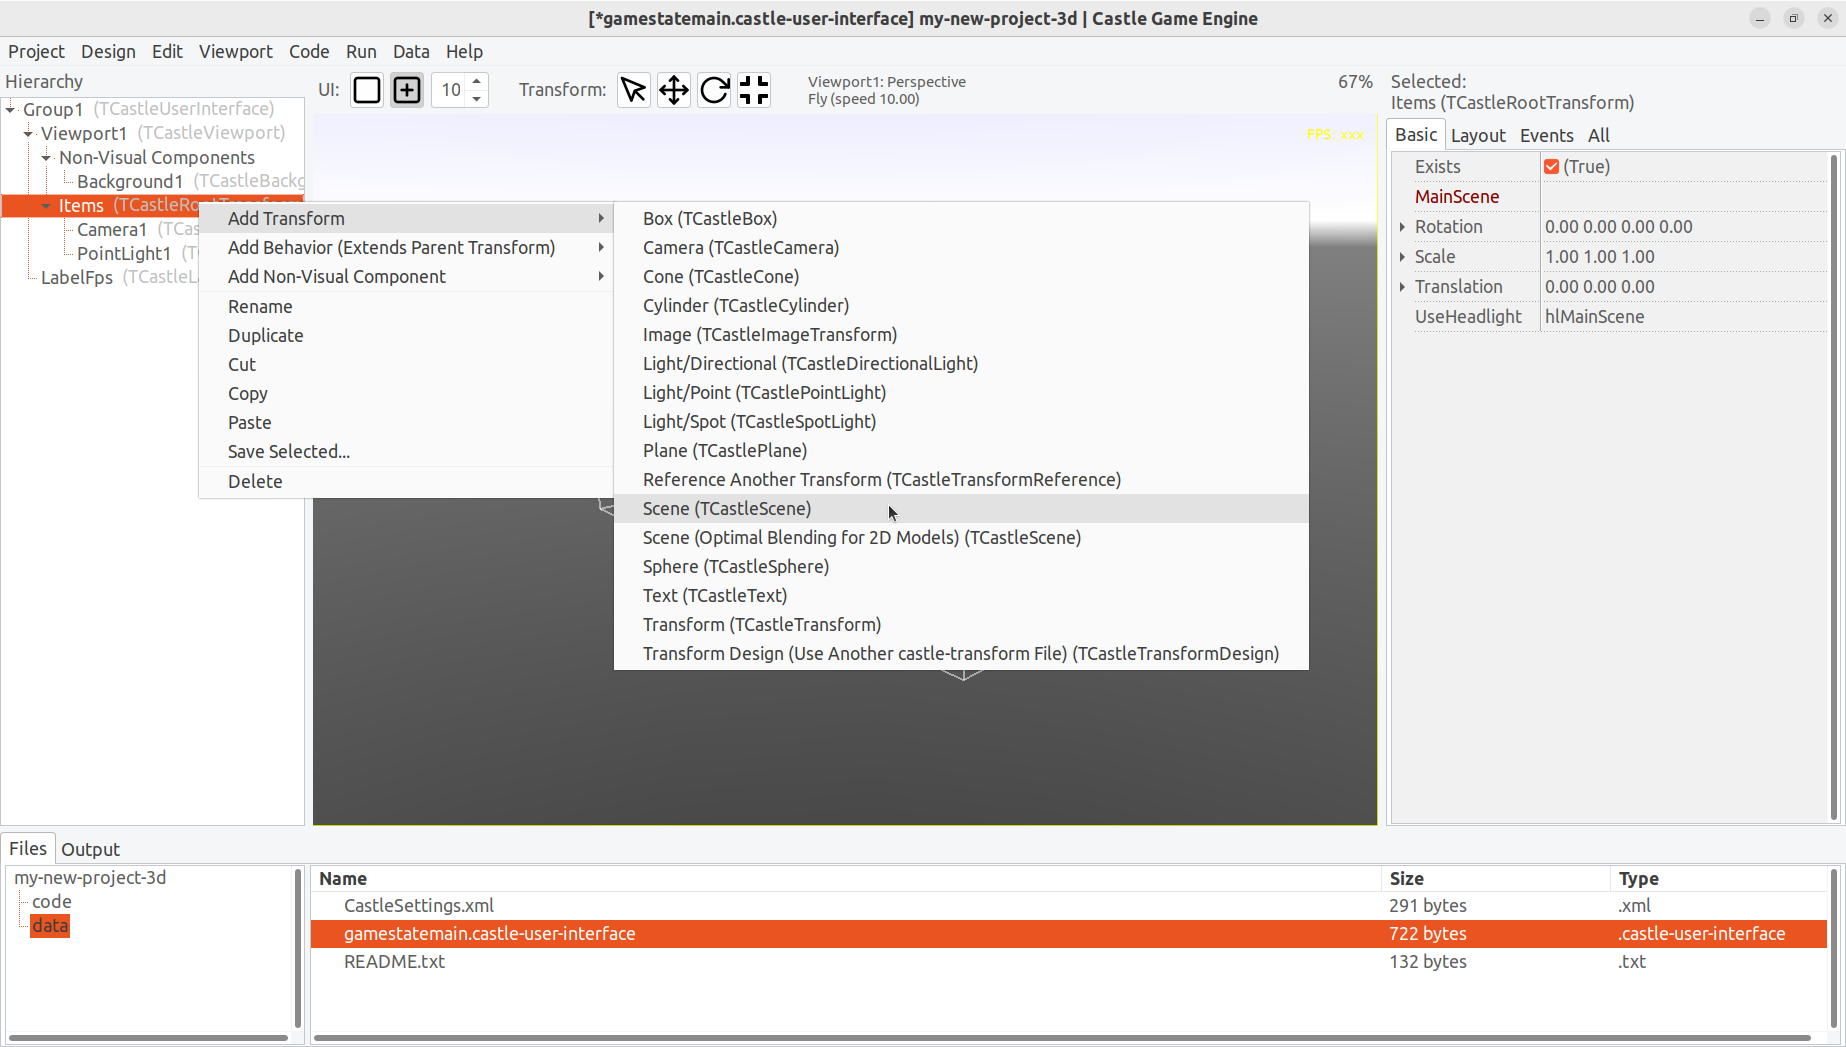
Add a
TCastleViewportby right-clicking onGroup1(the root component in the hierarchy) and choosing "Add User Interface → Viewport (3D)".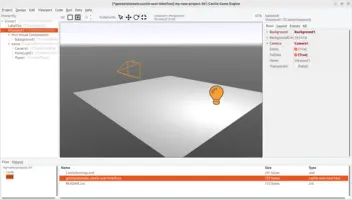
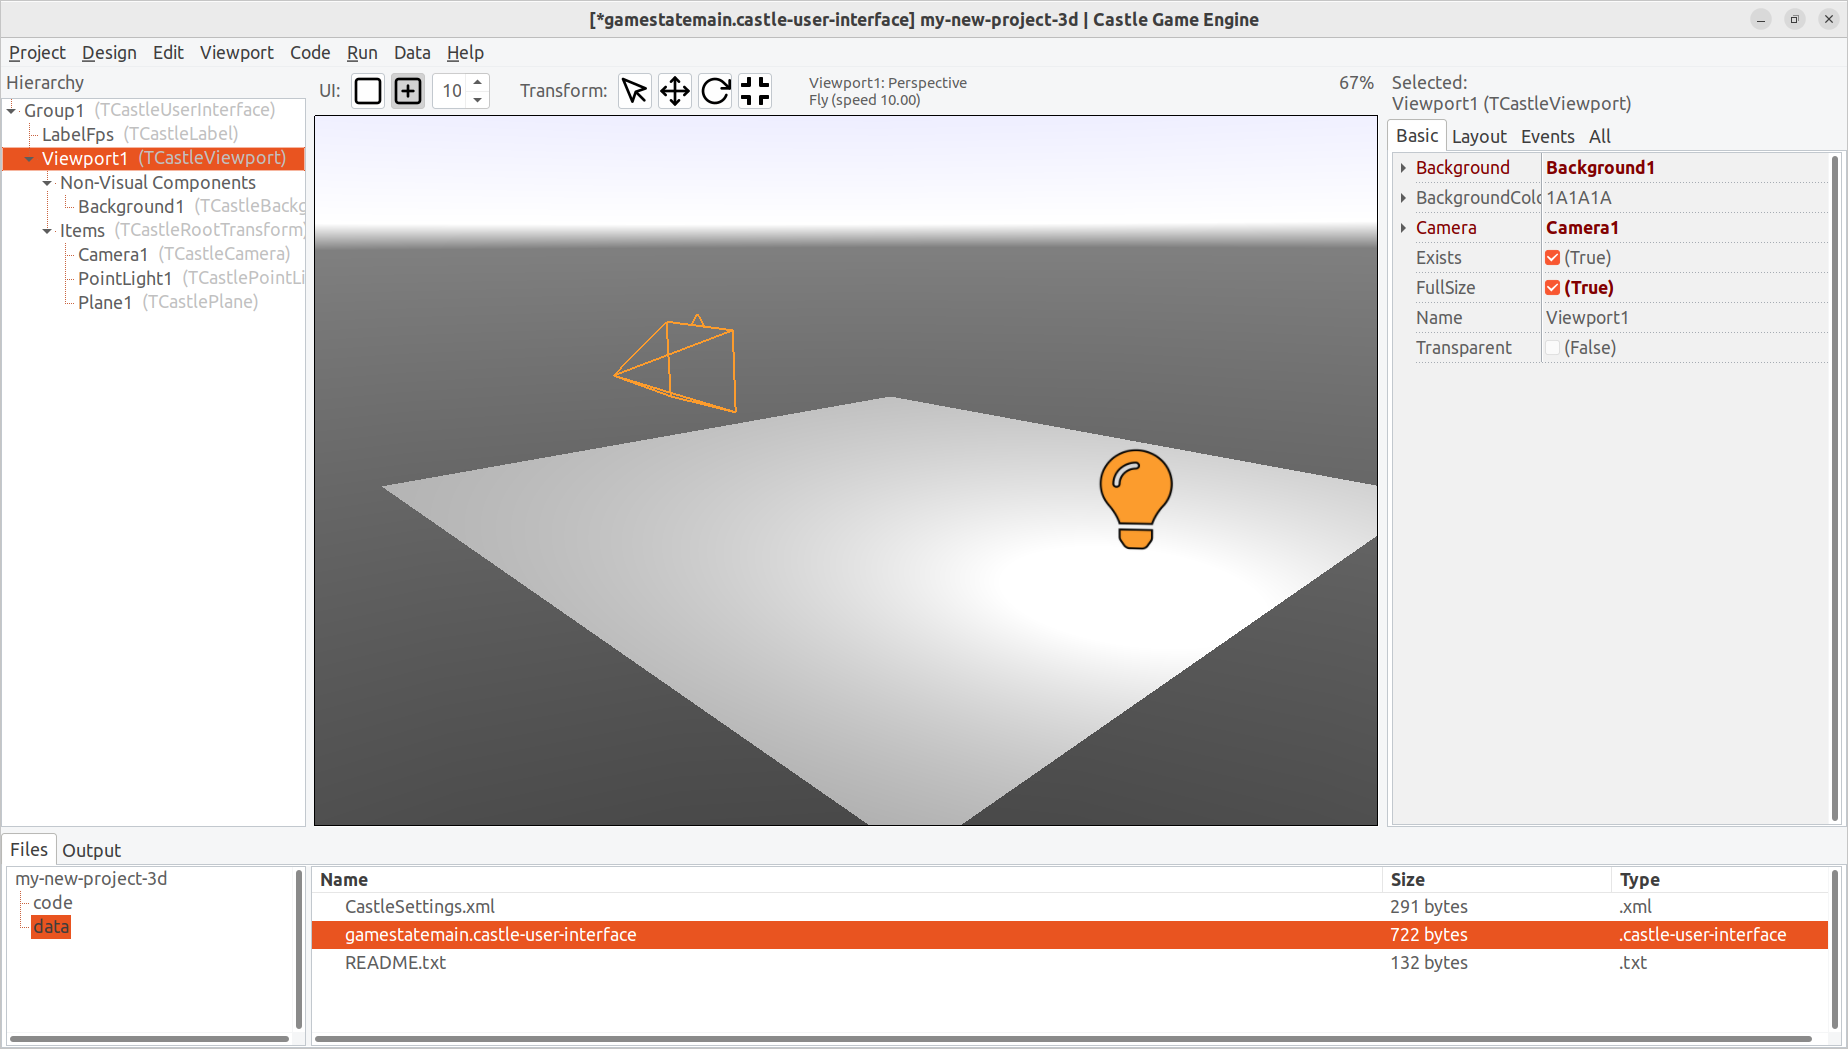
The new viewport includes by default:
Delete now the 3D plane (
Plane1). The rest of components will be useful for us.Note that viewport has by default
FullSizeset totrueand so it fills the entire design area. If you want, you can setFullSizetofalseand resize the viewport however you want.You want to move the new viewport in the hierarchy, such that it is underneath the
LabelFpscomponent. This way you will see FPS counter over the viewport.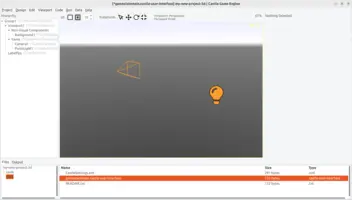

4. Add a scene showing the 3D car, adjust camera, lights and navigation
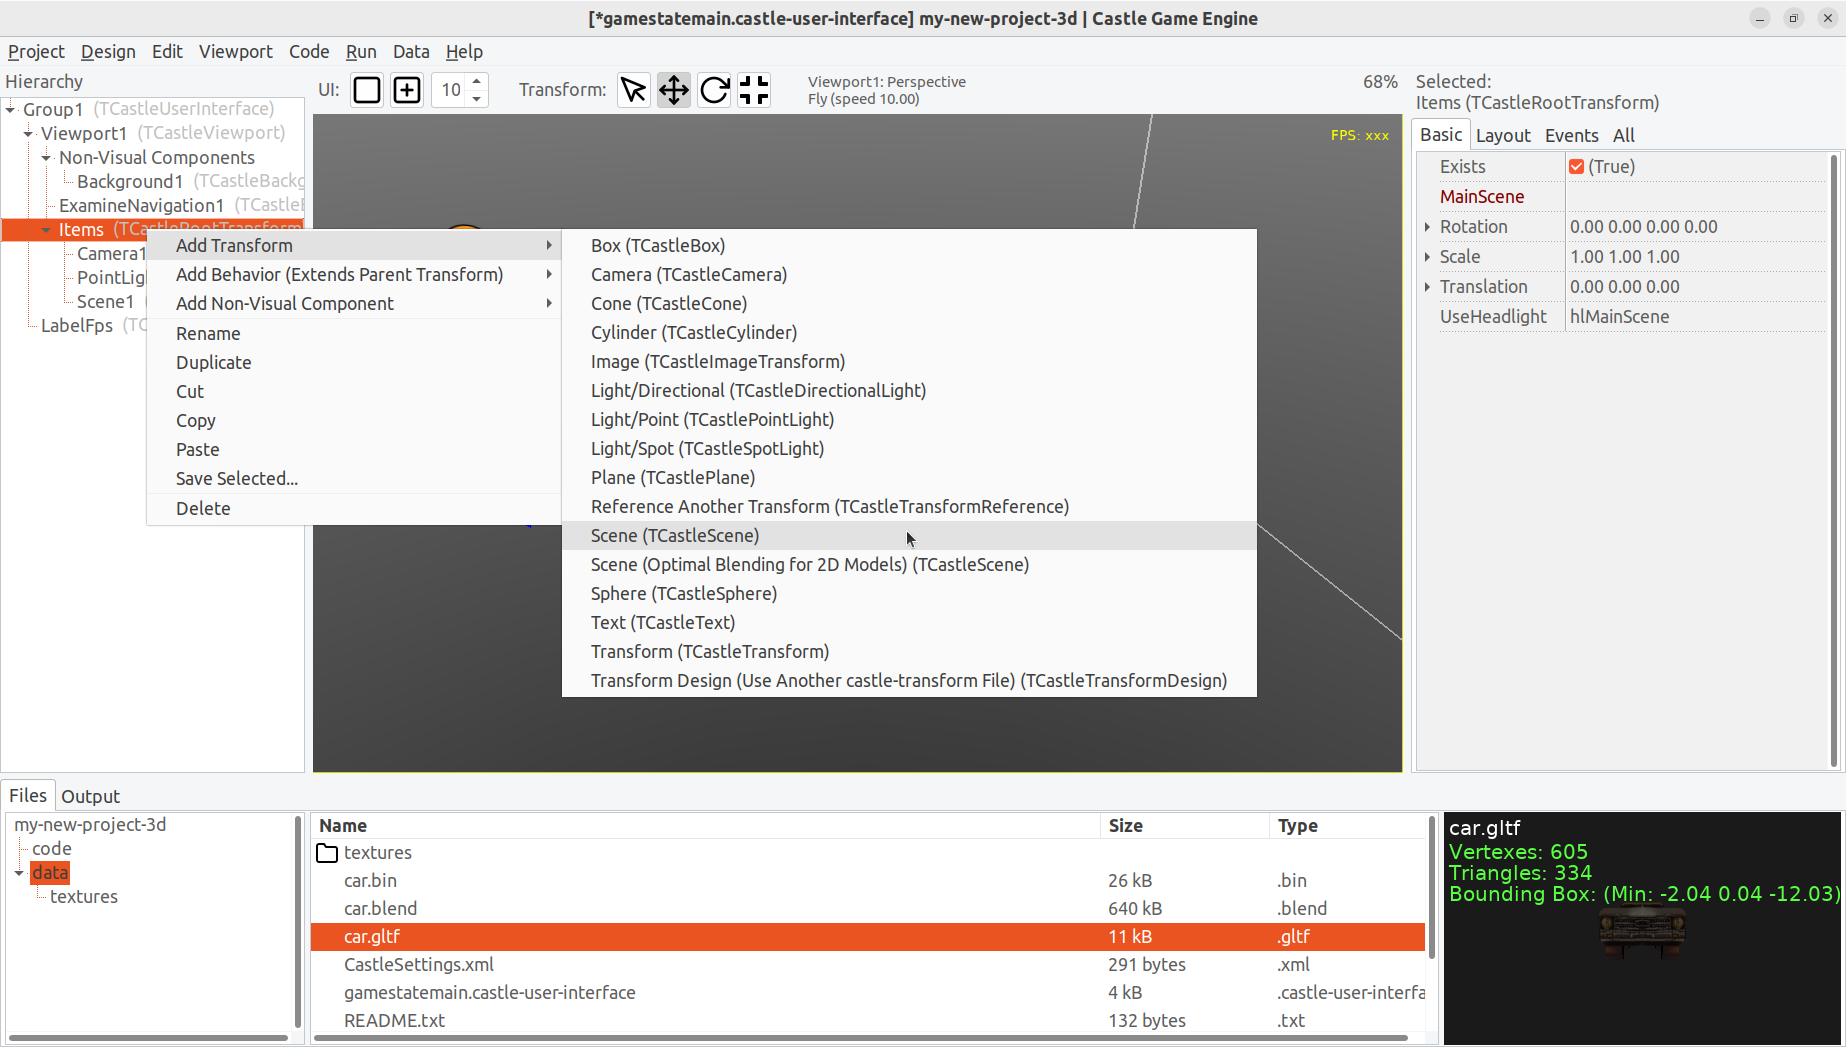
-
Add a
TCastleScenetoTCastleViewport.Items. It is easiest to do by right-clicking on theItemsin the editor hierarchy (panel on the left side), and choosing "Add Transform → Scene (TCastleScene)" from the menu that appears.
-
Now you need some 3D assets to actually play with.
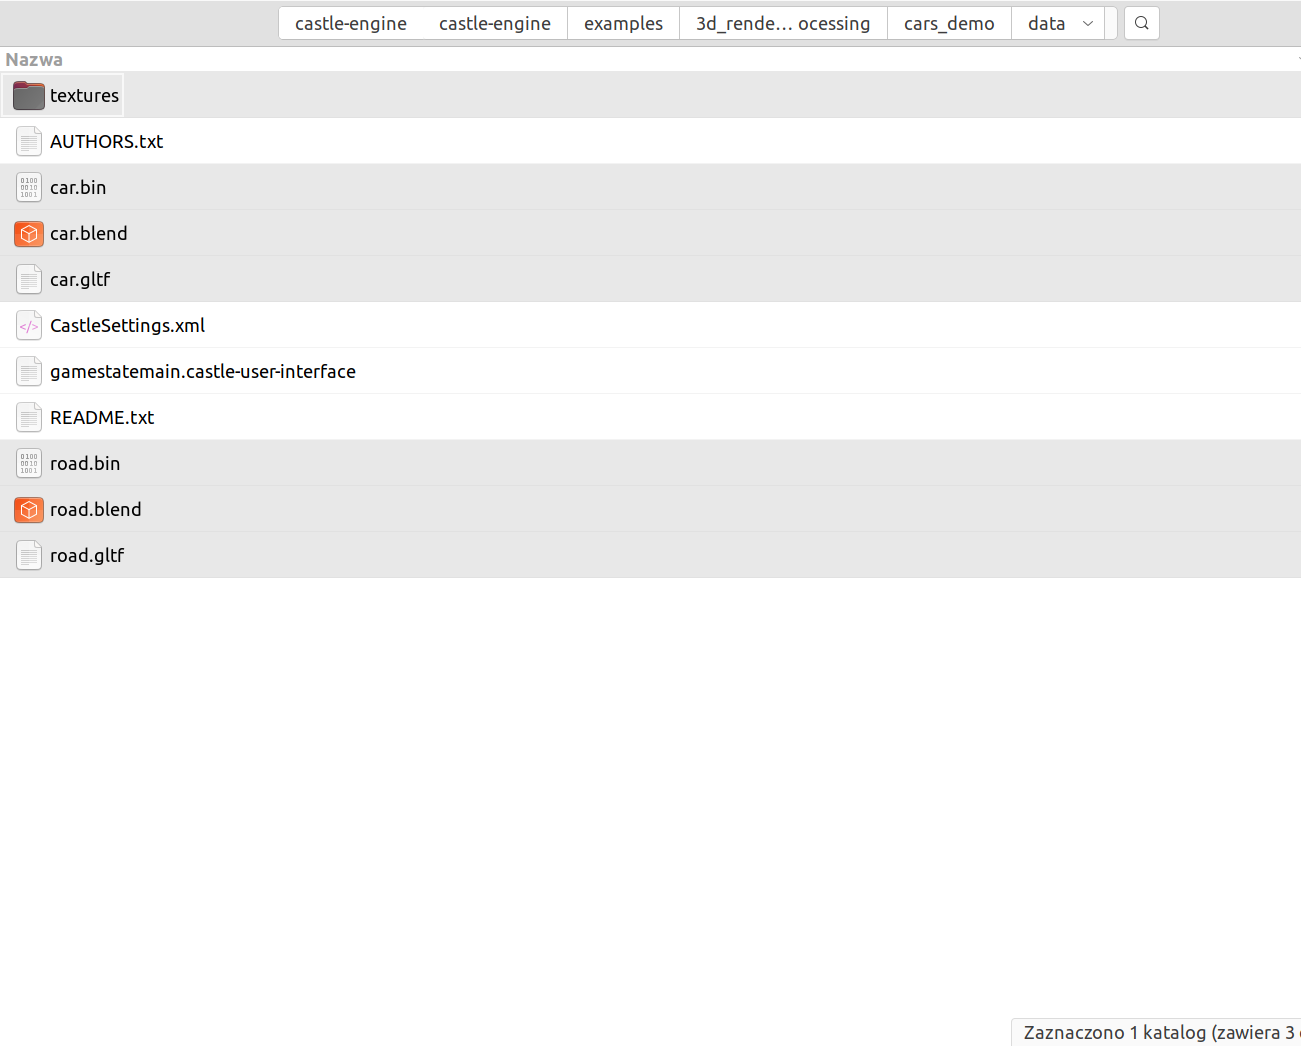
We advise at this point that you take the sample 3D asset of a car and road we have in our examples. Open in your file manager the examples/viewport_and_scenes/cars_demo/data subdirectory of your Castle Game Engine sources. Select there the files:
-
car.bin -
car.gltf -
road.bin -
road.gltf -
Whole
textures/subdirectory. -
Optionally, select also
car.blendandroad.blend. Castle Game Engine doesn’t read.blendfiles, but you can modify them in Blender and export to glTF, to play with what you can do in 3D.
Copy these files into your new project, into the
datasubdirectory. It is easiest to open it by right-clicking ondatain CGE editor, and choosing "Open In File Manager" from the context menu that appears.If you already have some 3D assets (see 3D assets formats we support) you can of course use at this point already.
-
-
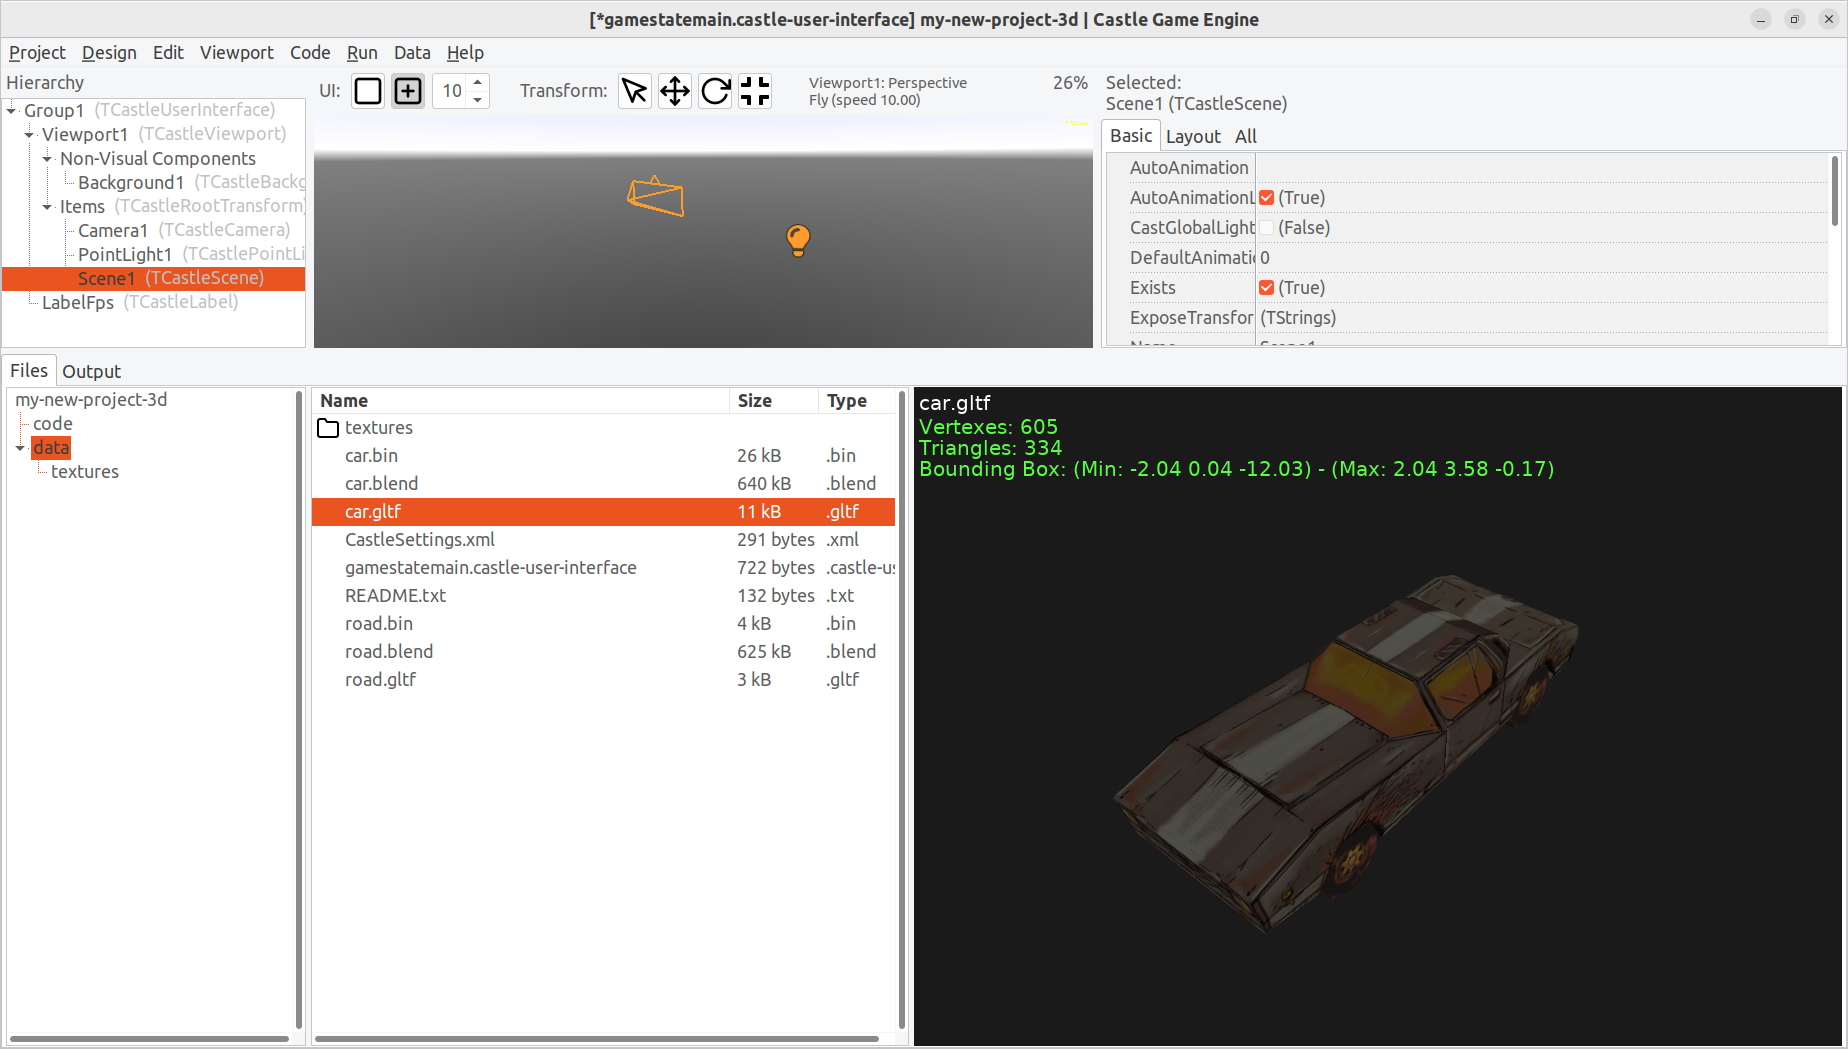
Try the preview feature of the editor at this point. Just select (click once) the
car.gltffile. If you copied everything correctly (includingcar.binandtextures/), it will display the 3D car model in a preview window that appears in the bottom-right corner.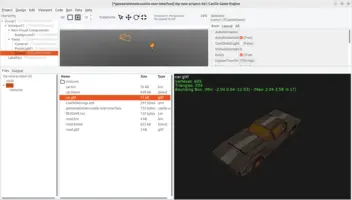
-
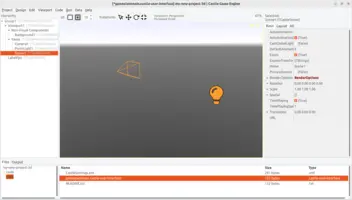
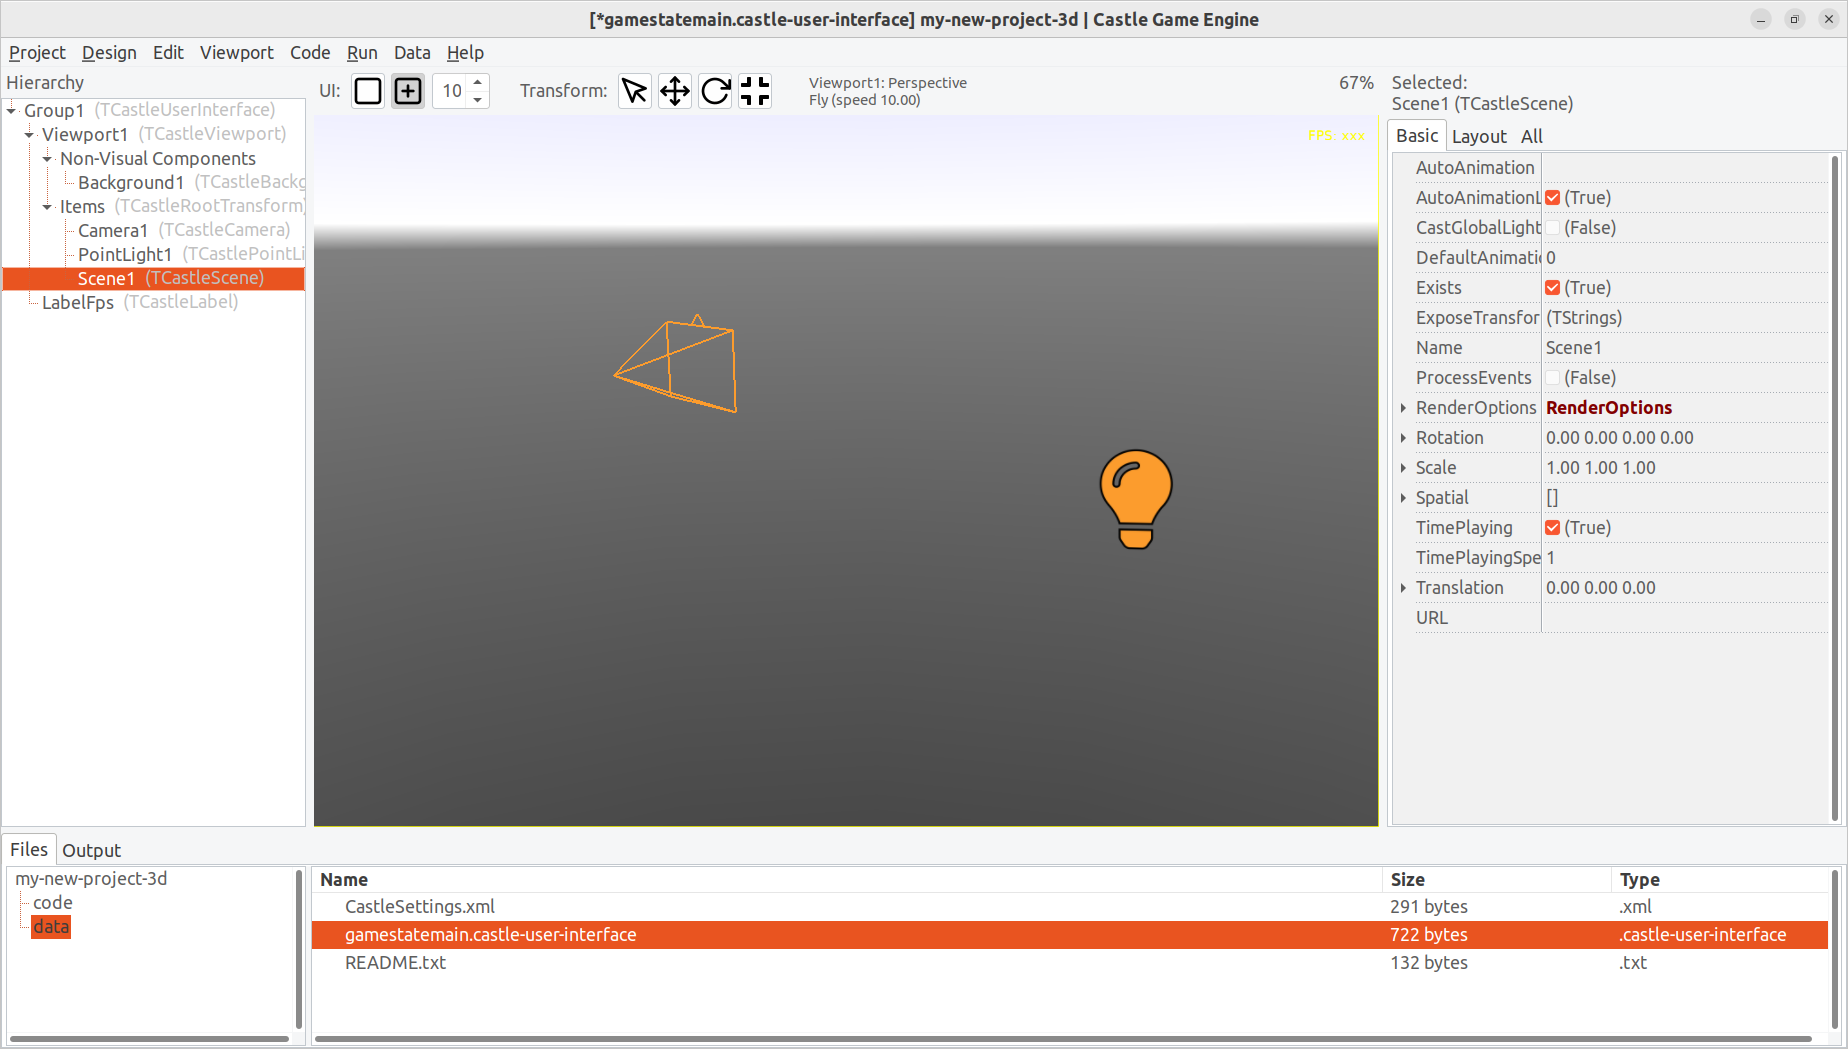
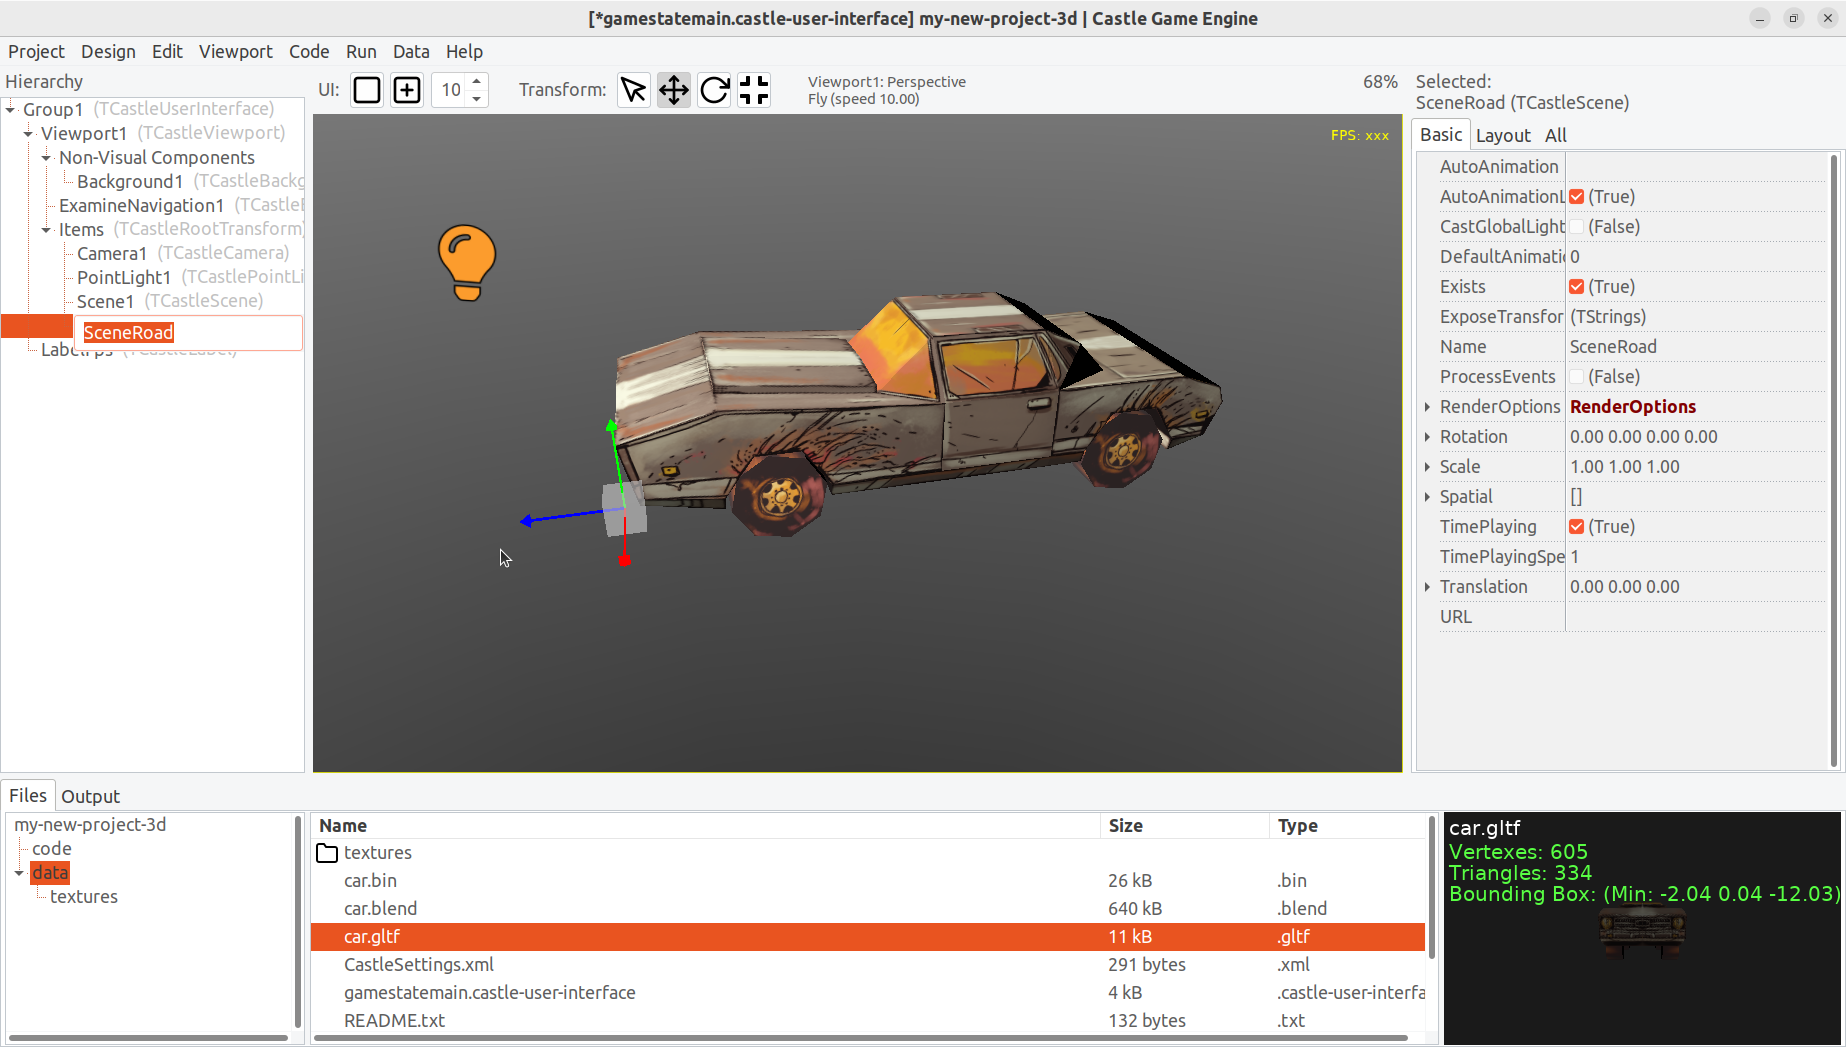
Set your
Scene1.URLproperty to thecar.gltfmodel in your data. To do this, selectScene1in the hierarchy (left panel of the editor), then look forURLin the object inspector (right panel of the editor), and click on the small button with 3 dots…in the edit field next to theURL. This will open a normal dialog window, where you should select thecar.gltfin your project’s data.Once you accepted this, note that the
Scene1.URLchanged thecastle-data:/car.gltf. In general, this is an URL of the file. It uses a specialcastle-dataprotocol to indicate that the file is in the project’s special data directory.Note that instead of clicking on the button with 3 dots, you could have also pasted the URL
castle-data:/car.gltfin the edit field. It’s a simple text field, you can edit it like any other text field if you need to, and it will reload the loaded model. You can set theURLto empty always to unload the model.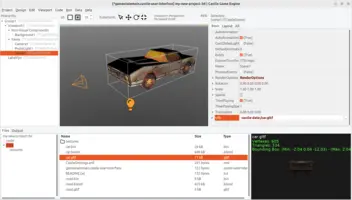
-
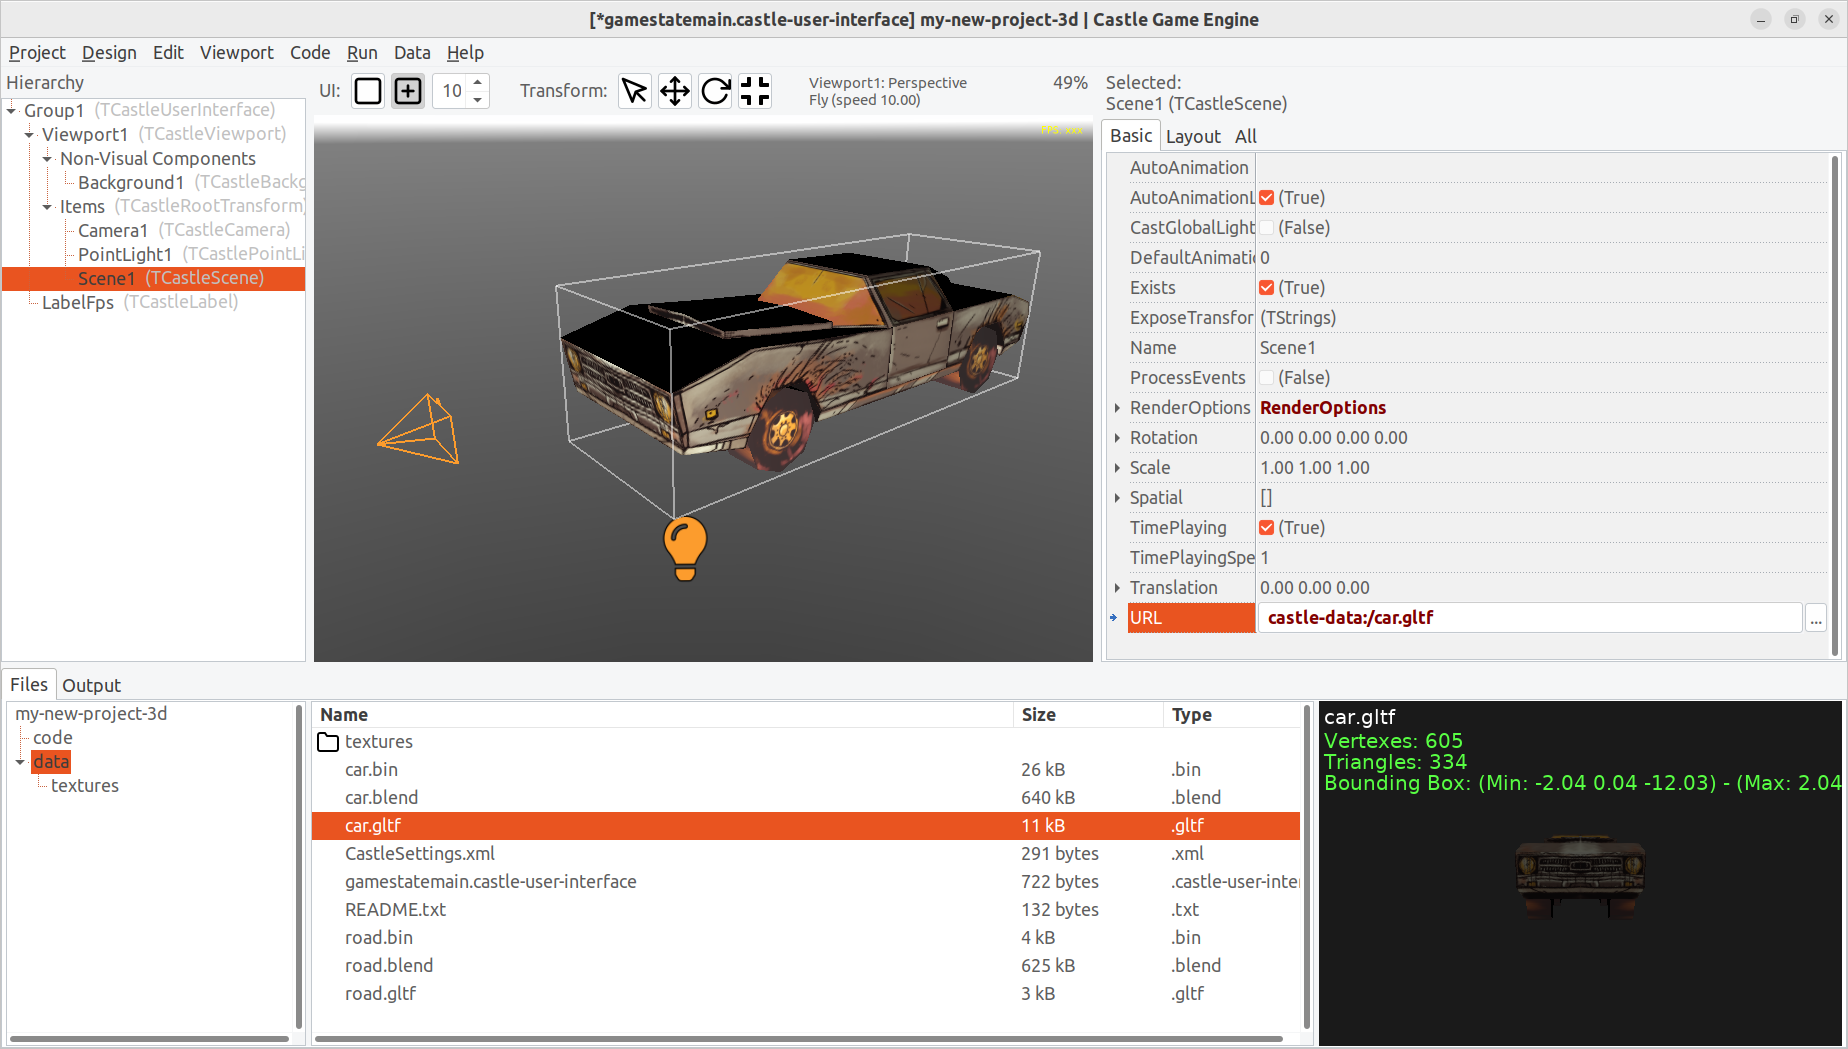
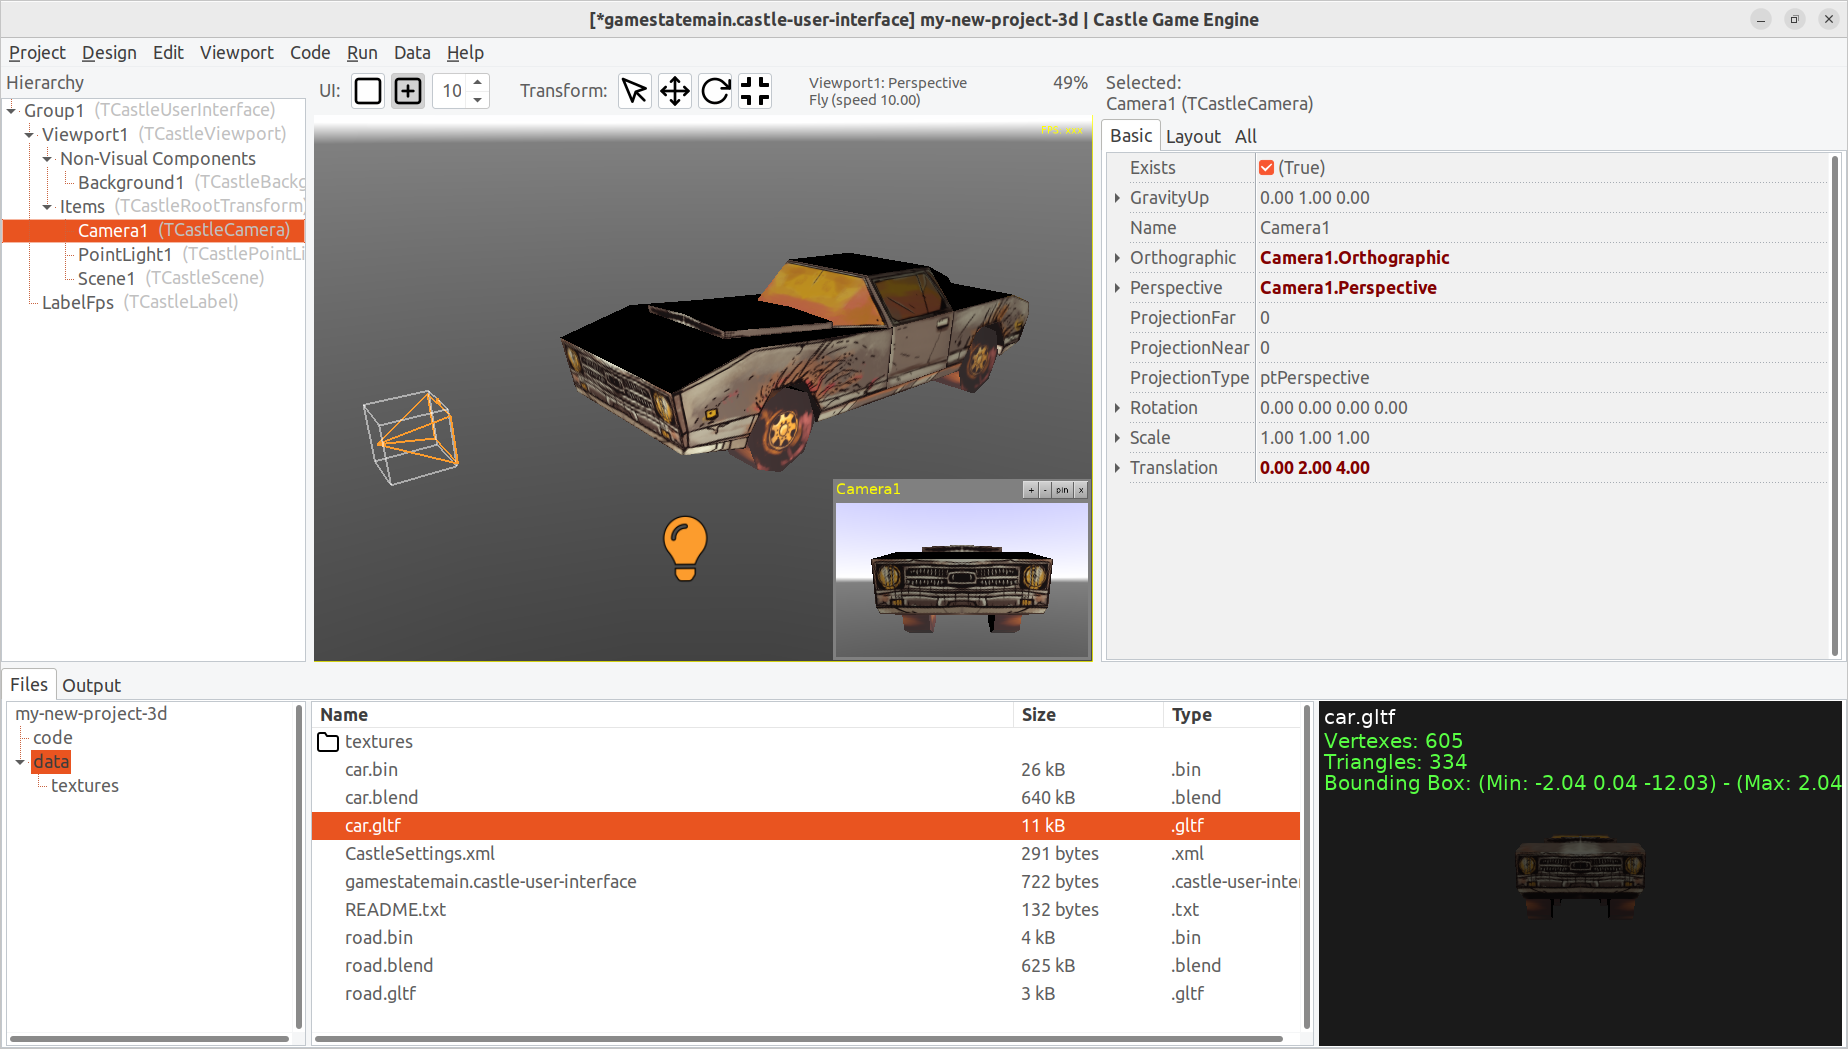
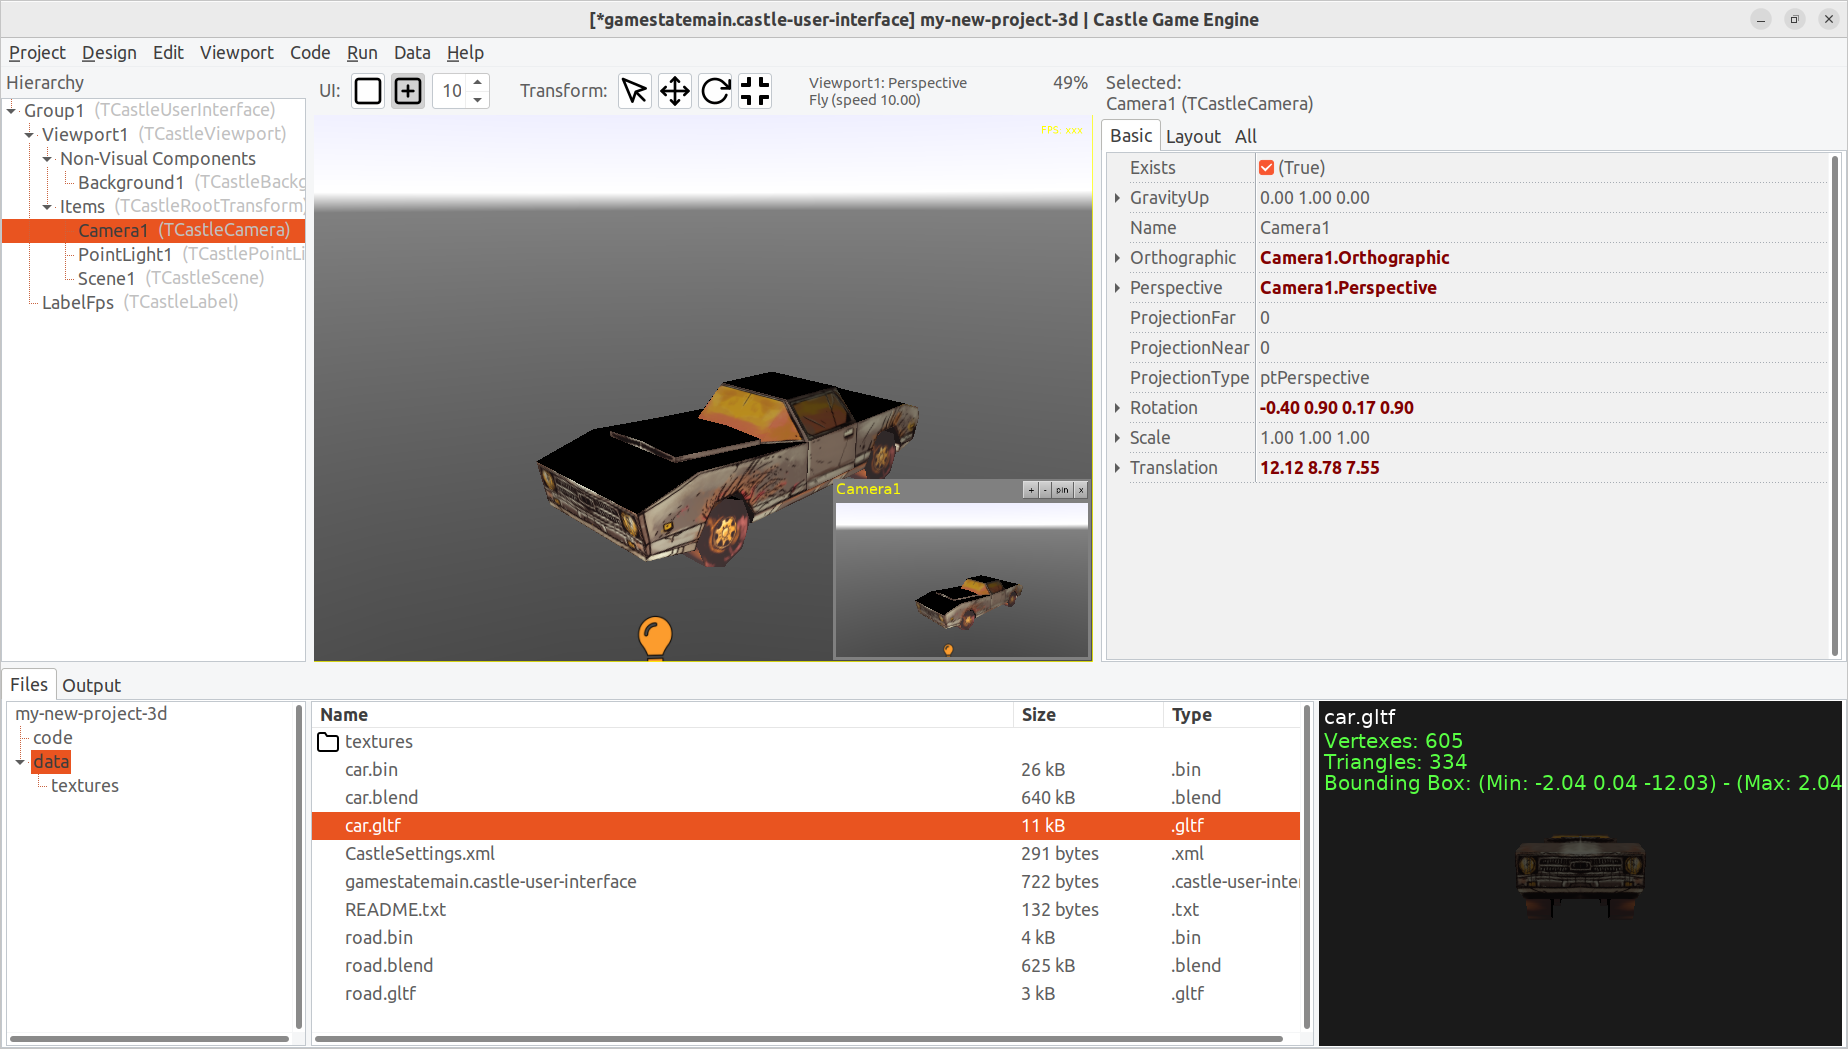
Select the
Camera1to see a preview of what is visible from the point of view of this camera. This is what the user will see right after running the application.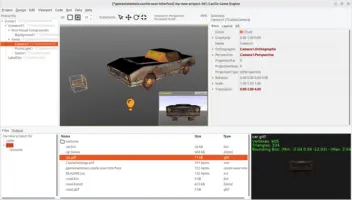
You can adjust the camera in 2 ways:
-
Fly around in the design by holding right mouse button and pressing AWSD (move forward, backward, strafe) and QE (move up, down) keys. Change the speed using mouse wheel. Once you have a view that satisfies you, use the menu item "Viewport → Align Camera To View" (key Ctrl + 0) to align camera to the view.
-
Or use the "Move Transform", "Rotate Transform" tools to move / rotate the camera. Observe the preview (you can "pin" it using the appropriate button) to see the results.
-
-
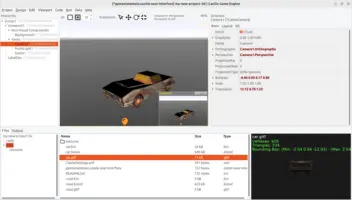
Allow user to navigate during the game. For start, we recommend using the
TCastleExamineNavigation. Right click on theViewport1and choose "Add User Interface → Navigation/Examine". This will addExamineNavigation1component to your hierarchy.NoteOther navigation methods are available, like TCastleWalkNavigationto walk or fly. You can also just control the camera completely through your own code, not relying on any built-inTCastleNavigationdescendant. For example, you can process the keyboard input in your view to move/rotate the camera. -
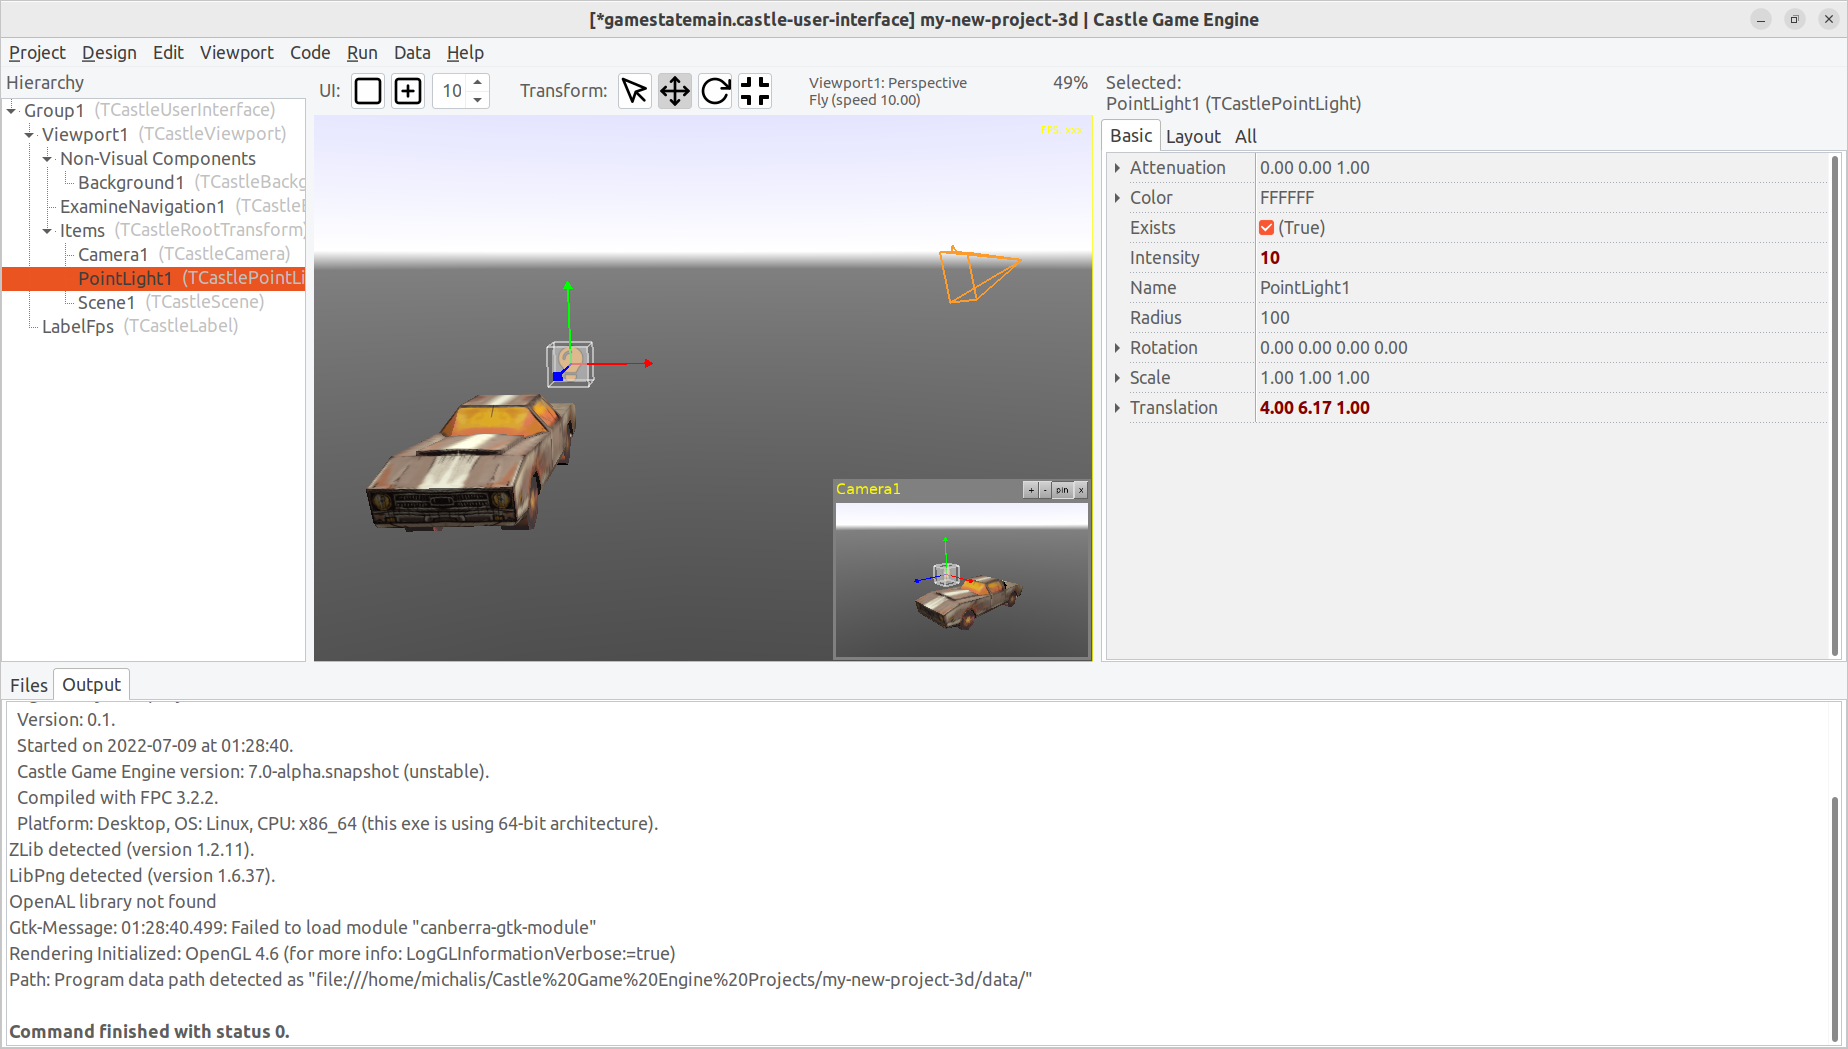
Move the light a bit higher. Switch to "Move Transform" tool, select the light, and drag it up.
The default point light (
TCastlePointLight) makes a nice local light effect. Later, to have a light nicely shine over a larger area, you can tweak it:-
increase
TCastlePointLight.Intensity(don’t be afraid to experiment with really large values; default is 100, larger values are OK too; lights in the Real World also do not have any brightness limit), -
or set
TCastlePointLight.Attenuationto0 0 0(this makes unrealistic light that has no attenuation, so it remains bright even far away; completely unrealistic, but then we don’t always want to be realistic), -
or add a new
TCastleDirectionalLightto make everything brighter (this is a light that shines in a given direction, like a sun). Maybe you will not need the point light anymore then — you can remove it.
-
5. Run the game
Run the game at this point! Just press F9 in the editor.

6. Play animation
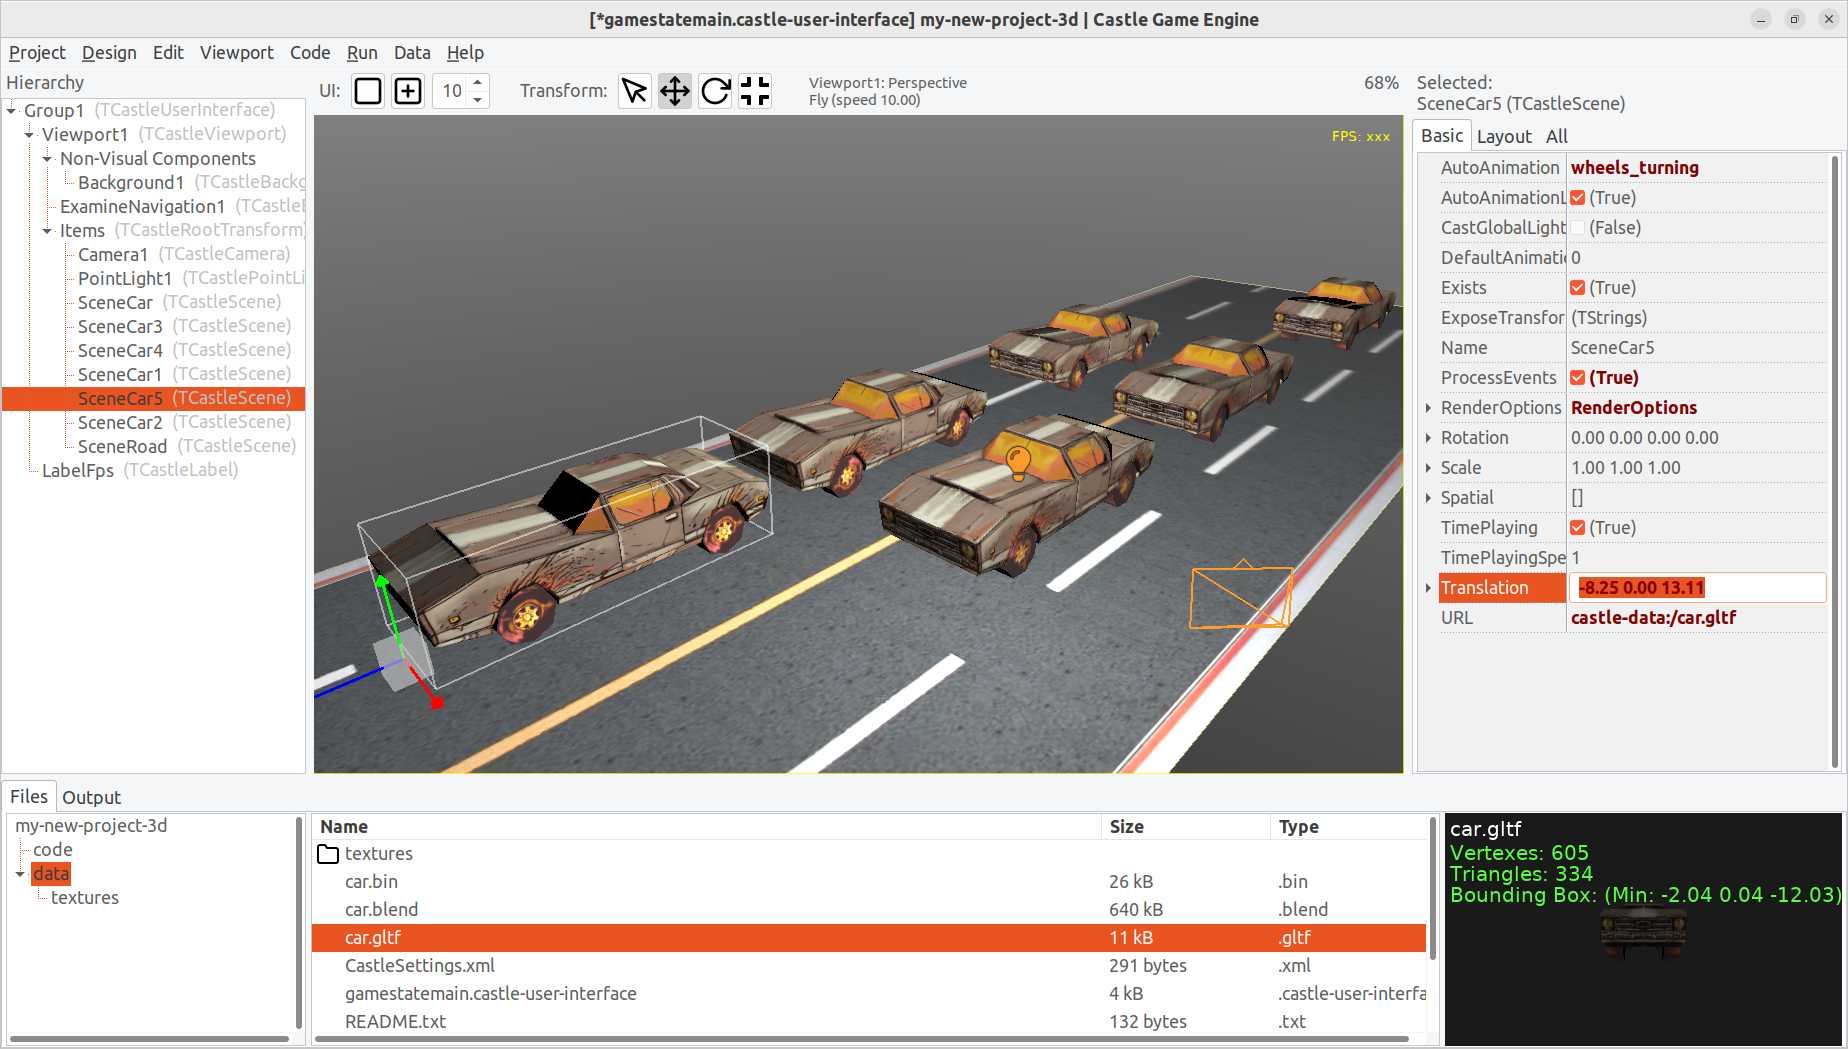
There is a simple animation called wheels_turning defined in the car.gltf model. Let’s configure the scene to automatically play it.
To do this, just edit the AutoAnimation property. You can choose one of the existing animations using the combo box there. Leave the AutoAnimationLoop property at default value of true to make the animation looping.
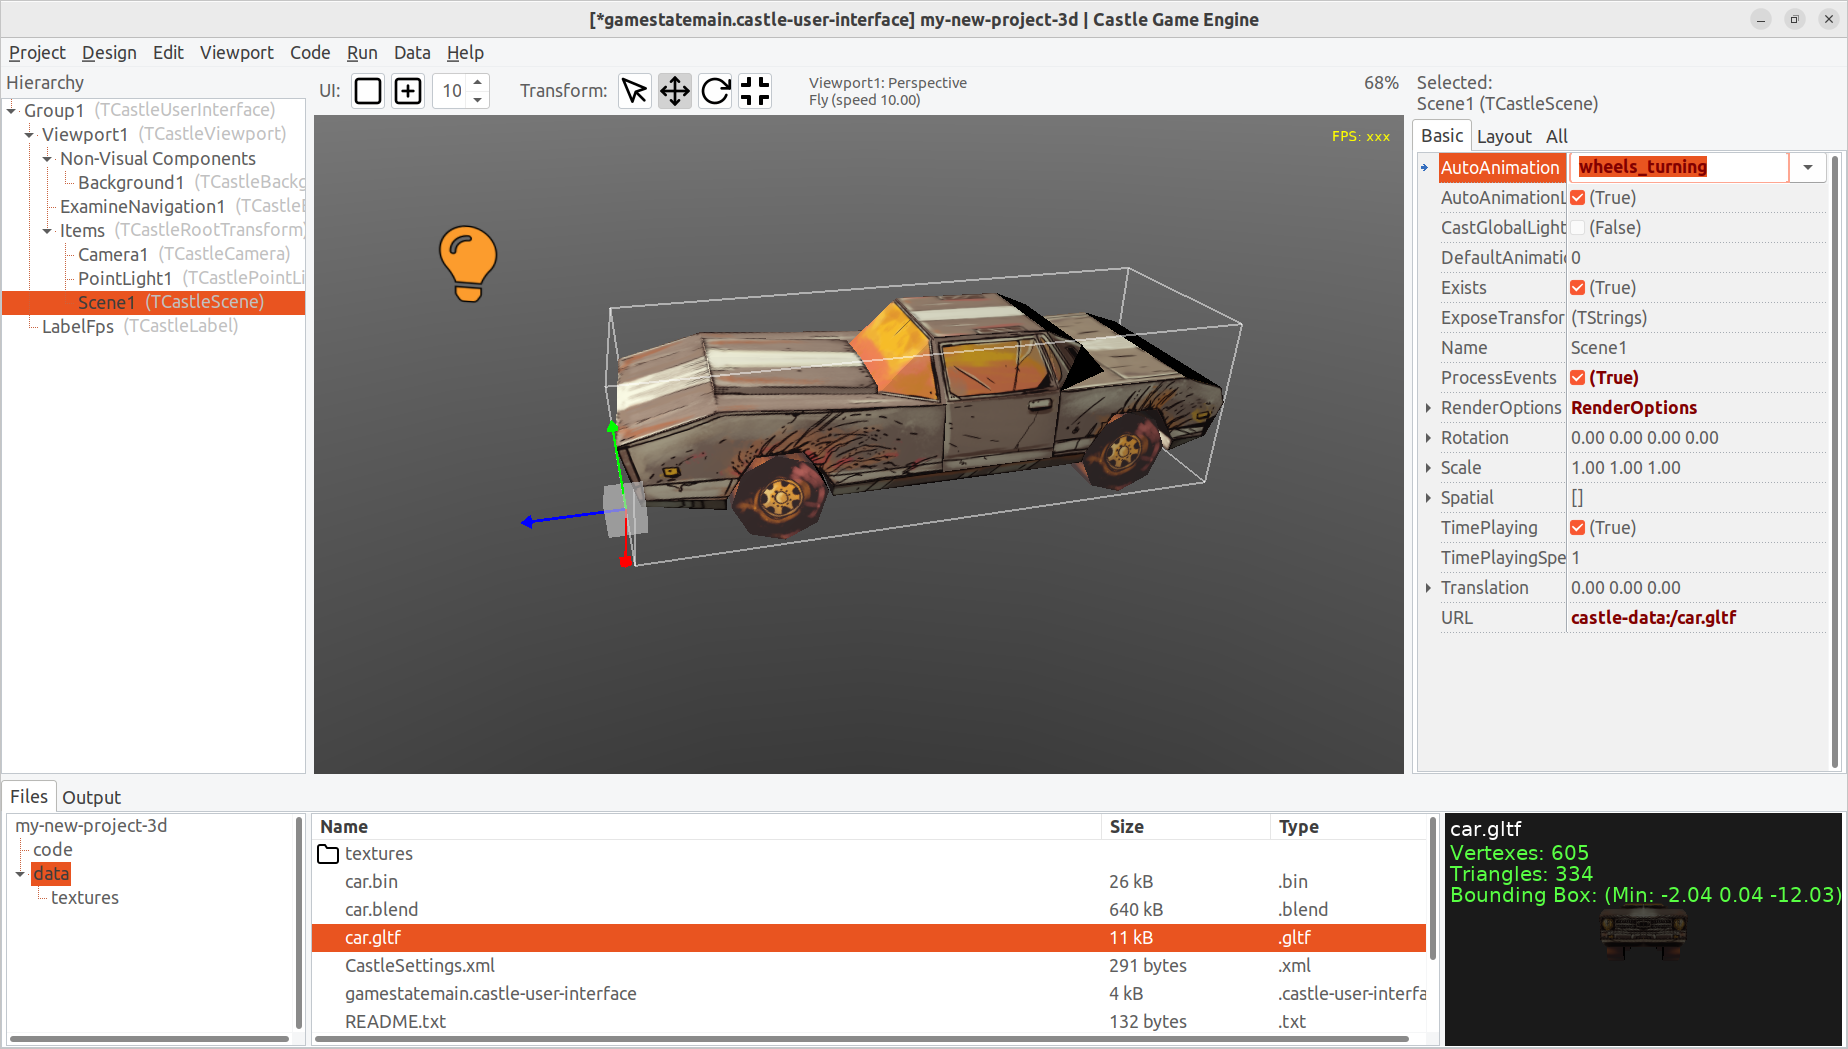
|
Note
|
During the game, you can switch the animation to a different one. You can do this by setting the AutoAnimation and AutoAnimationLoop from code, but usually it is more comfortable to use the PlayAnimation method. Chapter Writing code to modify scenes and transformations shows how to do this.
|
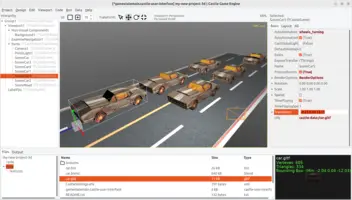
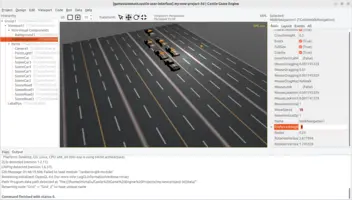
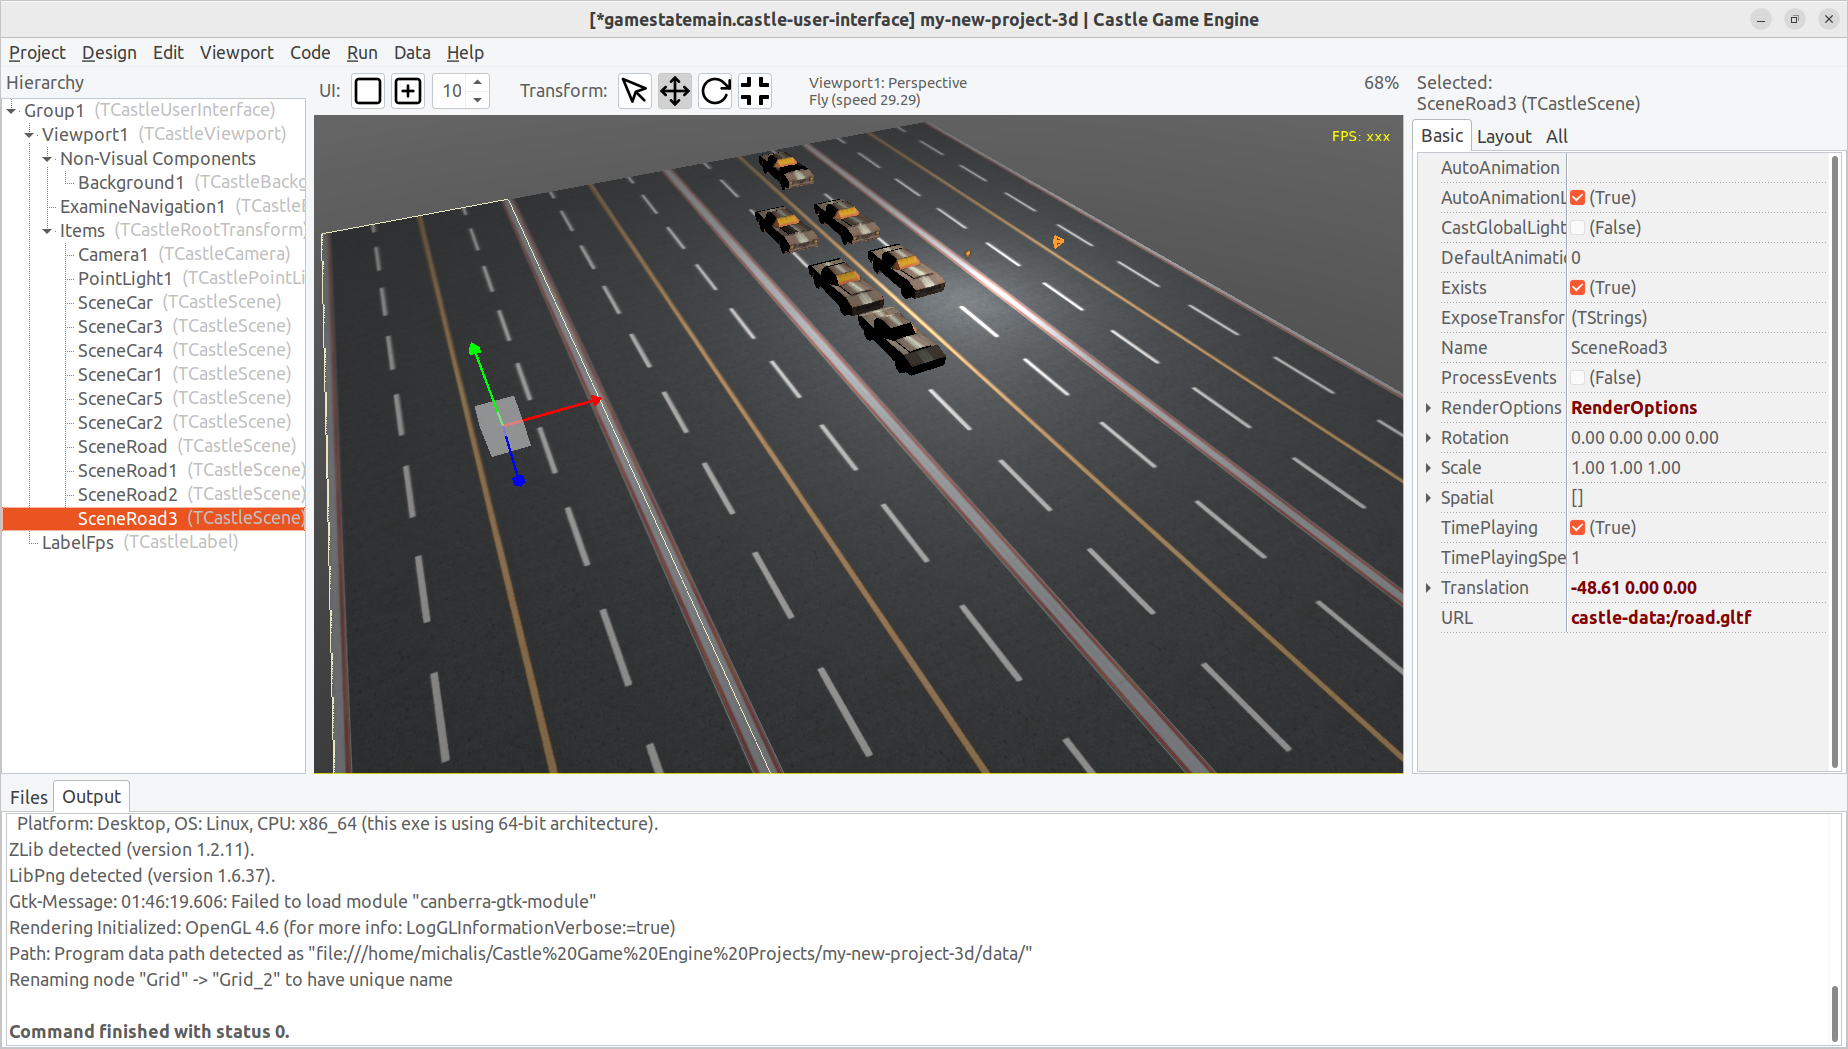
7. Add a road and more cars
Your viewport may contain many scenes. This is how you can design 3D game levels using the Castle Game Engine editor — just add various TCastleTransform (including TCastleScene) instances to the viewport, and arrange them (move, rotate, scale) as needed.
-
Add another scene to the viewport (right-click on the
Itemsproperty of the viewport).Call it
SceneRoad(edit theNameproperty in object inspector, or press F2 in the hierarchy to edit the name).Set its
URLto point to thecastle-data:/road.gltfmodel.

-
Edit the car scene name too, to make it more obvious in the hierarchy. Right now it is called
Scene1, we recommend to edit it toSceneCarnow. -
Add more cars. While you could add new
TCastleSceneinstances, by repeating the process above, it is easier to use "Duplicate" command (key shortcut Ctrl + D) available when you right-click on theSceneCar.New car scenes, named like
SceneCar1,SceneCar2…, will appear at the same position as the original car. Use the "Move Transform" tool to show a "gizmo", to move each car to a unique position. Click and drag on one of the arrows to move the car.You can observe that moving the car using gizmo also updates it’s
Translationproperty in the Layout tab. You can also move the car by just editing the numbers there, to manually input X, Y, Z movement values.


8. Run the game again
Run the game again at this point, to test that you can view the road and animated cars. Just press F9 in the editor.

9. Walk around the level
Now that we have constructed a simple 3D world, composed of multiple scenes (cars and road), it would be nice to walk around in this world using typical FPS (first-person shooter) controls.
-
We recommend first to duplicate the
SceneRoada few times, to have a large floor area to walk on.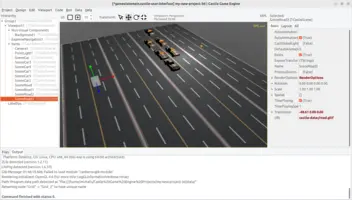
-
Switch navigation mode to walk. To do this, select
ExamineNavigation1component and delete it (just press Delete key), then add toViewport1new navigation by right-clicking and choosing "Add User Interface → Navigation/Walk". This will addWalkNavigation1. -
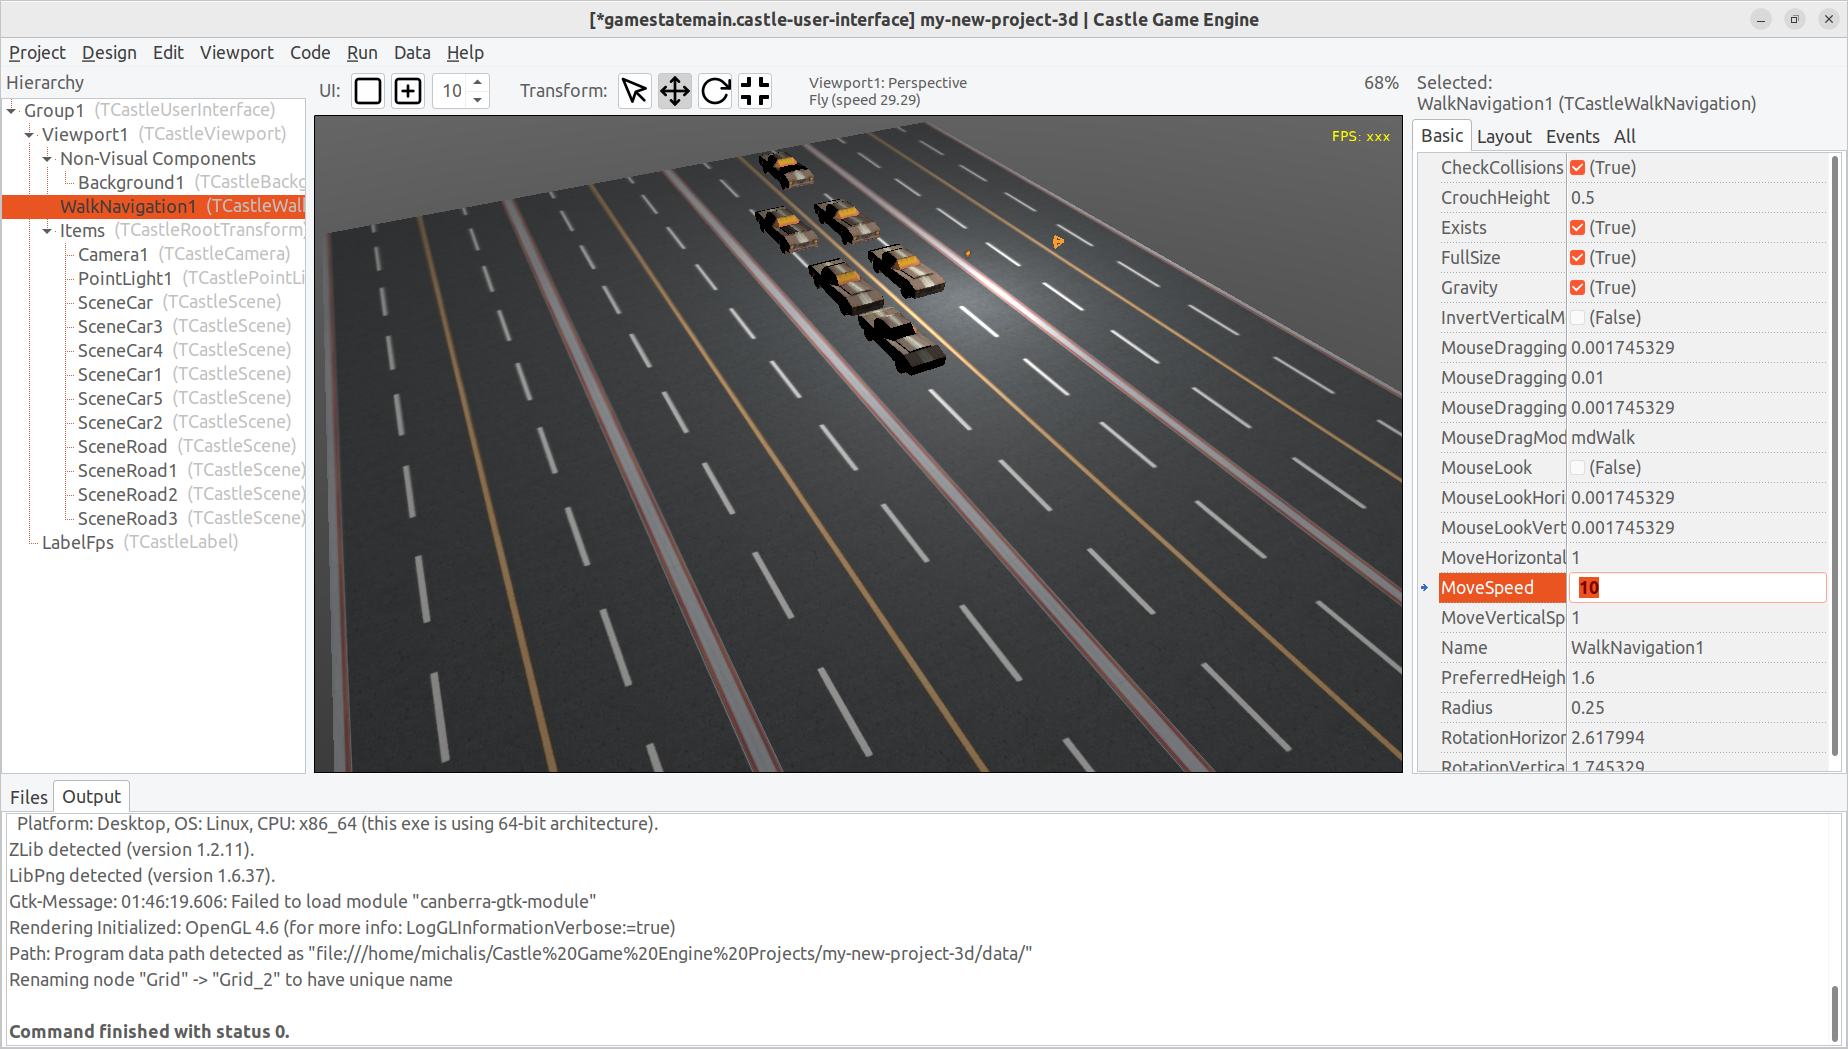
Change the
TCastleWalkNavigation.MoveSpeedproperty of yourWalkNavigation1to move faster. We recommend to set it to 10 now, which means you will move with speed of 10 units (meters) per second. This is not realistic (people are not that fast), but it allows for comfortable testing. Players in games often move unrealistically fast.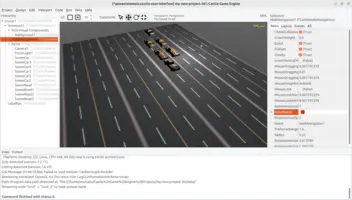
-
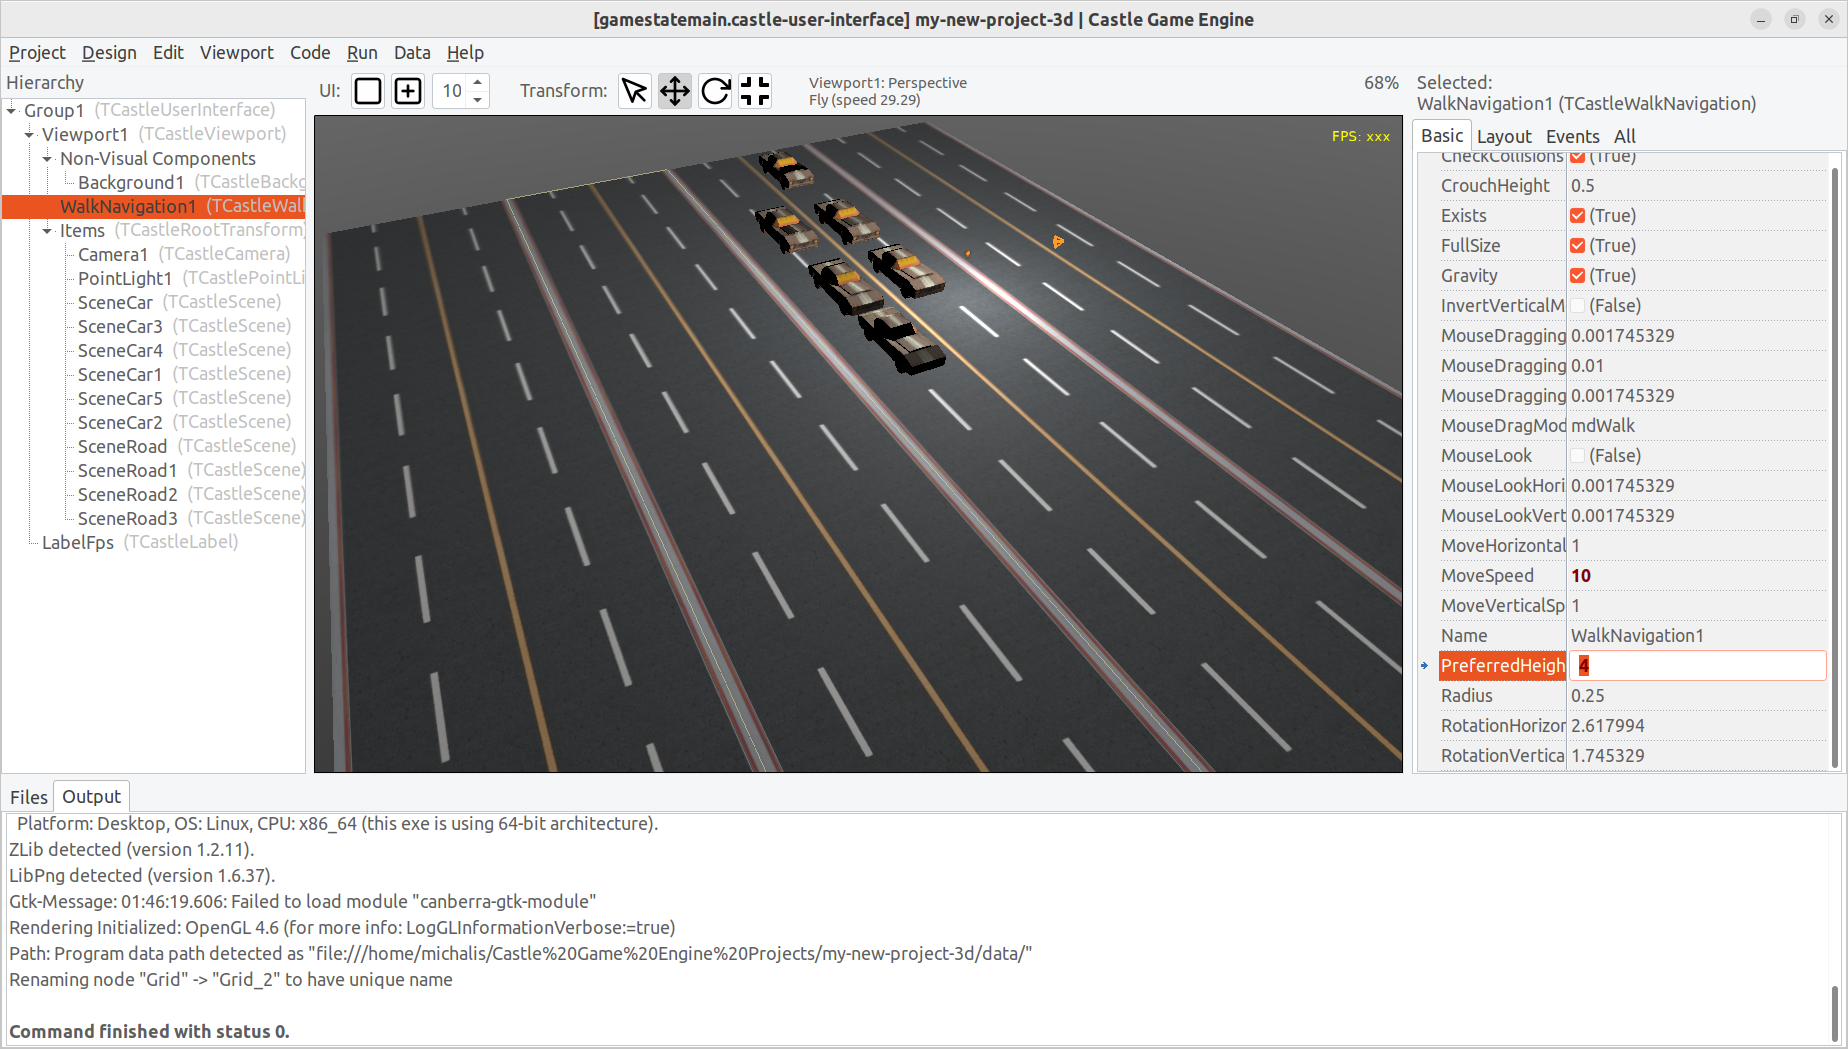
Increase the
TCastleWalkNavigation.PreferredHeightof theWalkNavigation1component. The default value is 1.6, which means that player’s height is 1.6 meters when standing — this corresponds to a normal (not very tall) human. For games, reasonable (but still somewhat realistic) values could be considered between 1.6 and 2.0 (players in games are often tall).For this demo, for now, we recommend you set this value to a big number: 4.0. This is not realistic at all (humans are rarely 4 meters tall :) ), but it will allow to test walking quickly, and will allow you to "walk over" cars. It also matches the unrealistic
10. Run the game - final test!
Run the game again with F9. Walk using:
-
A W S D keys to move (forward, backward, strafe).
-
C key to crouch.
-
Space key to jump.
-
Drag with left mouse button to move and rotate.
-
Use mouse scroll wheel to raise your head / bow down.
Walk over the cars and jump over them to test collisions and gravity.

11. Further things
11.1. Lighting
You can add, modify, delete lights on the level.
To add a new light in Castle Game Engine editor simply click on the Items property of the viewport and choose a new "Add Transform → Light…". Then move/rotate the light as needed. The following light sources are available:
-
TCastlePointLight- omnidirectional light that shines with a certainColor,IntensityandRadius. The rotation of this light doesn’t matter, only the position influences the actual effect. -
TCastleDirectionalLight- light that shines along a certain direction, with certainColorandIntensity. It approximates a light source that is very very far away, like a real-world sun. The position of this light source doesn’t matter, only the rotation influences the actual effect. -
TCastleSpotLight- light that shines from a given position, in a given direction, within a cone. The cone angle is configurable (byCutOffAngleandBeamWidth), as well asColor,IntensityandRadius.
You can also place a light as a child of the camera. This is an easy way to make a headlight. Simply add a TCastleDirectionalLight instance as Camera child to have a headlight, i.e. light shining in the direction you are currently looking.
Watch the presentation how to use light components:
11.2. "Mouse look" navigation
The walk navigation is easiest if you use mouse look. It will allow to move the mouse to rotate around.
11.2.1. Turn on by default
You can activate this by just setting WalkNavigation1.MouseLook property to true. Setting this property doesn’t change the navigation in the editor, but once you run the game the mouse look will work. The game will grab your mouse, and you will rotate by moving the mouse.
Note that, as we grabbed the mouse but didn’t provide any way to "escape" from it, you cannot easily close the game window by clicking on the usual "close" button on the window frame. Just press Alt+F4 on most systems to close it.
11.2.2. Allow to turn on/off using code
Instead of having the mouse look just active by default, we can make it active e.g. only once you click the right mouse button. Clicking the button again could deactivate it.
Such behavior has to be implemented using the code. Chapter Writing code to modify scenes and transformations describes how to edit the game code. We don’t want to get ahead of ourselves… But actually it is quite easy. Just edit the code/gameviewmain.pas file, and
-
Add
CastleCamerasunit to theusesclause in theinterface. -
Declare
WalkNavigation1: TCastleWalkNavigation;inside thepublishedsection of theTViewMain, under the comment { Components designed using CGE editor…. }. -
In
TViewMain.Pressimplementation, add this code:if Event.IsMouseButton(buttonRight) then WalkNavigation1.MouseLook := not WalkNavigation1.MouseLook;
11.3. More precise collisions
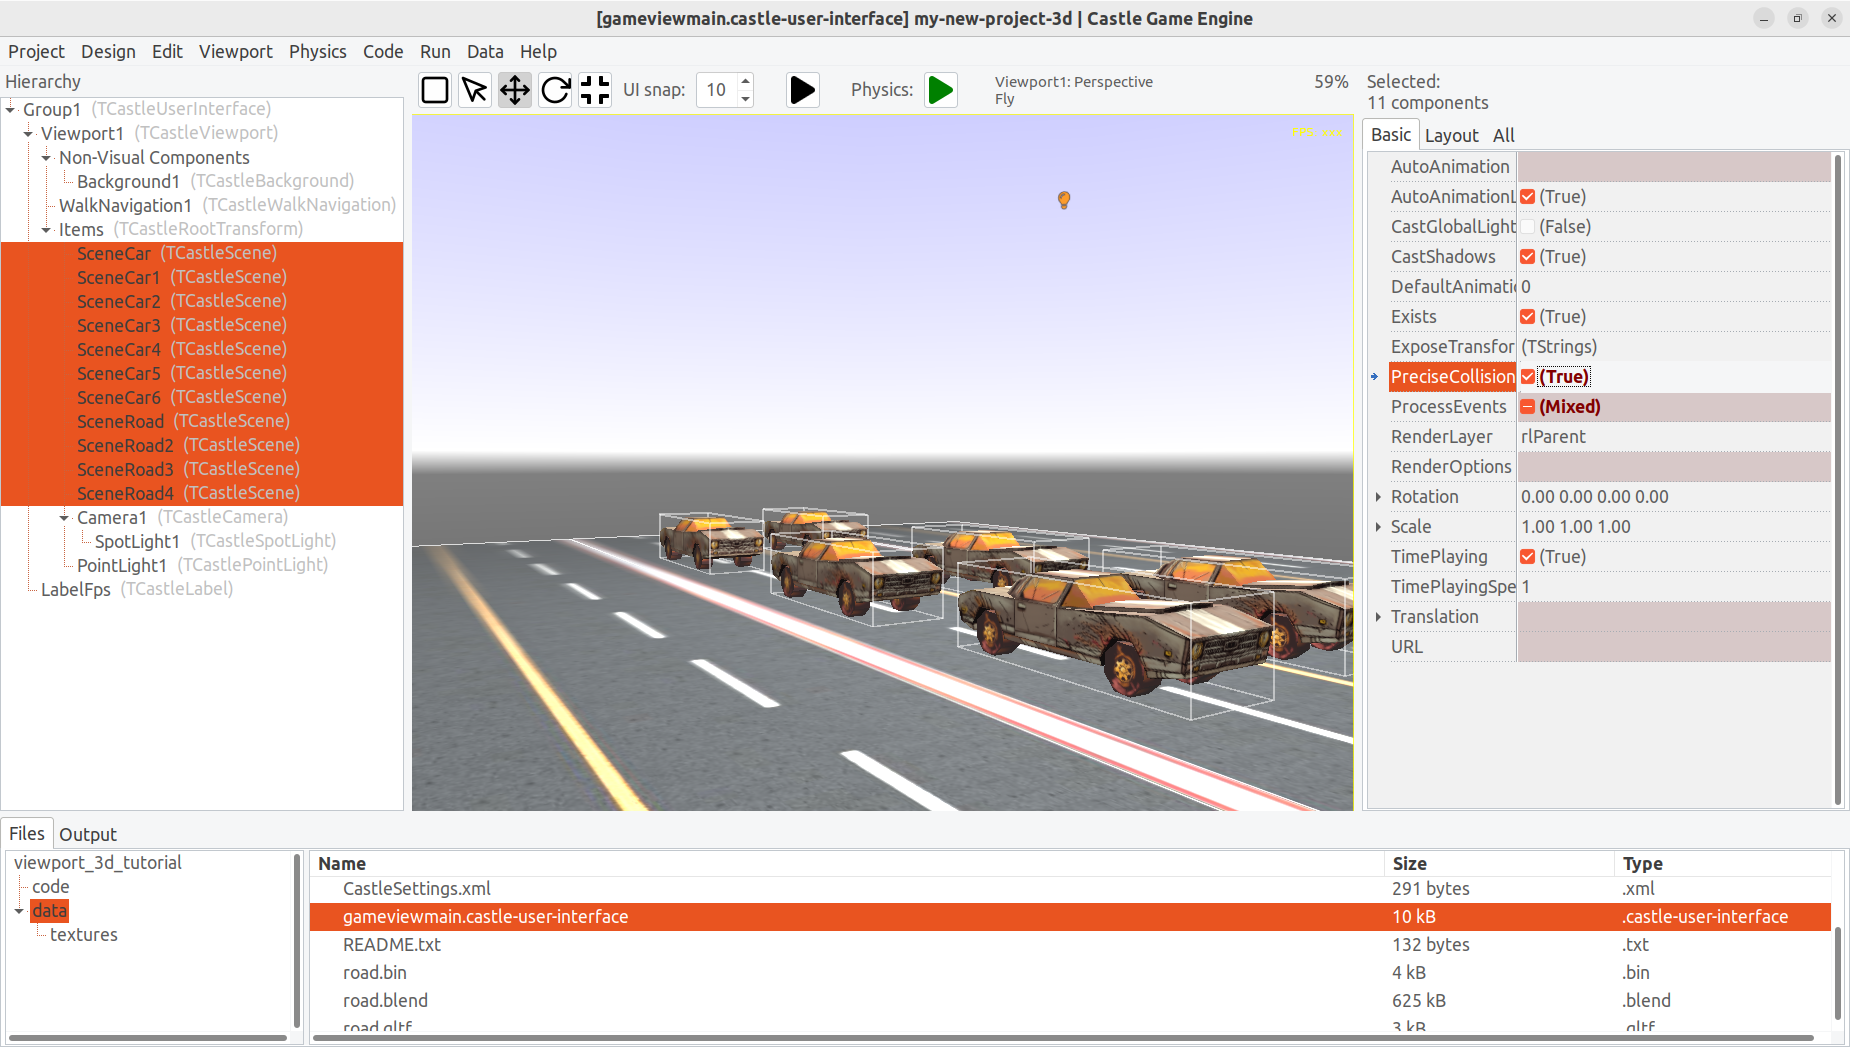
The collisions work correctly in this simple demo, as both the road and cars have simple shapes that can be approximated using boxes. In general, your levels will probably have more complicated shapes. To make any shape work nicely with default navigation collisions, set the PreciseCollisions property of your scenes to true. This means that level collides as a set triangles.
Do this for all your scenes, both cars and roads. Note that you can select multiple scenes in the hierarchy with Ctrl and then edit the PreciseCollisions property of all selected scenes at one.
|
Note
|
As outlined in physics, the PreciseCollisions property will at some point in the future be deprecated. What we will recommend instead is that you add a TCastleMeshCollider to your scene. This waits for TCastleWalkNavigation to be able to use physics to move.
|
11.4. Multiple instances of the same scene (using TCastleTransformReference)
It is possible to optimize the usage of resources, when you want to instantiate the same resource multiple times, and each instance has the same state (which means that it is static, or plays the same animation).
-
Remove the car copies you made with "Duplicate" command earlier. You’ll add copies in a different way. Leave only one car,
SceneCar. -
Add new copies by right-clicking on the
SceneCarin the hierarchy and choosing "Duplicate Linked (TCastleTransformReference)" from the context menu. Or just use shortcut Ctrl+Shift+D.
|
Note
|
Alternatively, you can add
|
Done. Now you can have lots of cars — yet they all share the same data, by referencing (in memory) the same SceneCar instances. This is great to conserve resources and speed when you need a lot of instances of something. E.g. this would be great for trees on a big outdoors level.
To improve this documentation just edit this page and create a pull request to cge-www repository.