#!/bin/bash
set -e
# Include current directory in LD_LIBRARY_PATH, to find Steam dynamic library
export LD_LIBRARY_PATH="${LD_LIBRARY_PATH}:."
./steam_test "$@" # <- replace this with name of your applicationManual
Steam
Table of Contents
1. Introduction
Out-of-the-box our engine includes integration with Steam. This allows you to use Steamworks API from Pascal code to
-
Use Steam achievements (list, get, set state).
-
Get some information from Steam (country, language, VR mode, Steam Deck, whether some DLC is installed).


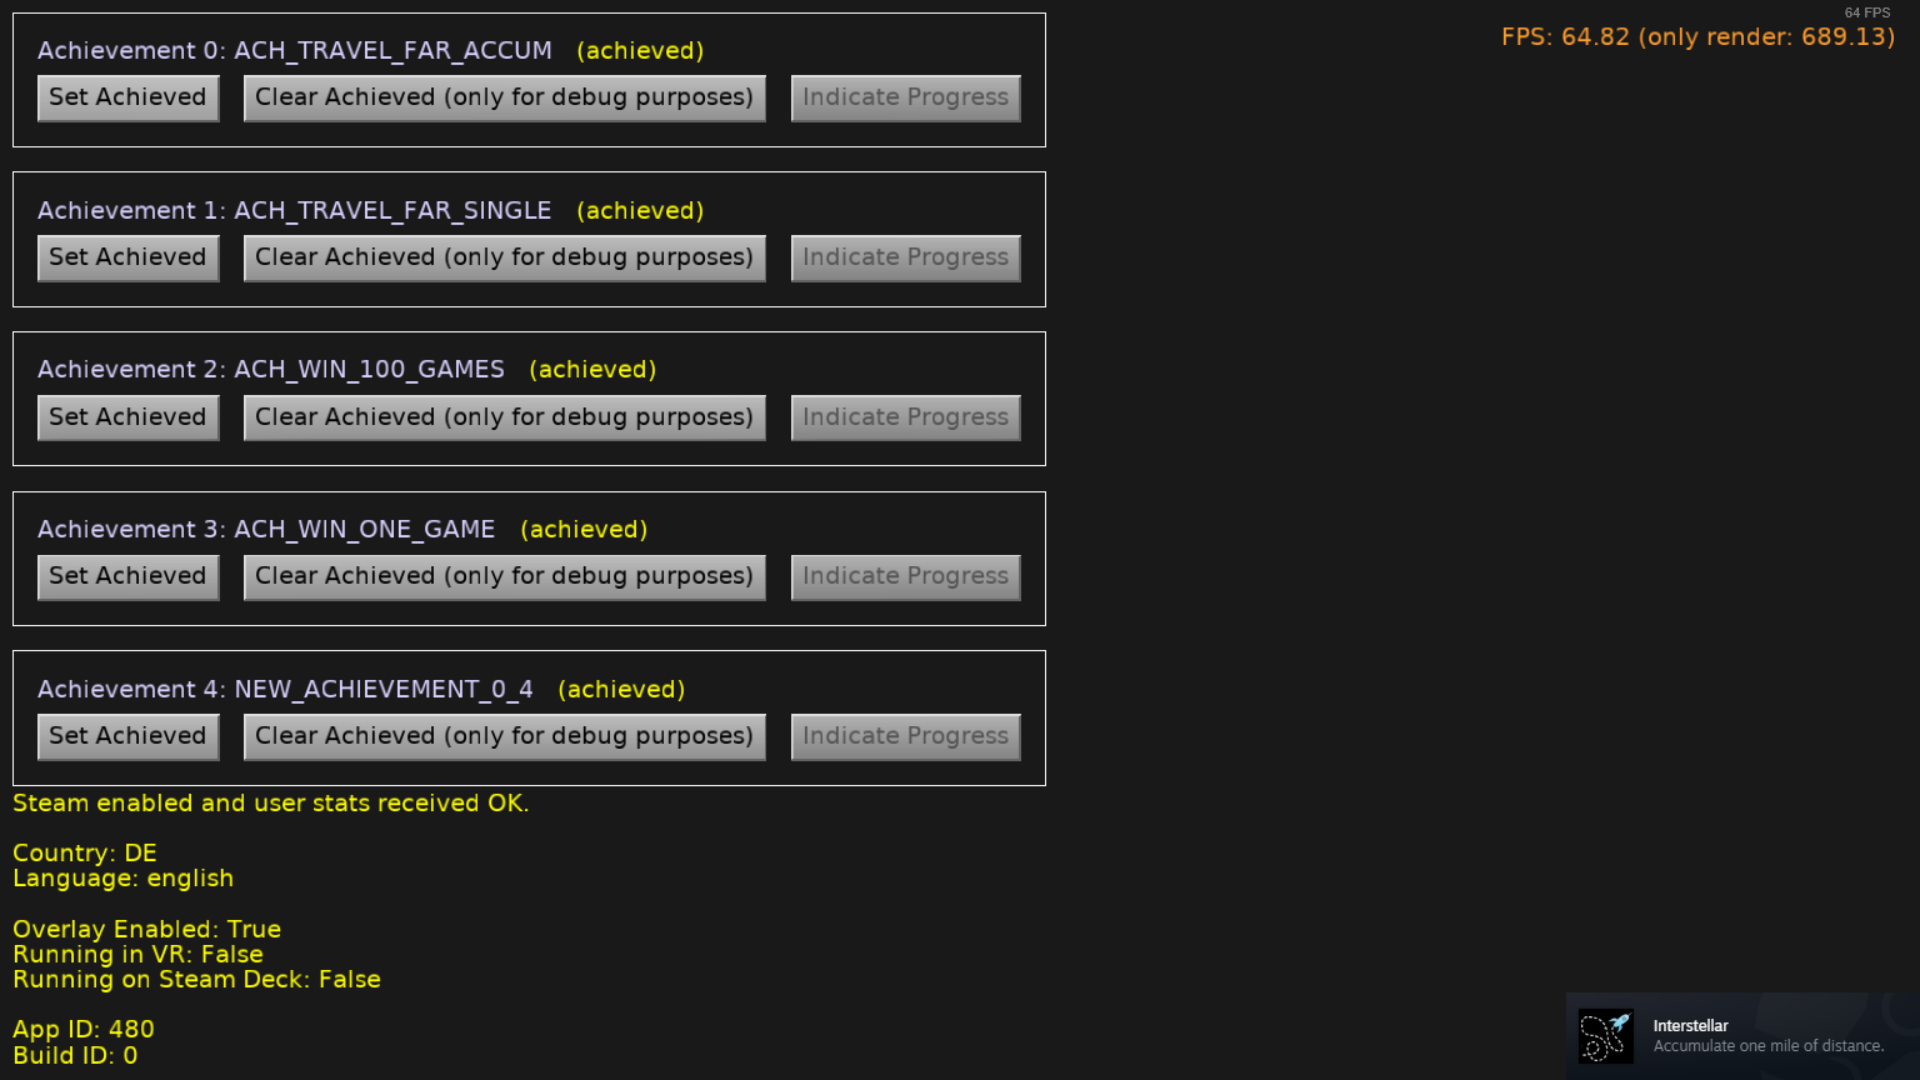
2. Example
Consult the examples/steam for a ready application that connects to Steam and allows to experiment with achievements — list them, clear, set.
3. Get the Steam dynamic library
In order for the integration to work, you need to set up the Steam dynamic library in your project. (For start, we advise to test it with examples/steam example mentioned above.) If you don’t do this, then the integration will do nothing — the game will run, but without the Steam dynamic library we cannot "talk" with Steam.
-
First, you need to be a registered Steam partner to have access to the Steam API.
-
Download the corresponding dynamic library from Steamworks downloads.
NoteCurrent code that integrates with Steam API requires a specific version of SteamWorks: 1.57. So you need to specifically get steamworks_sdk_157.zip. -
Extract the
steamworks_sdk_157.zipwherever you like. -
Copy the dynamic library from the extracted Steamworks SDK to your project.
The necessary libraries are in the
sdk/redistributable_bin/<platform>subdirectories.For example, in case of 64-bit Windows, copy the DLL file from
sdk/redistributable_bin/win64/steam_api64.dllinto the same directory as your .exe file. This is just the top-level directory of your project, if you build it in a standard fashion using our build tool or editor.NoteYou can ignore *.libfiles on Windows, they are not needed for dynamic linking. -
Additional step necessary on Linux: Create a
run.shscript to run your game on Linux with a modifiedLD_LIBRARY_PATH. This is necessary to link with the Steam dynamic library. Just create a new file, calledrun.shin your project’s top-level directory with contents like this:Save this file and do
chmod +x run.sh. Now you can execute it like./run.sh. Our build tool and editor are aware of this convention, so they will also execute your game through therun.shscript automatically.See examples/steam/run.sh file.
NoteThe instructions above assume a simple case where you only support one Linux architecture, most likely the modern x86_64. If you want to support multiple architectures with Linux (Steam supports bothi386andx86_64now) then you have to place thelibsteam_api.soin a CPU-specific subdirectory and extendLD_LIBRARY_PATHto include different subdirectories, based onuname --processor.NoteWe deliberately say this step matters for Linux, not Unix in general. That’s because on macOS (which is also Unix) you typically use an application bundle, and then our build tool and library loading cooperate to make things work automatically (the build tool copies *.dylibinside application bundle, and when loading we look inside the bundle). And other Unixes, like FreeBSD, are not supported by Steam as of now. -
Additional step to package your application: You want to distribute your application with the Steam dynamic library. To do this, extend the CastleEngineManifest.xml in your project to package the Steam dynamic library, like this:
<package>
  <!-- For 64-bit Windows -->
  <include path="steam_api64.dll" />

  <!-- For Linux -->
  <include path="run.sh" />
  <include path="libsteam_api.so" />

  <!-- For macOS: nothing is necessary for now.
    We pack lib*.dylib (and steam_appid.txt for testing)
    into bundle alongside exe automatically. -->
  <!-- include path="libsteam_api.dylib" /-->
</package>
As an example, see examples/steam/CastleEngineManifest.xml.
4. Using Steam integration from Pascal
Use the unit CastleSteam and class TCastleSteam for all the features. The typical usage goes like this:
-
Define an instance of a
TCastleSteamclass.We recommend to do this in a dedicated new unit in your project, like
GameSteam. Later you may put there other useful things related to the Steam integration (like constants for application id, achievement names etc.)See the examples/steam/code/gamesteam.pas for a working example.
-
Create an instance of
TCastleSteamclass, like this:Steam := TCastleSteam.Create(AppId);We recommend to do this along with the rest of your game initialization, in the callback you provided to the
Application.OnInitialize. See examples/steam/code/gameinitialize.pas. But in principle, you can create it at any time. -
Right after the constructor you can check if everything is OK (in particular, we found Steam dynamic library) by checking
TCastleSteam.Enabled. -
If
TCastleSteam.Enabledistrue, then some time after you should see theTCastleSteam.UserStatsReceivedchange fromfalsetotrue. You can observe this property e.g. in theUpdatemethod of your view or assign a callback toTCastleSteam.OnUserStatsReceived. -
Once
TCastleSteam.UserStatsReceivedistrue, you’re good to go. You can report achievements usingTCastleSteam.SetAchievement.
5. Steam application id in our example application
The example on examples/steam by default uses application id of SteamWorks game example: SpaceWar.
|
Note
|
Using this example will add the "SpaceWar" game to your Steam library. Moreover, if you don’t see the achievements initially (integration seems to work but 0 achievements are visible), then just view "SpaceWar" in your Steam library and run our test again. This seems to be just a quirk of this test game and the way Steam automatically adds it to your library. Things are smooth for a real game that you own before you run. |
However, you can edit this example to use your own application id. You will have it once you have created your own application on Steam. The application id is specified in 2 places, be sure to change them both:
-
AppIdconstant in the examples/steam/code/gamesteam.pas unit. -
steam_appid.txt file in the same directory as the executable.
When testing with your own game, make sure that:
-
you own the application on Steam, i.e. you have it in your Steam library,
-
it has some achievements set up, otherwise no achievements will be displayed by our example.
6. Testing the Steam integration
Depending on how you run the game (clicking "Play" in Steam, or by running the exe) and whether the steam_appid.txt file is present, the Steam integration will behave a bit differently.
The important advise is: When you upload the application to Steam, or when you give end-users a ZIP with the game (with Steam integration included), do not include the steam_appid.txt file. The steam_appid.txt file is supposed to be used only during development — see below, it prevents from ever restarting the process.
Details, how the game behaves:
-
Ways to run the game for end-users:
-
Running the game by clicking "Play" from Steam: This is the most common way how end-users run a Steam game. Of course Steam integration "just works" in this case.
-
Running the game by running the exe file directly (without the
steam_appid.txtfile present): In this case, the exe will immediately close and restart the game through Steam. It will even start Steam (and display Steam login dialog if necessary), if Steam was not running already.This even works if Steam is not installed (we tested this case on Windows). In this case, the game will not restart, and it will continue to work (without Steam integration of course).
This is a nice way when you want to distribute your game as a ZIP file but you want it to still integrate with Steam (e.g. report achievements), if only user has Steam.
-
-
Ways to run the game that should only be used during development:
-
Running the game by running the exe file directly (with the
steam_appid.txtfile present), when Steam runs in the background: Steam integration still works (and the game doesn’t need to restart). -
Running the game by running the exe file directly (with the
steam_appid.txtfile present), when Steam does not run in the background: Steam integration will not work. But nothing crashes etc. So it’s not a problem, just remember during testing that Steam achievements are not collected in this case.
-
7. Platforms supported and tested
-
Windows / x86_64
-
Windows / i386
-
Linux / x86_64
-
Linux / i386 (TODO: untested, but should work out-of-the-box)
-
macOS / x86_64
-
macOS / arm64 (TODO: untested, but should work out-of-the-box)
Castle Game Engine supports a few more platforms (even for desktop, like Linux / Aarch64 or FreeBSD), but Steam does not support other platforms.
|
Note
|
We put quite some effort to make our Steam integration code clean and simple. E.g. there’s no wrapper library. And we dispatch Steam callbacks using the SteamAPI_ManualDispatch_GetNextCallback and friends — no assembler, no hacks to simulate C++ VMT. This implies that our integration should "just work" on any platform supported by Steam, as long as you provide the Steam dynamic library.
|
8. TODO
-
Steamworks includes a lot of useful features and in time, we plan to integrate them more. For example
-
support joysticks through Steam API (would allow to account for essentially any gamepad in a uniform fashion).
-
support SteamDeck-specific API (e.g. to invoke on-screen keyboard).
-
-
We also plan to simplify some pieces of above "Get the Steam dynamic library" section. The need to define
run.shand extend<package>should disappear once we define "services on desktop platforms", this is part of our roadmap about making packages.
You’re most welcome to discuss more ideas and ping us about it. Supporting us on Patreon toward this goal is also very much appreciated.
To improve this documentation just edit this page and create a pull request to cge-www repository.