procedure TMyView.Create(AOwner: TComponent);
begin
  inherited;
  SomeImage := TDrawableImage.Create('castle-data:/image.png');
end;
...
procedure TMyView.Render;
begin
  inherited;
  SomeImage.Draw(XOnScreen, YOnScreen, WidthOnScreen, HeightOnScreen);
end;Images
1. Display images
There are 3 recommended ways to display an image using Castle Game Engine.
1.1. TCastleImageControl (image as user interface component)
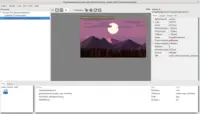
When the image is part of a 2D user-interface, use TCastleImageControl. Set the TCastleImageControl.Url to load the image.
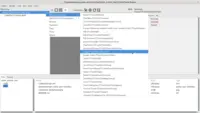
You can create such image components using Pascal code or using the CGE visual editor.
Manual chapter Designing user interface describes using images in UI.
1.2. TCastleImageTransform (image component inside a viewport, with powerful game features)
When the image is part of the viewport, use TCastleImageTransform. Set the TCastleImageTransform.Url to load the image.
Such images are part of the viewport. See manual about viewport. The advantages of this approach are:
-
you have a camera (to control what user sees) in a viewport.
-
you can trivially have a working navigation, in 3D or 2D, too.
-
you can combine the image with other
TCastleTransformcomponents. In particular you can addTCastleScenewith animations (sprite sheets), you can transform images in 3D too, you can display everything freely behind or in front of images. -
such images can have physics colliders and rigid bodies.
1.3. TDrawableImage (drawing image yourself)
The last method is to load the image to TDrawableImage. This is the low-level approach, where you will need to manually handle drawing the image at the appropriate moment, following manual about custom-drawing UI things in CGE.
The basic code example is:
2. Which approach to use?
The approaches 1 and 2 can be used when designing the game in the editor and are more advised.
Approach 3 may be easier to use in some cases (if you already think in terms "I want to have code that draws images").
3. Supported image formats
All approaches handle all the image formats supported by CGE, like PNG or JPG; see Castle Image Viewer docs for the full list.
4. Batching
Batching is a technique to increase rendering speed by passing multiple requests to draw the same image as a single draw call to the lower-level rendering API. If you draw the same image (maybe a different subset of the same image) a lot, then batching can be a significant speedup. For example, rendering something similar to a 2D tile map / grid can often benefit from batching.
To use batching:
-
If you use UI and
TCastleImageControl, enableTCastleContainer.UserInterfaceBatching. See this news. -
If you use
TCastleImageTransform, enableTCastleViewport.DynamicBatching. -
If you use
TDrawableImage, it has explicit methods to draw multiple images at once. Effectively, you can make your own batching. You can also useTDrawableImage.BatchingBeginandTDrawableImage.BatchingEndto automatically batch as much as possible.
5. See also: Tiled maps for 2D games
If you want to draw 2D maps, see how you can use Tiled and render maps using dedicated TCastleTiledMap.
See the Tiled maps manual chapter for details.
This is an alternative to drawing a map using images.
6. Internal: Image types in CGE
-
TCastleImageControlis a descendant ofTCastleUserInterfaceand allows to use the image as part of the UI. It refers toTCastleImagePersistentto load image contents using cache. It is a trivial user-interface control to render image on the screen. It can be added and configured in the editor. -
TCastleImageTransformis a descendant ofTCastleTransformand allows to place the image in theTCastleViewport, modify image size, repeat it many times etc. It is also useful from the editor. -
TEncodedImageis an image loaded to a regular memory (RAM) to operate on it by Pascal code (that is, on CPU).Important descendant of
TEncodedImageisTCastleImagewhich is an image that is expressed in memory as directly-accessible array of pixels. It has more descendants for grayscale, RGB, RGBA, float-based images etc. If you want to edit image on CPU, this is what you will use. E.g. createTRGBAlphaImageand iterate overTRGBAlphaImage.Pixels. There are many methods to draw lines, shapes, text to the image.Images are usually 2D, but we also support 3D, for 3D (volumetric) textures.
-
TDrawableImageholds an image (loaded fromTEncodedImage) on GPU. It can be actually rendered on the screen.Also, you can edit this image by drawing to it on GPU, see
TDrawableImage.RenderToImageBegin. Example is in examples/images_videos/draw_images_on_gpu.lpr. -
TCastleImagePersistentis a container aroundTCastleImageandTDrawableImage. It is using cache to load images. It is visually configurable in the CGE editor.It’s like a
TPicturein VCL — it doesn’t draw the image, but it has everything else to describe how to load and draw the image. It’s used byTCastleImageControl.Image,TCastleButton.CustomBackgroundNormal,TCastleButton.CustomBackgroundPressedetc. -
There are a few X3D nodes to express images. The most important are
-
TImageTextureNodewhich is an image loaded from URL (set likeMyImageTexture.SetUrl(['castle-data:/my_image.png'])) -
TPixelTextureNodewhich is an image defined byTCastleImage(set likeMyPixelTexture.FdImage.Value := MyImage, remember thatMyImagebecomes "owned" byTPixelTextureNode).
These nodes are used underneath when you load image into
TCastleSceneorTCastleImageTransform. We do not advise using these nodes directly, -
TODO: There are too many classes above. In time, we hope to remove some of the above, and hide some others (in internal units). See roadmap.
7. Deprecated: load image directly in TCastleScene
You can load the image to TCastleScene, using the TCastleScene.Load method (or by setting TCastleScene.URL). While traditionally TCastleScene is used for "heavier" 3D and 2D assets, it is perfectly suitable to also just use it to render a trivial rectangle with a simple image. See CGE manual about loading and using scenes.
Under the hood, this method creates nodes to define a rectangle, and applies the image as a texture. The "manual" way of achieving the same is presented in the example code here.
This approach is deprecated now, as TCastleImageTransform is better.
7.1. Parameters when loading image to TCastleScene
By default we display an entire image. Alternatively, when loading the image to TCastleScene, you can use a special syntax with URL anchors to specify a subset of the image. That is, instead of
my_image.png
you can load
my_image.png#left:100,bottom:100,width:256,height:256
This will cut the appropriate subset of the image.
These are the parameters:
-
leftLeft coordinate of chosen rectangle (in image pixels)
-
bottomBottom coordinate of chosen rectangle (in image pixels)
-
widthWidth of chosen rectangle (in image pixels)
-
heightHeight of chosen rectangle (in image pixels)
All the parameters are integers (we have not yet found a use-case to make them floats, but please tell us if you have such use-case).
Note that if you specify area that is too large (outside of the actual image area), the excessive pixels will show the clamped image border (the image is simply rendered as a texture with repeat=FALSE).
To improve this documentation just edit this page and create a pull request to cge-www repository.

