-
move some object,
-
check whether player is in some state,
-
check whether user is pressing some key to keep doing something, as long as user holds the key down.
Writing code to modify scenes and transformations
Table of Contents
- 1. Introduction
- 2. Example code
- 3. Where to edit code
- 4. Creating initial project
- 5. Refer to the designed components
- 6. Change the existence of a scene
- 7. Creating TCastleScene
- 8. Playing animation
- 9. Moving scene in each update
- 10. Multiple instances of the same scene
- 11. Building a mesh using code
1. Introduction
In this chapter we’ll show how to do some useful operations on viewports and scenes using Pascal code. We assume you have already read the overview of the viewport and scenes and Tutorial: Designing a 3D world (that shows how to set up things using the editor).
By editing Pascal code you can do much more than what is possible by just designing in the Castle Game Engine editor.
-
All the classes that you can create using the Castle Game Engine editor can be also created using code. Creating these classes from code allows to do it at any moment in the application. For example you can spawn a new
TCastleScenewhen user presses a key.We call these classes components, as they descend from standard Pascal
TComponentclass. -
Likewise, it is possible to adjust all of the classes properties, whenever you want. For example, you can update the
Translationto move some object. -
Moreover, there are many engine features that are only available using Pascal code, as exposing them in the editor is not easy (though we work on making more and more features available in the editor).
2. Example code
 |
The complete result of this tutorial is in the Castle Game Engine. Just open the project examples/viewport_and_scenes/cars_demo and consult it as necessary.
3. Where to edit code
In simple applications, most of the code modifications will be done in the Pascal file that defines your view.
If you started from the "Empty" template, this view is called Main by default, and the Pascal unit is code/gameviewmain.pas.
If you started from the "3D FPS game" or "2D game" templates, then you have 2 views created by default. The actual game is in view called Play, and the Pascal unit is code/gameviewplay.pas.
You can just double-click on that Pascal file in Castle Game Engine editor. It will open your code editor, like Lazarus or Delphi or Visual Studio Code (see installation for instructions how to configure this).
The Pascal unit defines a class called like TViewMain that descends from TCastleView. It overrides some virtual TCastleView methods, and these are the usual places where you will want to add your own code:
-
TViewMain.StartoverridesTCastleView.Start. It is run once when we enter the view. It is a good place to initialize something. -
TViewMain.UpdateoverridesTCastleView.Update. It is run very often, multiple times per second. It is a good place to do something you have to do constantly. Use this for example to -
TViewMain.PressoverridesTCastleView.Press. It is run when user presses a key or a mouse button.
See Designing user interface and handling events chapter that also talks about the view code.
4. Creating initial project
If you want to try all the examples on this page yourself, we recommend that you create a simple test project now. Follow a subset of the Tutorial: Designing a 3D world instructions to:
-
Create a new project using the "Empty" template.
-
Add an instance of
TCastleViewporton the design. Call itMainViewport. -
Add the sample 3D models of the car and road: copy them from CGE
examples/viewport_and_scenes/cars_demo/datainto your project. -
Add an instance of
TCastleSceneon the design. Call itRoadScene, and load therecastle-data:/road.gltf.
5. Refer to the designed components
Often, your code will need to refer to some components that you have added in the editor. The component Name is used to uniquely get an instance of this component from code. In this example, we want to access MainViewport and RoadScene in Pascal. To do this:
-
Declare their corresponding fields. Do this in the
publishedsection ofTViewMainclass, near the comment { Components designed using CGE editor…. }. There should beLabelFpsalready defined (it is part of the "Empty" template), you will add 2 new lines below it:RoadScene: TCastleScene; MainViewport: TCastleViewport;The end result is that
TViewMainclass starts like this:type { Main view, where most of the application logic takes place. } TViewMain = class(TCastleView) published { Components designed using CGE editor. These fields will be automatically initialized at Start. } LabelFps: TCastleLabel; RoadScene: TCastleScene; MainViewport: TCastleViewport; -
Remember to add the necessary units to your
usesclause to have the appropriate identifiers defined. If you follow the reference links, like this one:TCastleScene, then you will see in which unit is each identifier defined.TCastleSceneclass is part of theCastleSceneunit.TCastleViewportis part of theCastleViewportunit.
That’s it. Now anywhere in your view code you can access RoadScene or MainViewport.
Compile and run the application now. Use menu item "Run → Compile And Run (F9)" from the Castle Game Engine editor.
If you are familiar with Lazarus or Delphi or other IDE, you can also compile and run from there. Use "Code → Open Project in Code Editor" to open your code editor. In Lazarus or Delphi you can again press F9 to compile and run (possibly inside a debugger).
6. Change the existence of a scene
Now that we have a reference to RoadScene, let’s make a simple modification: let’s make to road disappear when user presses the key R on the keyboard. And appear again, when user presses R again.
To do this, we will react to pressing the R key and toggle the Exists property of RoadScene.
-
Find the
TViewMain.Pressimplementation. -
In the implementation, add these lines:
if Event.IsKey(keyR) then begin RoadScene.Exists := not RoadScene.Exists; Exit(true); end; -
Add the
CastleKeysMouseunit to theusesclause.
Testing Event.IsKey(keyR) is the way to test whether user pressed a key that generates letter R.
When user pressed R, we toggle the Boolean value of RoadScene.Exists. So it will change to false if it is true right now, or change to true if it is false right now.
We return using the Exit(true) call to tell the parent user interface control that "pressing this key has been handled". This doesn’t really matter in case of this simple application, as nothing else is interested in handling the input. But it matters for more complicated setups, when multiple controls may be interested in handling the same key.
Compile and test the code. The road should appear / disappear as you press R on the keyboard now.
|
Note
|
Another way to show and hide the scene would be to toggle the You can also make a scene non-collidable but still visible. Use |
|
Note
|
All these properties ( |
|
Note
|
Yet another way to make the scene non-existing would be to remove it from
|
7. Creating TCastleScene
You can create TCastleScene instances using code. You can add the created scene to a viewport and adjust it’s properties like Translation.
-
Declare a new field
CarScene: TCastleScenein theprivatesection ofTViewMain. -
In the
TViewMain.Startadd code to initialize it, load car model, and add to the viewport:CarScene := TCastleScene.Create(FreeAtStop); CarScene.Load('castle-data:/car.gltf'); CarScene.PreciseCollisions := true; MainViewport.Items.Add(CarScene);
Doing this in TViewMain.Start isn’t yet very useful. We could have added the car scene using the editor too. But it will be useful later.
8. Playing animation
 |
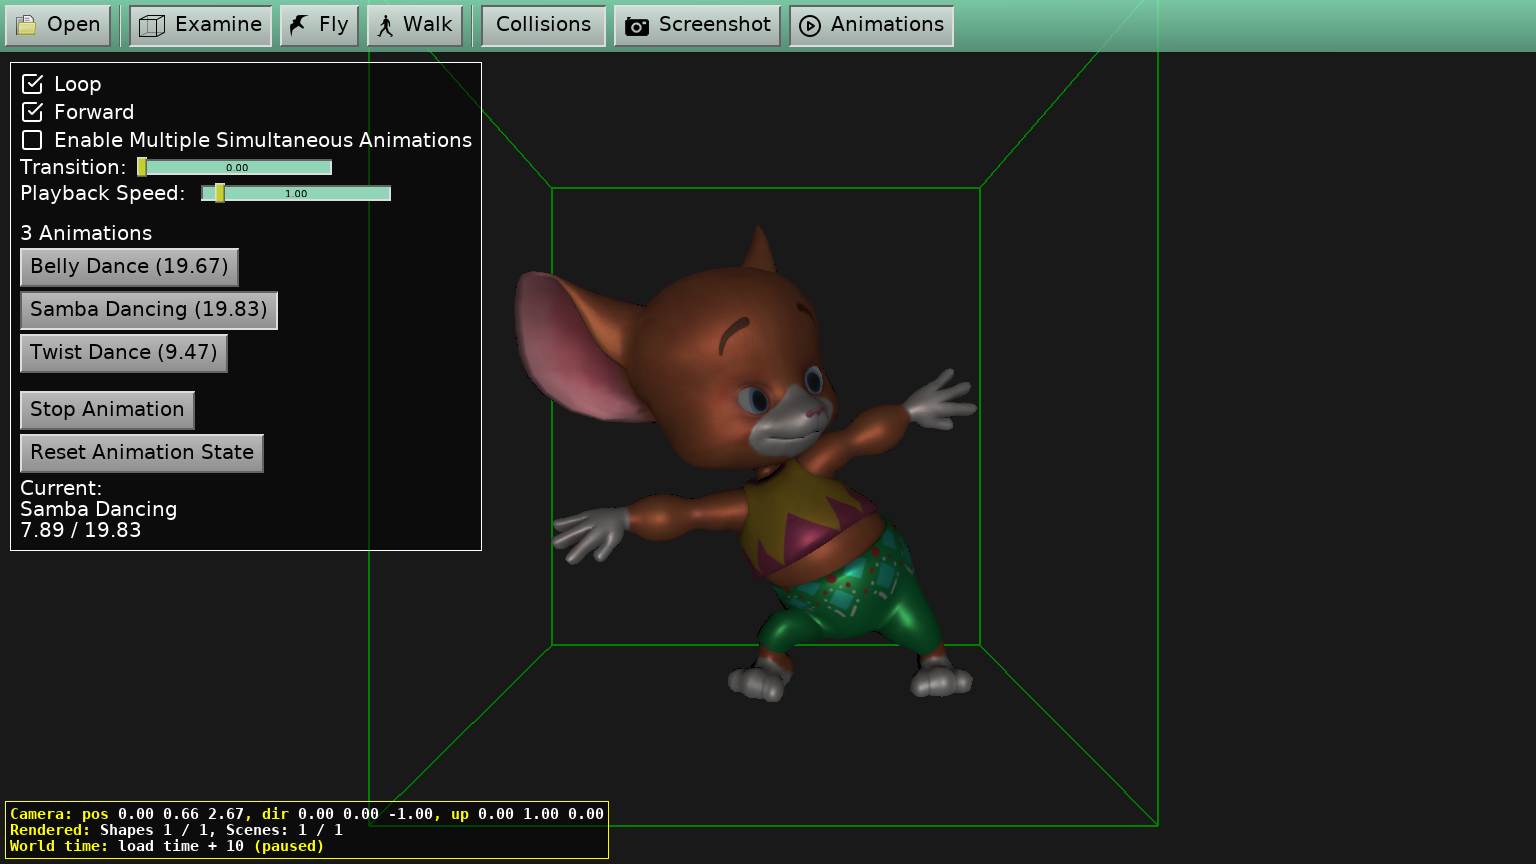 |
To play an animation, call the PlayAnimation method from code.
Just add this to the TViewMain.Start to play wheels_turning animation once the model is loaded:
CarScene.PlayAnimation('wheels_turning', true);|
Note
|
You can test what animations are available on your model e.g. by opening it with Castle Model Viewer (activate the panel Animations to test animations). |
PlayAnimation is very powerful. In addition to choosing an animation (by name) and whether it should loop, it has an overloaded version that takes TPlayAnimationParameters instance and allows to:
-
play animation with blending (cross-fading with previous animation) (see
TPlayAnimationParameters.TransitionDuration; note that you can also adjustDefaultAnimationTransitionto do cross-fading by default), -
play animation backwards (see
TPlayAnimationParameters.Forward), -
play animation from the middle (not from start) (see
TPlayAnimationParameters.InitialTime), -
receive a stop notification, when animation stops (see
TPlayAnimationParameters.StopNotification).
See the example examples/animations/play_animation in engine sources for a demo of PlayAnimation capabilities.
|
Note
|
Code can also set the |
9. Moving scene in each update
To make the car moving, we can update its position in TViewMain.Update. Change it into this:
procedure TViewMain.Update(const SecondsPassed: Single; var HandleInput: Boolean);
var
  T: TVector3;
begin
  inherited;
  { This virtual method is executed every frame.}
  LabelFps.Caption := 'FPS: ' + Container.Fps.ToString;

  T := CarScene.Translation;
  { Thanks to multiplying by SecondsPassed, it is a time-based operation,
    and will always move 40 units / per second along the +Z axis. }
  T := T + Vector3(0, 0, 40) * Container.Fps.SecondsPassed;
  { Wrap the Z position, to move in a loop }
  if T.Z > 70 then
    T.Z := -50;
  CarScene.Translation := T;
end;10. Multiple instances of the same scene
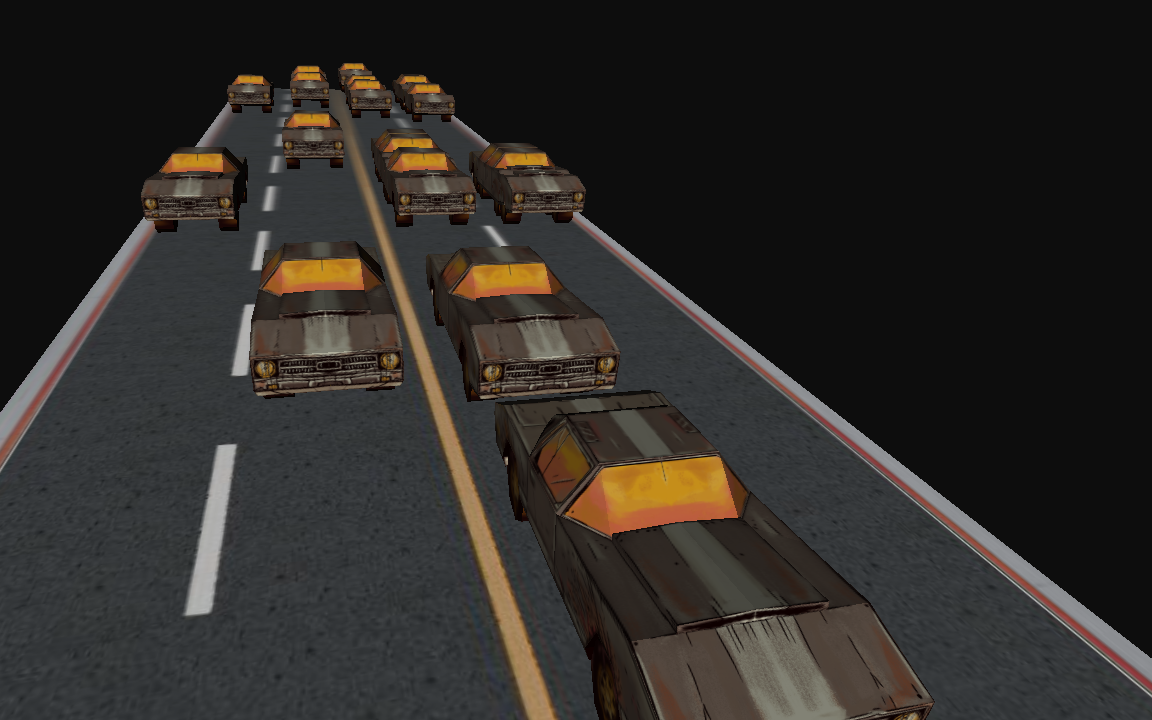 |
It’s allowed to add the same instance of the TCastleScene many times to your viewport items. This allows to reuse it’s data, which is great for both performance and the memory usage.
|
Note
|
It is possible to achieve the optimization described in this section also using TCastleTransformReference class. Such approach is also possible to do in the editor, without writing any code. See the Tutorial: Designing a 3D world for details.
|
For example, let’s make 20 cars moving along the road. You will need 20 instances of TCastleTransform, but only a single instance of the TCastleScene.
-
Declare in the
privatesection ofTViewMainan array of transformations:CarTransforms: array [1..20] of TCastleTransform; -
Initialize it in
TViewMain.Startlike this:for I := Low(CarTransforms) to High(CarTransforms) do begin CarTransforms[I] := TCastleTransform.Create(Application); CarTransforms[I].Translation := Vector3( (Random(4) - 2) * 6, 0, RandomFloatRange(-70, 50)); CarTransforms[I].Add(CarScene); Viewport.Items.Add(CarTransforms[I]); end;Above we added a randomization of the initial car position. The
RandomFloatRangefunction is in theCastleUtilsunit. There’s really nothing magic about the randomization parameters, I just adjusted them experimentally to look right. -
Remove the line
MainViewport.Items.Add(CarScene);All our cars will be now controlled using the
CarTransformsarray. TheCarSceneis used 20 times as a child ofCarTransforms[…]items. -
Finally, make all our cars moving. Change the
TViewMain.Updateto do the same thing as previously, but now in a loop, for every instance ofCarTransformslist.procedure TViewMain.Update(const SecondsPassed: Single; var HandleInput: Boolean); procedure UpdateCarTransform(const CarTransform: TCastleTransform); var T: TVector3; begin T := CarTransform.Translation; { Thanks to multiplying by SecondsPassed, it is a time-based operation, and will always move 40 units / per second along the +Z axis. } T := T + Vector3(0, 0, 40) * Container.Fps.SecondsPassed; { Wrap the Z position, to move in a loop } if T.Z > 70 then T.Z := -50; CarTransform.Translation := T; end; var I: Integer; begin inherited; { This virtual method is executed every frame.} LabelFps.Caption := 'FPS: ' + Container.Fps.ToString; for I := Low(CarTransforms) to High(CarTransforms) do UpdateCarTransform(CarTransforms[I]); end;
Note that all 20 cars are in the same state (they display the same animation). This is the limitation of this technique. If you need the scenes to be in a different state, then you will need different TCastleScene instances. You can efficiently create them e.g. using the TCastleScene.Clone method. In practice, it is simplest to reserve this optimization (sharing the same scene multiple times) only for completely static scenes (where you don’t use PlayAnimation).
11. Building a mesh using code
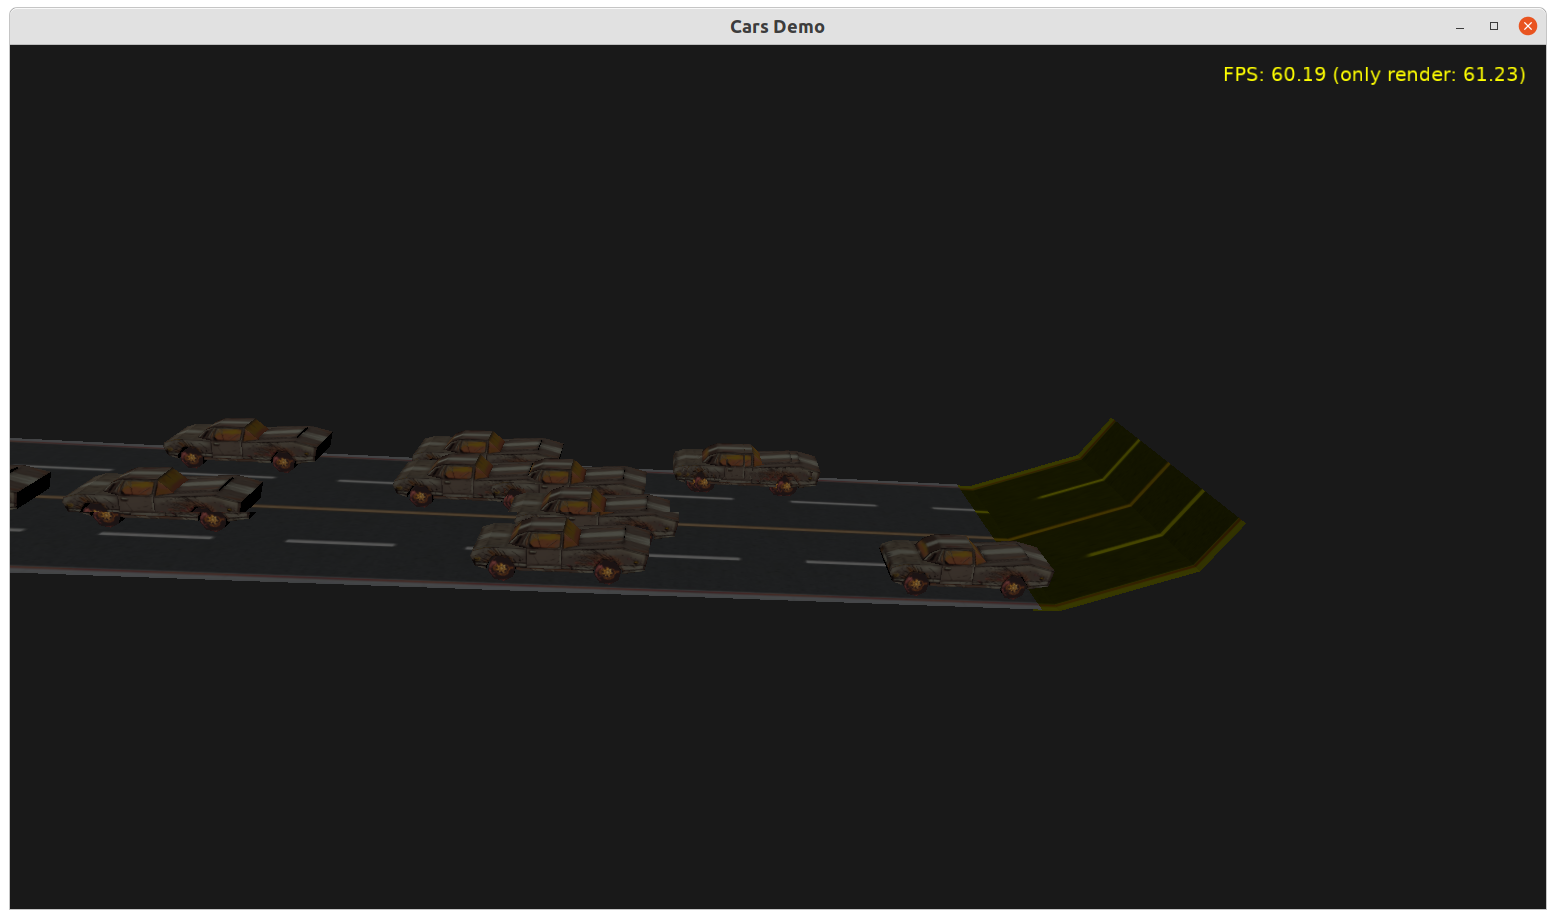 |
The scene property RootNode holds a scene graph of your scene. It is automatically created when you load the model from file, and automatically modified by animations. You can also modify it by code, during the game. This means that you can freely modify the 3D models as often as you like (at initialization, as a reaction to key press, every frame…) and you can even build from scratch new 3D objects.
Below we show a sample code building a scene with a mesh. Building mesh like this is a bit pointless (because it would be easier to just define such mesh in Blender road.blend and export it to road.gltf) but it should give you lots of ideas how to extend it, to make procedurally-generated world. For example, you could take a curve defined using Curves tool and build a road for cars using this curve as a guide.
Our scene graph is composed from X3D nodes organized in a tree. A number of classes used below, named like TXxxNode, correspond to various X3D nodes. The nodes we use below are:
-
TIndexedFaceSetNodedefines a mesh (set of polygons) -
TCoordinateNodeprovides 3D vertex positions forTIndexedFaceSet -
TTextureCoordinateNodeprovides 2D texture coordinates forTIndexedFaceSet -
TImageTextureNodedefines a texture loaded from an image file -
TPhysicalMaterialNodedefines material (using Physically-Based Rendering shader) -
TAppearanceNodeacts just as a container forTPhysicalMaterialNode -
TShapeNodeconnects geometry (TIndexedFaceSet) with its appearance (TAppearanceNode) -
TTransformNodetransforms children -
TX3DRootNodeacts as final container node, that can be loaded toTCastleScene
This is a function using these nodes to create TCastleScene with a mesh:
function CreateAdditionalMesh: TCastleScene;
var
  Coord: TCoordinateNode;
  TexCoord: TTextureCoordinateNode;
  IndexedFaceSet: TIndexedFaceSetNode;
  BaseTexture: TImageTextureNode;
  Material: TPhysicalMaterialNode;
  Appearance: TAppearanceNode;
  Shape: TShapeNode;
  Transform: TTransformNode;
  RootNode: TX3DRootNode;
begin
  Coord := TCoordinateNode.Create;
  Coord.SetPoint([
    Vector3(-15.205387, -66.775894, -0.092525),
    Vector3(9.317978, -66.775894, -0.092525),
    Vector3(-15.205387, -68.674622, -0.092525),
    Vector3(9.317978, -68.674622, -0.092525),
    Vector3(9.317978, -78.330063, 3.456294),
    Vector3(-15.205387, -78.330063, 3.456294),
    Vector3(9.317978, -80.814240, 7.241702),
    Vector3(-15.205387, -80.814240, 7.241702)
  ]);

  TexCoord := TTextureCoordinateNode.Create;
  TexCoord.SetPoint([
    Vector2(0.0001, 0.9964),
    Vector2(1.0000, 0.9964),
    Vector2(1.0000, 0.8541),
    Vector2(0.0001, 0.8541),
    Vector2(0.0001, 0.7118),
    Vector2(1.0000, 0.7118),
    Vector2(1.0000, 0.5695),
    Vector2(0.0001, 0.5695),
    Vector2(0.0001, 0.5695),
    Vector2(1.0000, 0.5695),
    Vector2(1.0000, 0.4272),
    Vector2(0.0001, 0.4272)
  ]);

  IndexedFaceSet := TIndexedFaceSetNode.Create;
  IndexedFaceSet.Coord := Coord;
  IndexedFaceSet.TexCoord := TexCoord;
  IndexedFaceSet.SetTexCoordIndex([0, 1, 2, 3, -1, 4, 5, 6, 7, -1, 8, 9, 10, 11, -1]);
  IndexedFaceSet.SetCoordIndex([0, 1, 3, 2, -1, 2, 3, 4, 5, -1, 5, 4, 6, 7, -1]);
  IndexedFaceSet.Solid := false; // make it visible from both sides

  BaseTexture := TImageTextureNode.Create;
  BaseTexture.SetUrl(['castle-data:/textures/tunnel_road.jpg']);

  Material := TPhysicalMaterialNode.Create;
  Material.BaseTexture := BaseTexture;
  Material.BaseColor := Vector3(1, 1, 0); // yellow

  Appearance := TAppearanceNode.Create;
  Appearance.Material := Material;

  Shape := TShapeNode.Create;
  Shape.Geometry := IndexedFaceSet;
  Shape.Appearance := Appearance;

  Transform := TTransformNode.Create;
  Transform.Translation := Vector3(0, 0, 0);
  Transform.Rotation := Vector4(1, 0, 0, -Pi / 2);
  Transform.AddChildren(Shape);

  RootNode := TX3DRootNode.Create;
  RootNode.AddChildren(Transform);

  Result := TCastleScene.Create(FreeAtStop);
  Result.Load(RootNode, true);
end;
Test it like this:
-
Add
X3DNodesandCastleBoxesunits to the uses clause. -
Add the
CreateAdditionalMeshfunction as a nested routine toTViewMain.Start. -
Call the
CreateAdditionalMeshfunction and add the new scene to the viewport, by adding toTViewMain.Startthis:MainViewport.Items.Add(CreateBoxesScene);
To improve this documentation just edit this page and create a pull request to cge-www repository.