-
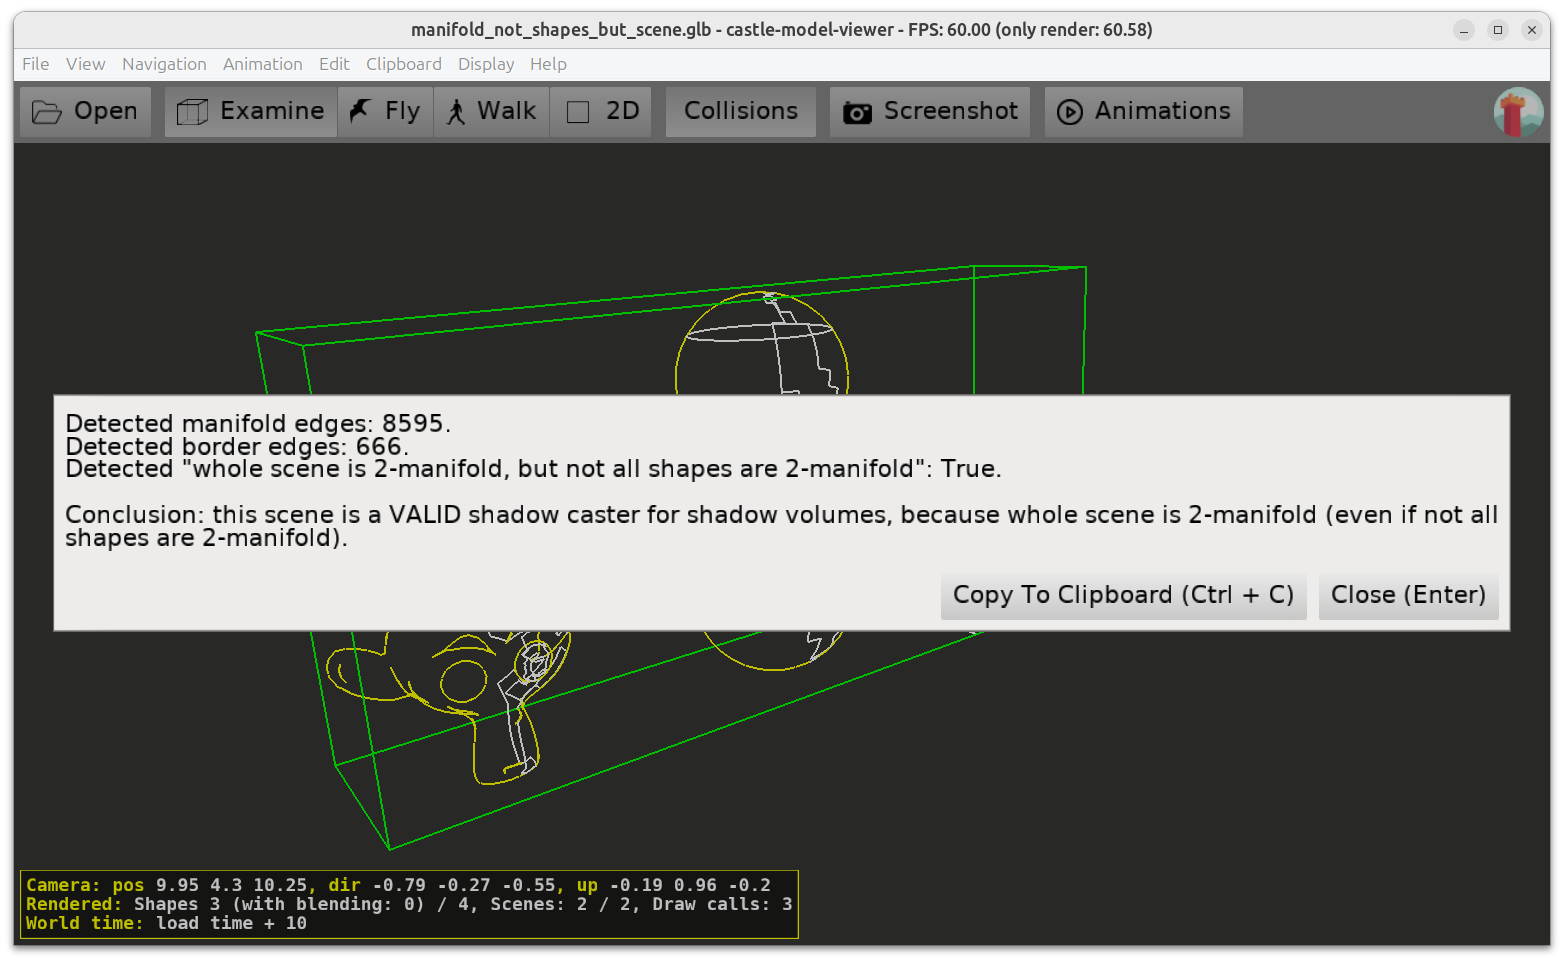
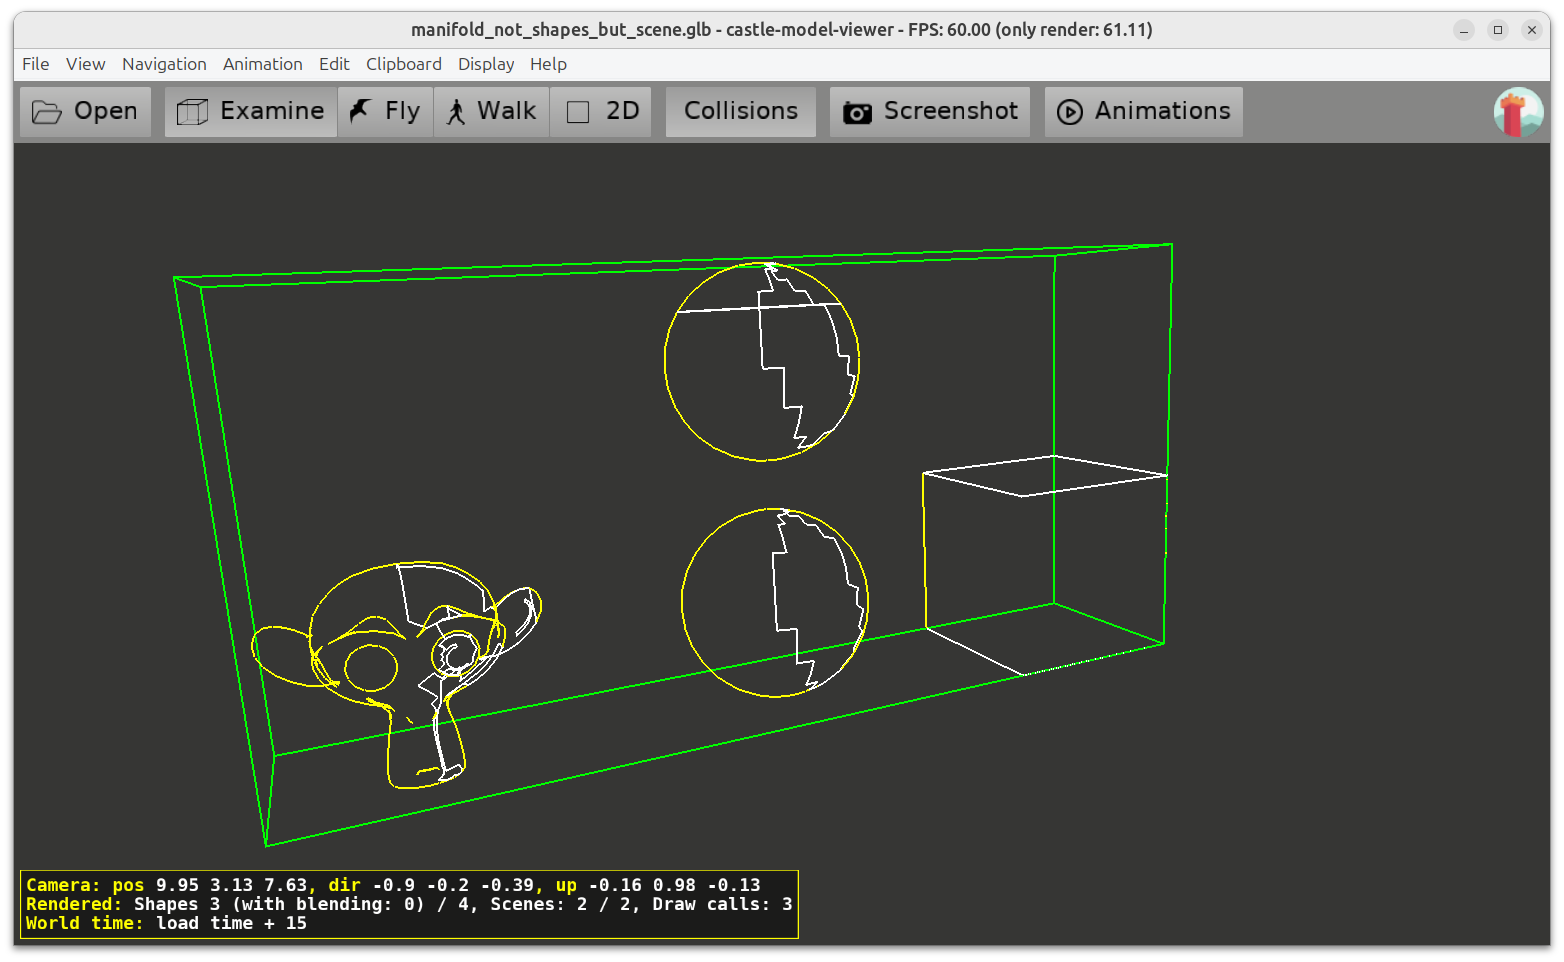
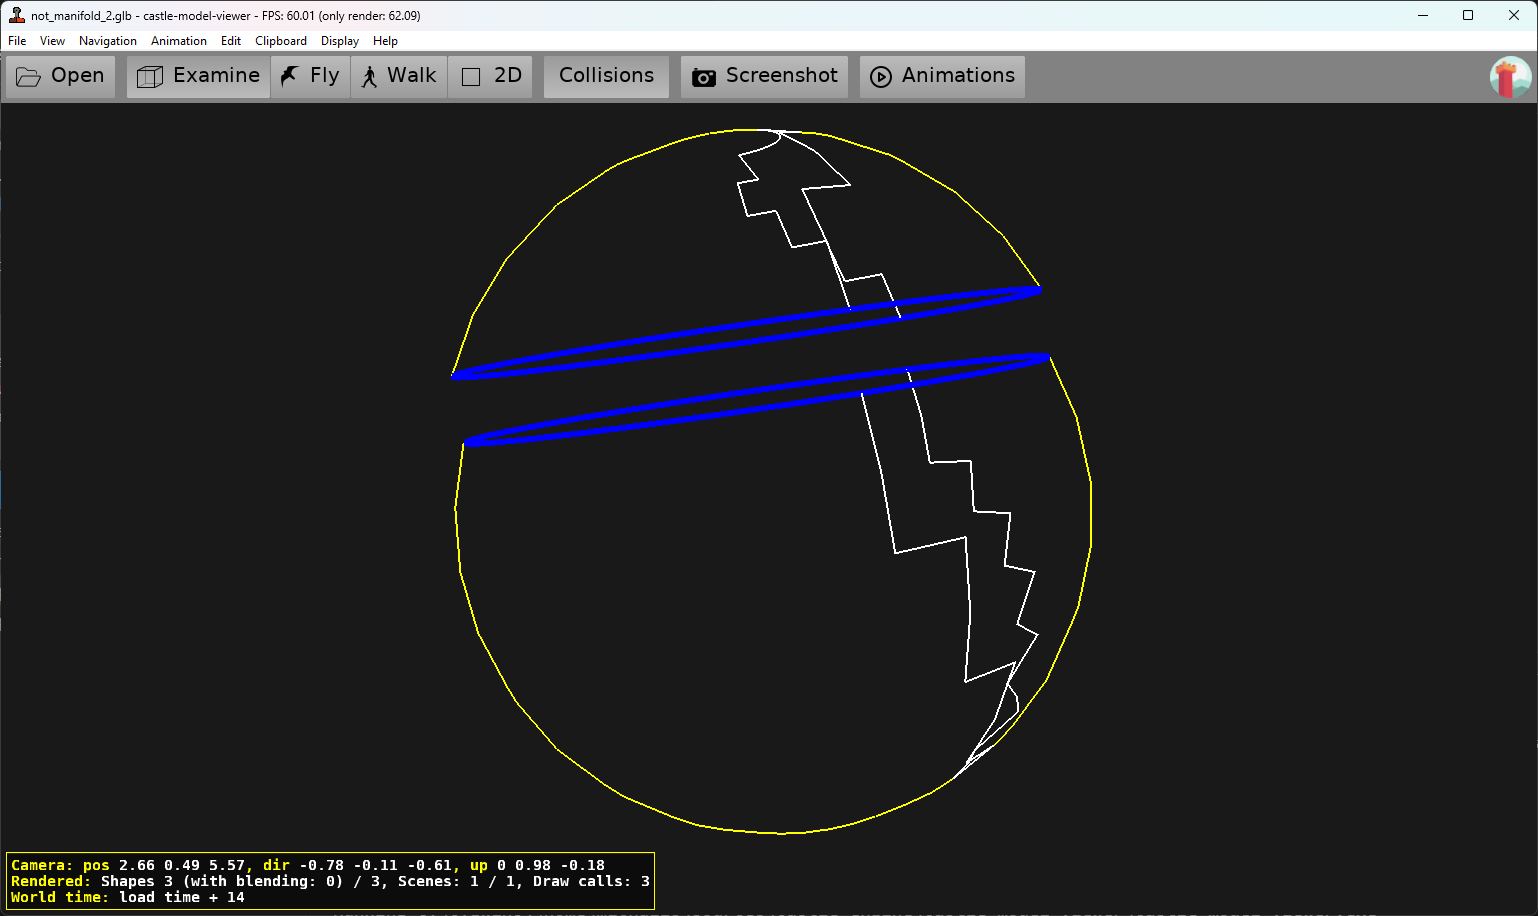
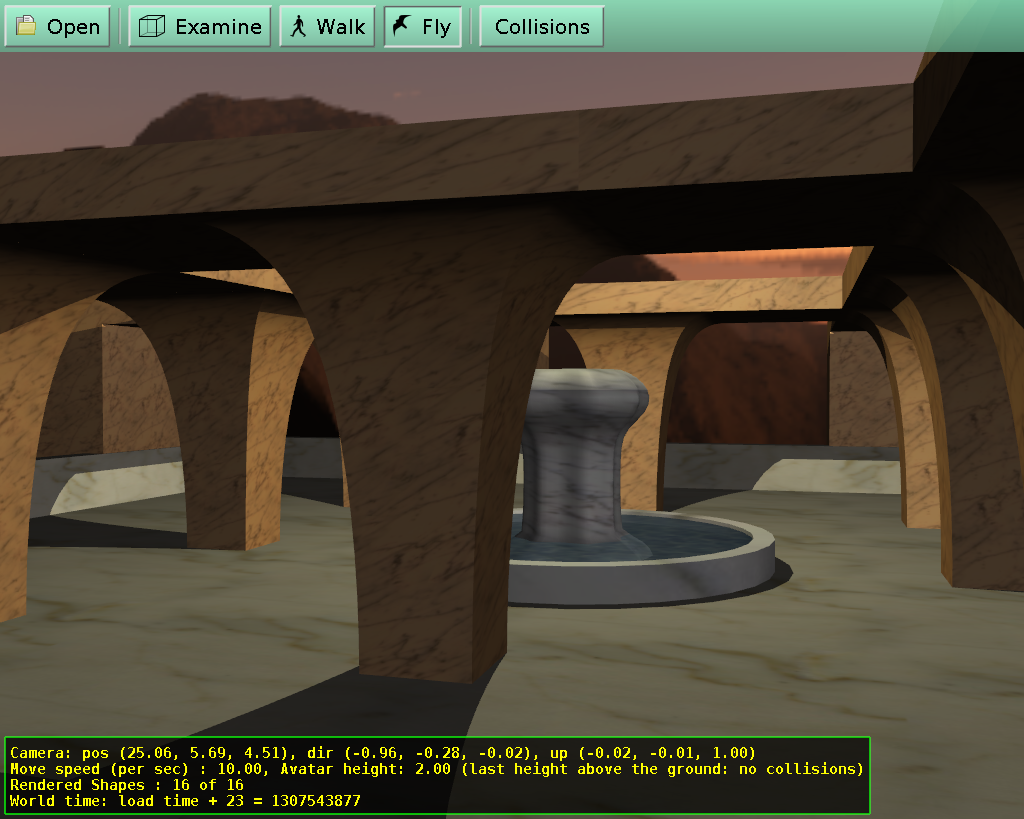
Manifold silhouette edges (that have 2 neighboring faces in the same shape) are displayed as yellow. Only a subset of them are displayed, forming a silhouette of the shape, from the point of view of current camera.
-
Edges that have 2 neighboring faces but in different shapes are displayed as white.
-
Finally, the "bad" border edges, that don’t have 2 neighboring faces, are displayed as blue. You want to get rid of them!
Shadow Volumes
Table of Contents
1. Introduction
Shadow volumes are a method of rendering dynamic shadows. "Dynamic" means that everything (light source, shadow casters, shadow receivers) can move and change each frame and the shadows will reflect that.
To activate them in Castle Game Engine,
just set the light’s Shadows property to true.
You can do this in the editor, and observe the effects immediately.
Important limitations:
-
The models that cast shadows must be 2-manifold. This means that every edge has exactly 2 (not more, not less) neighbor faces, so the whole shape is a closed volume.
-
Right now only one light source can cast shadows using shadow volumes. Do not set
Shadowstotrueon multiple lights, as only one of them (and it’s not defined which one) will cause shadows.
2. Examples
Check out these CGE examples:
-
"3D FPS game" template for new projects (select it when creating new project in our editor) has a light casting shadows by default.
-
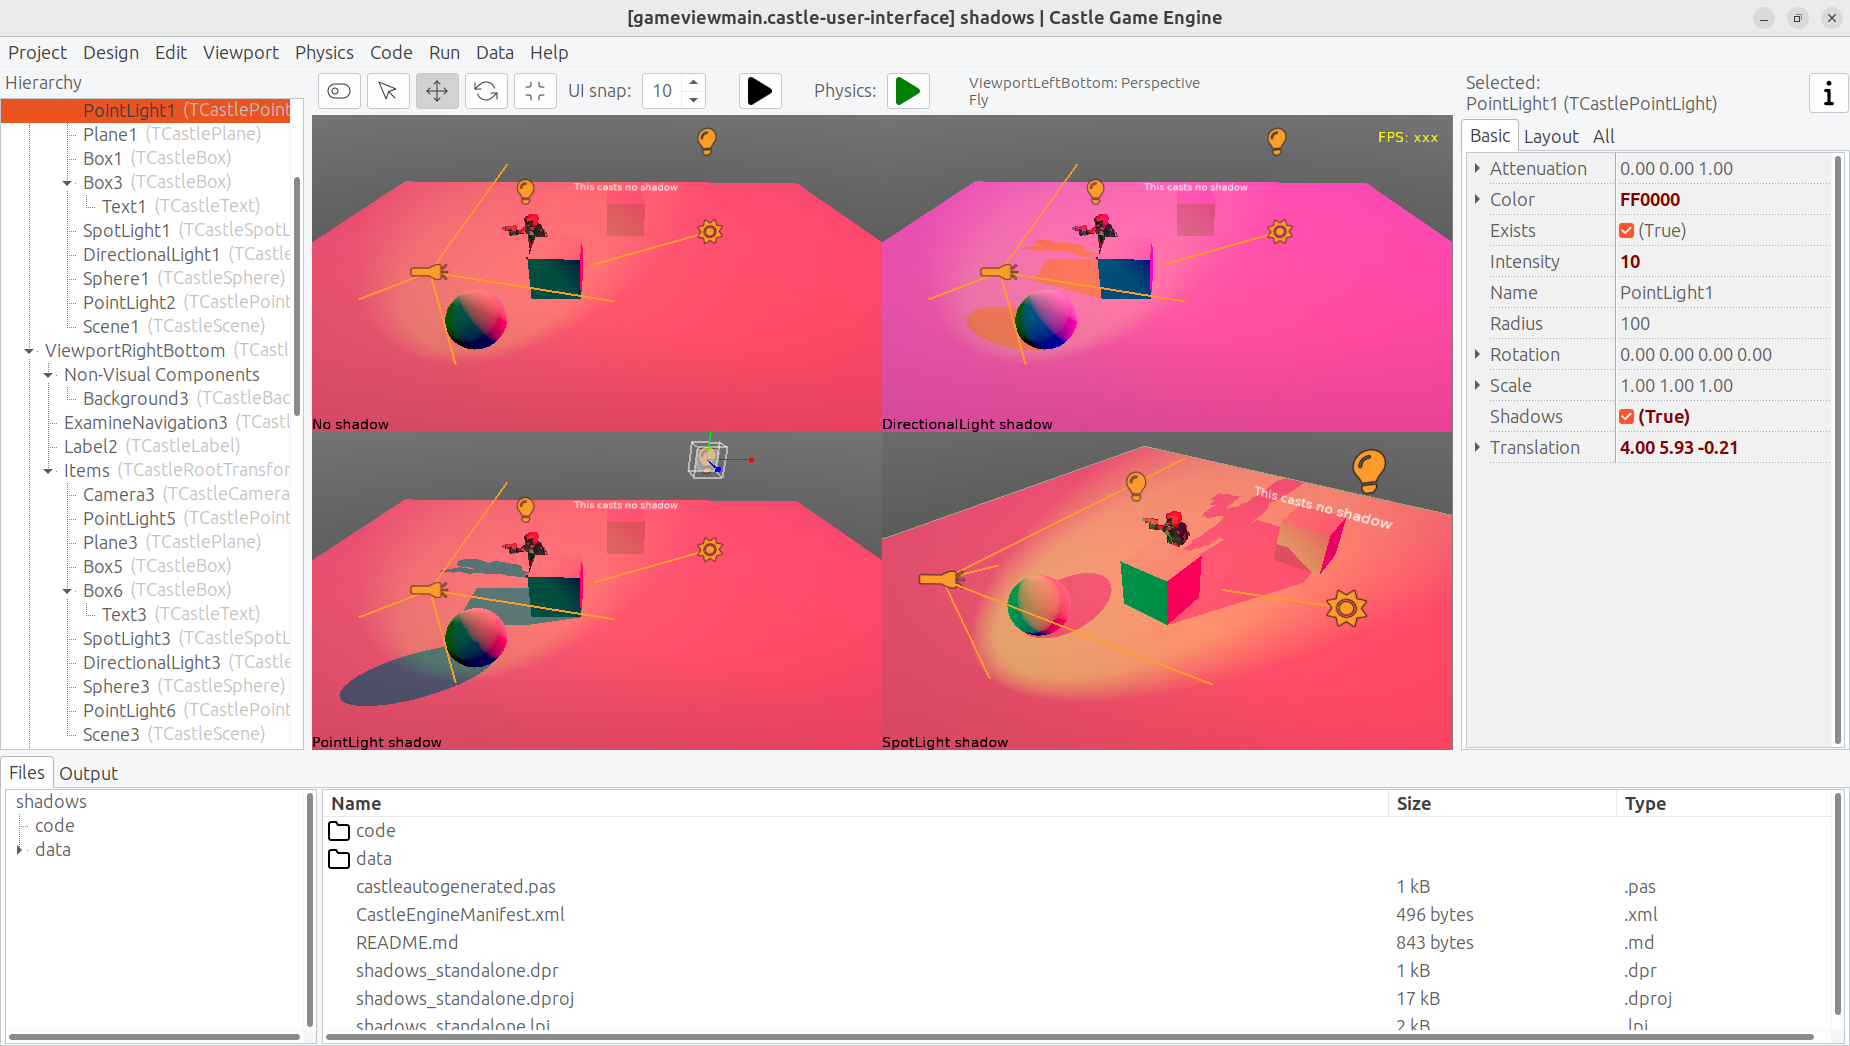
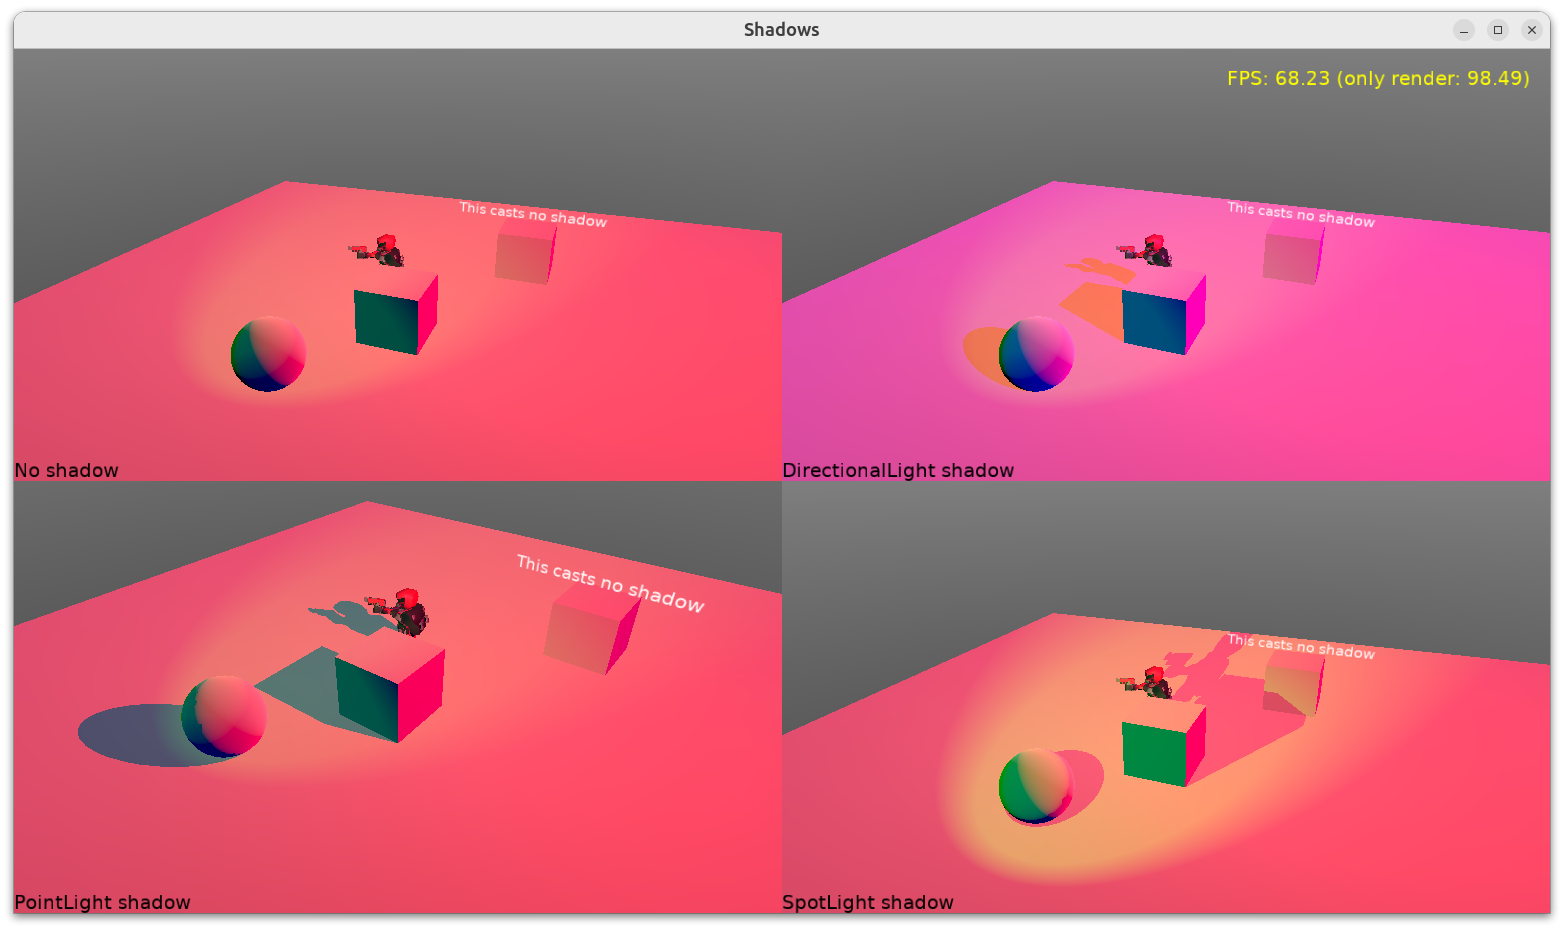
examples/viewport_and_scenes/shadows - simple example showing shadow volumes from different light source types.
-
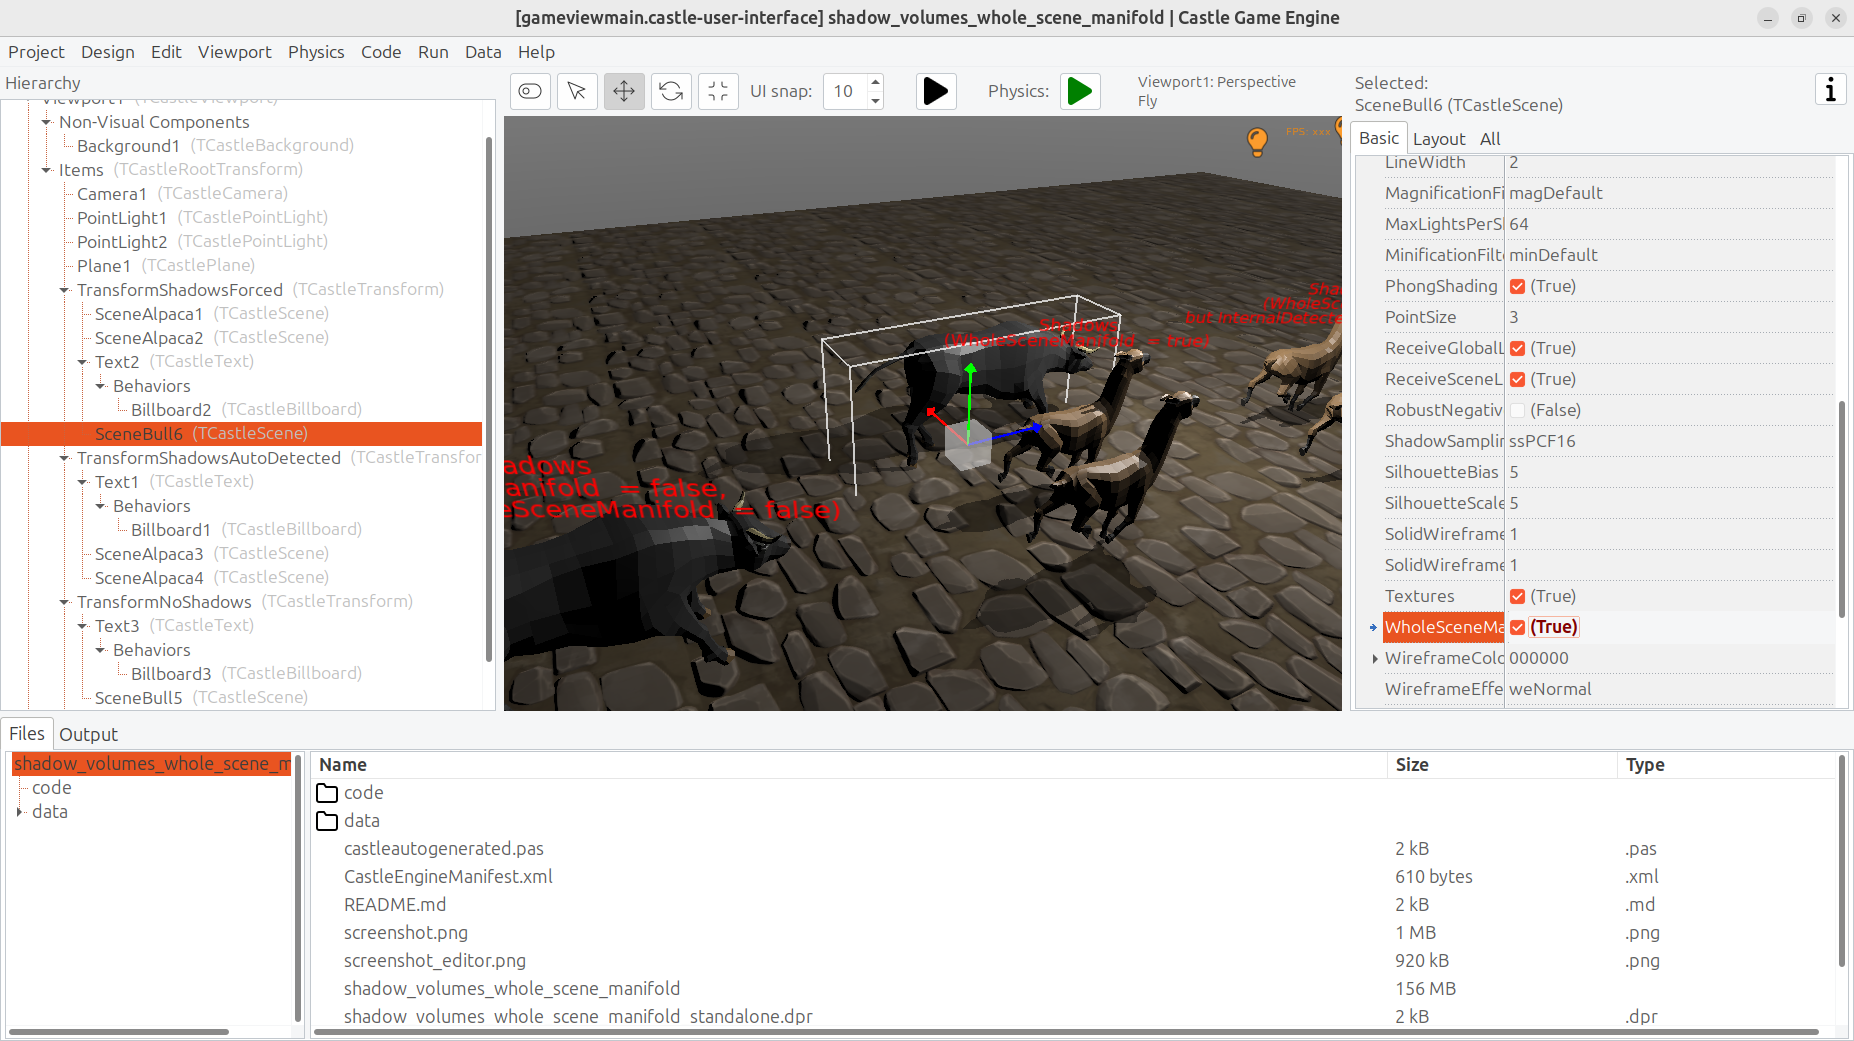
examples/viewport_and_scenes/shadow_volumes_whole_scene_manifold - demonstrates auto-detection of 2-manifold scenes and the
TCastleRenderOptions.WholeSceneManifoldfeature. -
examples/viewport_and_scenes/shadows_distance_culling - tests that shadow volumes cooperate with
TCastleScene.DistanceCullingcorrectly. -
Numerous other examples enable shadows, since it’s so easy and it improves the look of the 3D world. E.g. examples/physics/physics_throw_chickens, examples/animations/animate_bones_by_code.
3. Features
Features of shadows by shadow volumes (in particular, how does this technique compare to shadow maps):
-
Shadow volumes produce hard shadows. That’s both an advantage (they are as sharp as your geometry, no problems with texture resolution like in shadow maps) and disadvantage (when simulating large area lights, hard shadows may look unrealistic).
-
Shadow volumes are easier to activate. To see the shadows, just choose one light in the scene (probably the brightest one) and set
Shadowstotrue.That’s it. Compared to shadow maps, you don’t need to tweak anything to deal with shadow maps resolution, bias etc.
-
Shadow volumes require the shadow casters to be 2-manifold. So you need to be more careful when modeling. Shadow volumes usually don’t work if you try to activate them on a random 3D scene. More about this below.
-
It’s difficult to compare the speed of "shadow volumes" vs "shadow maps". Both techniques are expensive in different ways. On one hand, shadow volumes require extra rendering passes (additional rendering of "shadow quads" to the stencil buffer, and then additional render to color buffer, for each shadow-casting light). On the other hand, shadow maps require updating the shadow textures (one for each light source).
-
Our current shadow volumes implementation allows for only one light casting shadow volumes. And it is unsure if we will ever remove this limitation.
Reason: shadow volumes algorithm requires more and more rendering passes as more light sources cast shadows. This is the practical reason why we didn’t yet implement shadow volumes from multiple light sources: it could quickly become too expensive to be useful. Each light requires yet another rendering pass (if we add the light contribution) or even each lights' combination requires yet another rendering pass (in the naive approach when we replace the pixels).
In contrast, shadow maps support as many lights as you want already, and each light only requires to keep yet another shadow texture up-to-date.
-
Note that it’s perfectly fine to use both shadow volumes and shadow maps in a single scene. It may make perfect sense in some situations, if you want one light source to cast precise hard shadows using shadow volumes and the rest to cast soft shadows using shadow maps.
-
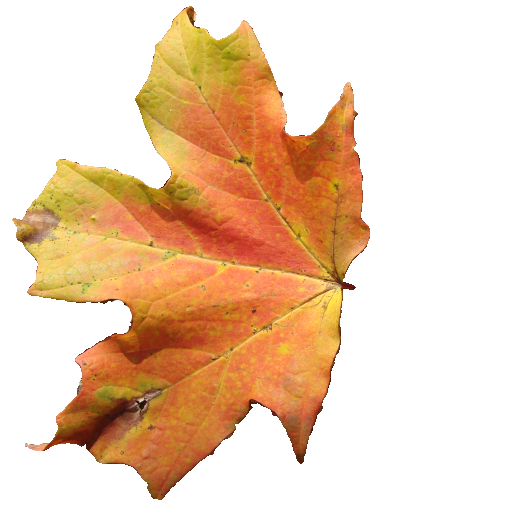
Applying a texture with transparency (alpha testing) on the object has no effect on the shadows cast.
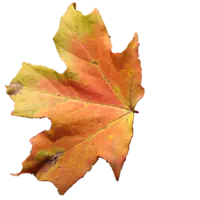
E.g. if you have a leaf designed as a simple quad, with a leaf texture that has transparent parts — the shadows cast by shadow volumes will look like cast by quads, they will not reflect the leaf shape. Similarly if you make a fence as a plane with a texture.
In general, shadow volumes cannot account for the object visual appearance like a texture. They only account for the object topology (polygons, edges, vertices).
In contrast, shadow maps interact with objects using texture with alpha-testing nicely (fully transparent places will not cast shadows).
Note that shadow casters may use partial transparency (by alpha testing or alpha blending). They can use material with non-zero
transparency, they can use textures with alpha channel. These shapes render OK, they just cast shadows just as if they were completely opaque.
4. Shadow casters 3D geometry must be 2-manifold (closed volume)
A 3D model is said to be 2-manifold if every edge has exactly 2 (not more, not less) neighbor faces, so the whole shape is a closed volume. Also, faces must be oriented consistently (e.g. CCW outside). This requirement is often quite naturally satisfied for natural objects. There are other, equivalent terms this is sometimes called: 3D mesh can be said to be watertight or closed.
|
Note
|
See Wikipedia about n-manifold for more general mathematical definition. |
For shadow volumes, the shadow caster must be 2-manifold. There are 3 ways how you can make it happen:
-
Make every shape of your scene a 2-manifold.
The term shape in Castle Game Engine means X3D
Shapenode, which is equal to glTF primitive, which is generally equal to a subset of Blender object that has a single material.This is the most efficient approach, it means that every shape is a potential shadow caster.
The engine detects this case automatically.
-
Or, forget about shapes, but at least make your whole scene a 2-manifold.
This is a common situation when you have a 2-manifold mesh in Blender, but it uses multiple materials. In such case, exporting it to glTF or X3D splits each mesh into multiple shapes. Each shape is not 2-manifold but whole scene is.
Again, the engine detects this case automatically.
-
Finally, if your scene is not detected as 2-manifold, but you want to force using it as a shadow caster for shadow volumes, accepting eventual rendering artifacts, then you can set
TCastleRenderOptions.WholeSceneManifoldtotrue. See the Bull model from examples/viewport_and_scenes/shadow_volumes_whole_scene_manifold for an example using it.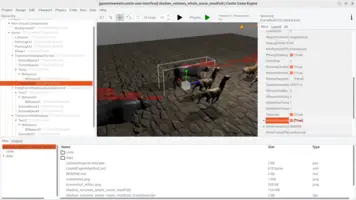
|
Note
|
Satisfying the above requirements (2-manifold, consistent ordering) means that you can also use backface culling which improves rendering performance. You typically turn on backface culling in your 3D authoring software (e.g. check it in Blender material settings) which will export it to the glTF or X3D file. Our engine will automatically follow this information. So, there’s an extra "gain" you can have from making your mesh 2-manifold. |
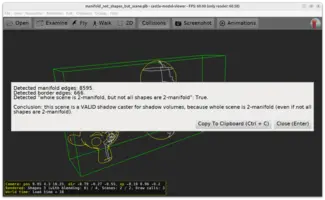
You can inspect whether your shapes are detected as a 2-manifold by Castle Model Viewer. From the editor, just double-click on a model to open it in Castle Model Viewer.
-
Use the menu item "Help → 2-Manifold Information (Shadow Volumes Casting)" to get a concise report like this:
-
To check how edges are detected use "View → Fill mode → Silhouette and Border Edges".
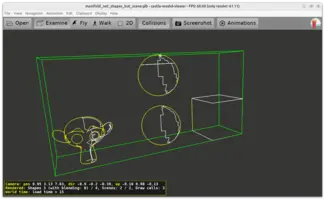

The meaning of colors:
-
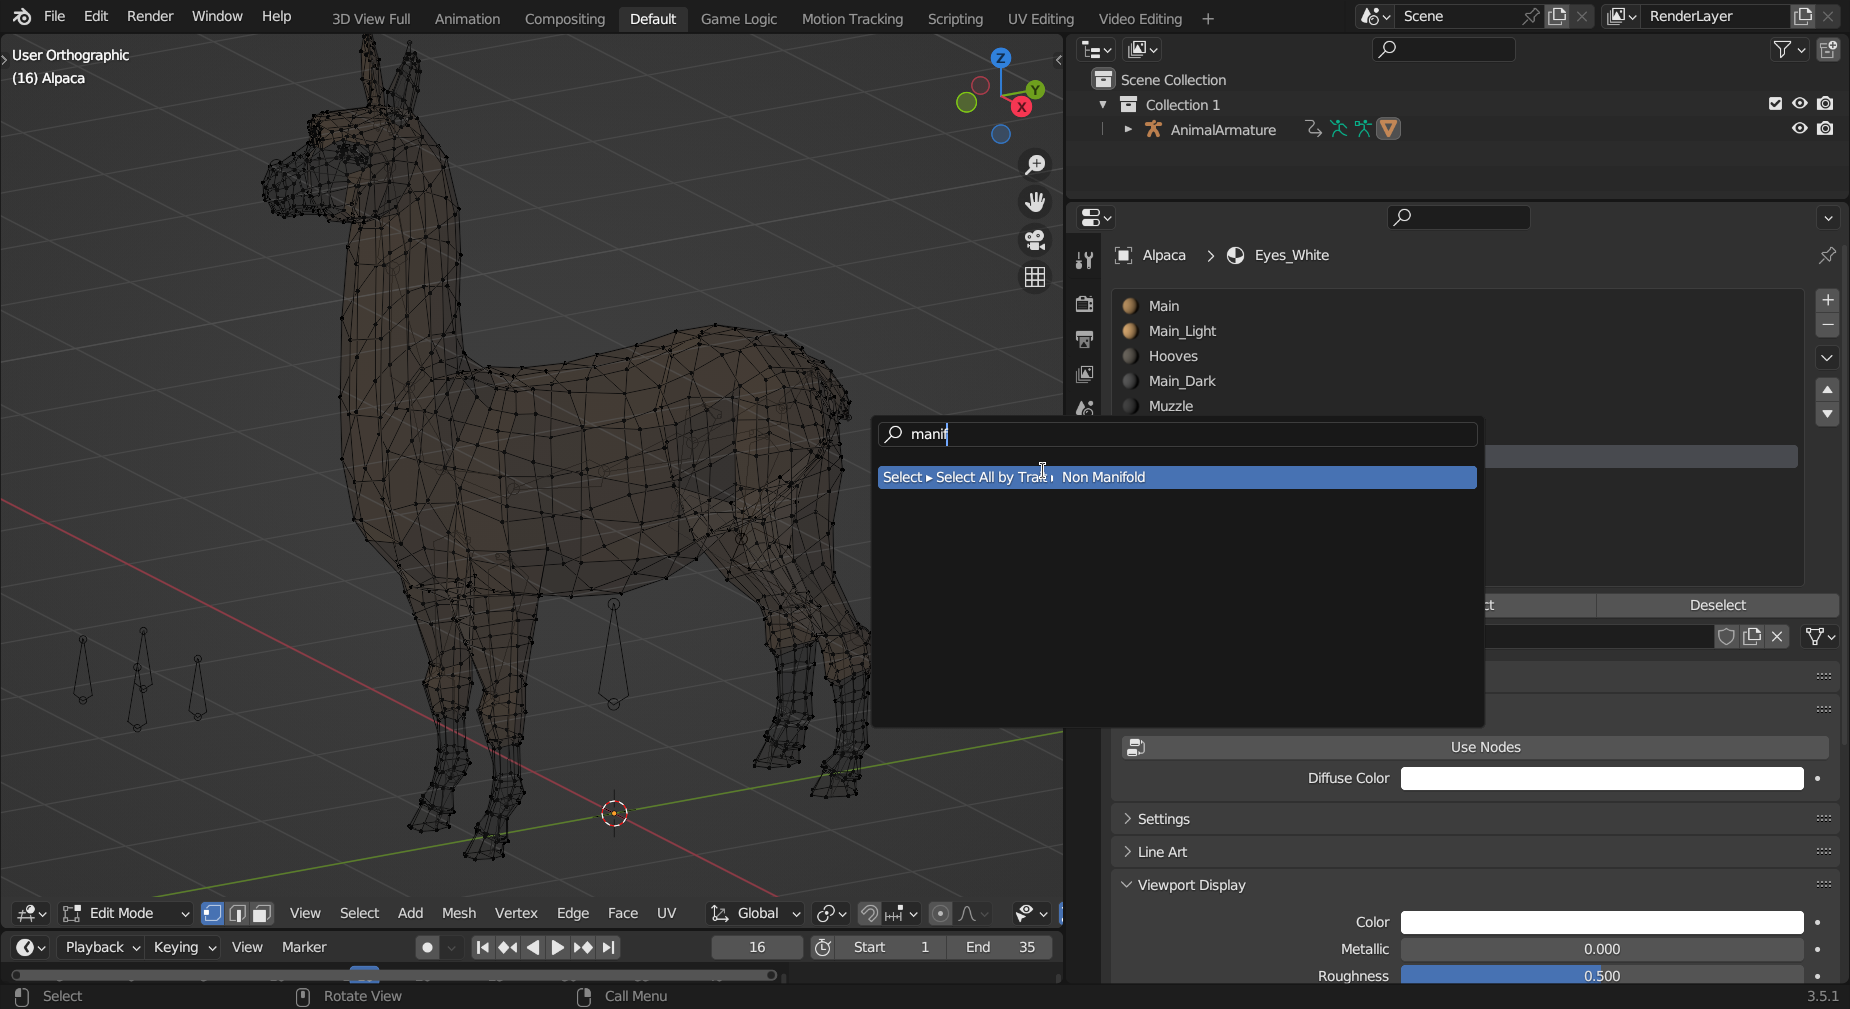
You can also check manifold edges in Blender: you can easily detect why the mesh is not manifold by "Select → Select All By Trait → Non Manifold" command (press F3 to find this command in edit mode). Also, remember that faces must be ordered consistently CCW — in some cases "Recalculate normals outside" (this actually changes vertex order in Blender) may be needed to reorder them properly.

5. Adjust what casts shadows
By default, all shadow casters detected as 2-manifold (see above) cast shadows.
To stop some objects from casting shadows, set TCastleTransform.CastShadows to false.
6. Deprecated: Control from X3D
|
Warning
|
Do not use directly the X3D fields documented below. We will likely remove them at some point, in favor of using simpler shadows boolean at X3D light sources along with a choice for algorithm: SFString shadowsMethod ["VOLUMES", "MAPS"]. See also roadmap item about shadow maps that will connect shadow volumes and shadow maps.
|
|
Note
|
This section is relevant only for X3D authors that directly edit X3D nodes. Most Castle Game Engine developers can ignore it. Just control the shadows by toggling TCastlePunctualLight.Shadows property at the light source, and TCastleTransform.CastShadows property at the potential shadow casters.
|
You can use X3D nodes to design your lights and shadow volumes on them. In the simplest case, just activate shadow volumes on a light source by setting fields shadowVolumes and shadowVolumesMain both to TRUE.
6.1. Example models
Demo 3D models that use dynamic shadow volumes are inside our demo_models, see subdirectory shadow_volumes/. Open them with Castle Model Viewer and play around.
6.2. X3D fields shadowVolumes and shadowVolumesMain
To all X3D light nodes, we add two fields:
*Light {
  ... all normal *Light fields ...
  SFBool  [in,out]  shadowVolumes      FALSE
  SFBool  [in,out]  shadowVolumesMain  FALSE # meaningful only when shadowVolumes = TRUE
}
The idea is that shadows are actually projected from only one light source (with shadow volumes, number of light sources is limited, since more light sources mean more rendering passes; for now, I decided to use only one light). The scene lights are divided into three groups:
-
First of all, there’s one and exactly one light that makes shadows. Which means that shadows are made where this light doesn’t reach. This should usually be the dominant, most intensive light on the scene.
This is taken as the first light node with
shadowVolumesMainandshadowVolumes=TRUE. Usually you will setshadowVolumesMaintoTRUEon only one light node. -
There are other lights that don’t determine where shadows are, but they are turned off where shadows are. This seems like a nonsense from "realistic" point of view — we turn off the lights, even though they may reach given scene point ? But, in practice, it’s often needed to put many lights in this group. Otherwise, the scene could be so light, that shadows do not look "dark enough".
All lights with
shadowVolumes=TRUEare in this group. (As you see, the main light has to haveshadowVolumes=TRUEalso, so the main light is always turned off where the shadow is). -
Other lights that light everything. These just work like usual X3D lights, they shine everywhere (actually, according to X3D light scope rules). Usually only the dark lights should be in this group.
These are lights with
shadowVolumes=FALSE(default).
Usually you have to experiment a little to make the shadows look good. This involves determining which light should be the main light (shadowVolumesMain = shadowVolumes = TRUE), and which lights should be just turned off inside the shadow (only shadowVolumes = TRUE). This system tries to be flexible, to allow you to make shadows look good — which usually means "dark, but not absolutely unrealistically black".
In Castle Model Viewer you can experiment with this using Edit → Lights Editor.
If no "main" light is found (shadowVolumesMain = shadowVolumes = TRUE) then shadows are turned off on this model.
Trick: note that you can set the main light to have on = FALSE. This is the way to make "fake light" — this light will determine the shadows position (it will be treated as light source when calculating shadow placement), but will actually not make the scene lighter (be sure to set for some other lights shadowVolumes = TRUE then). This is a useful trick when there is no comfortable main light on the scene, so you want to add it, but you don’t want to make the scene actually brighter.
6.3. X3D field Appearance.shadowCaster
If you edit X3D nodes, you can control what casts shadows for each particular shape using the Appearance.shadowCaster field. See Appearance.shadowCaster documentation.
To improve this documentation just edit this page and create a pull request to cge-www repository.