ScreenEffect : X3DChildNode {
  SFNode       [in,out]      metadata    NULL        # [X3DMetadataObject]
  SFBool       [in,out]      enabled     TRUE
  SFBool       [in,out]      needsDepth  FALSE
  MFNode       [in,out]      shaders     []          # [X3DShaderNode]
}Screen (Post-Processing) Effects
1. Introduction
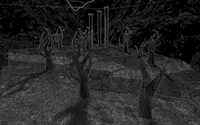
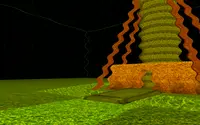
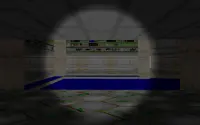
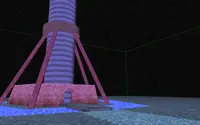
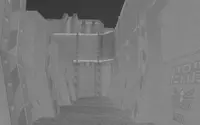
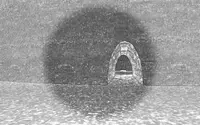
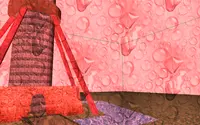
Screen effects allow you to create nice effects by processing the rendered image. Demos:
-
Try the View → Screen Effects menu in Castle Model Viewer, after loading any 3D scene. Note that you can activate many effects at the same time.
-
Try the X3D files screen_effects.x3dv, screen_effect_blood_in_the_eyes.x3dv, screen_effect_film_grain.x3dv, screen_effect_movie_texture.x3dv. You should download our complete X3D demo models and open files in
screen_effectssubdirectory there, to see the complete working demos with an example castle model underneath. -
Compile and run Castle Game Engine demo in examples/screen_effects_demo.
2. For X3D authors: define screen effects inside X3D
You can define your own screen effects by using the ScreenEffect node in your X3D files. Inside the ScreenEffect node you provide your own shader code to process the rendered image, given the current color and depth buffer contents. With the power of GLSL shading language, your possibilities are endless :). You can warp the view, apply textures in screen-space, do edge detection, color operations and so on.
A ScreenEffect is active if it’s a part of normal X3D transformation hierarchy (in normal words: it’s not inside a disabled child of the Switch node or such) and when the "enabled" field is TRUE. In the simple cases, you usually just add ScreenEffect node anywhere at the top level of your X3D file. If you use many ScreenEffect nodes, then their order matters: they process the rendered image in the given order.
You have to specify a shader to process the rendered image by the "shaders" field. This works exactly like the standard X3D "Appearance.shaders", by selecting a first supported shader. Right now our engine supports only GLSL (OpenGL shading language) shaders inside ComposedShader nodes. To learn more about GLSL and X3D, see
3. For Pascal developers: use TCastleScreenEffects
To define a screen effect using Pascal code, you can create an instance of TScreenEffectNode. It has properties corresponding to the X3D node ScreenEffect documented above.
Then you can add this screen effect to a TCastleScreenEffects control. The effect will be applied to everything rendered by this TCastleScreenEffects control, including its children (like buttons, labels etc.). Call TCastleScreenEffects.AddScreenEffect to add an effect.
To make things simple, TCastleViewport descends from TCastleScreenEffects. So every viewport already has AddScreenEffect method.
This a sample how you can add a screen effect to a viewport:
procedure AddScreenEffect(const MyViewport: TCastleViewport);
var
  ScreenEffect: TScreenEffectNode;
  ComposedShader: TComposedShaderNode;
  FragmentShader: TShaderPartNode;
begin
  FragmentShader := TShaderPartNode.Create;
  FragmentShader.ShaderType := stFragment;
  FragmentShader.Contents :=
    'void main (void)' +NL+
    '{' +NL+
      '  vec4 left   = screen_get_color(ivec2(screen_x() - 1, screen_y()));' + NL +
      '  vec4 right  = screen_get_color(ivec2(screen_x() + 1, screen_y()));' + NL +
      '  vec4 top    = screen_get_color(ivec2(screen_x(), screen_y() - 1));' + NL +
      '  vec4 bottom = screen_get_color(ivec2(screen_x(), screen_y() + 1));' + NL +
      '  gl_FragColor = (1.0 + abs(left - right) + abs(top - bottom)) / 2.0;' + NL +
    '}';

  ComposedShader := TComposedShaderNode.Create;
  ComposedShader.SetParts([FragmentShader]);

  ScreenEffect := TScreenEffectNode.Create;
  ScreenEffect.SetShaders([ComposedShader]);

  MyViewport.AddScreenEffect(ScreenEffect);
end;
Consult the example examples/screen_effects_demo for a full demo.
4. Shader language (GLSL) variables and functions
The GLSL shader code inside ScreenEffect can use some special functions and uniform variables.
/* Size of the rendering area where this screen effect is applied, in pixels.
   This corresponds to TCastleScreenEffect.RenderRect.Width / Height in Pascal. */
uniform int screen_width;
uniform int screen_height;

// Float-based API -----------------------------------------------------------

// Positions below are expressed as vec2 (pair of float).
// The positions are in range [0..screen_width, 0..screen_height].

/* Current position on the screen, in [0..screen_width, 0..screen_height] range. */
vec2 screenf_position();
float screenf_x(); // Same as screenf_position().x
float screenf_y(); // Same as screenf_position().y

/* Color at given position,
   with position being vec2 in [0..screen_width, 0..screen_height] range. */
vec4 screenf_get_color(vec2 position);

/* Depth buffer value at the indicated position,
   with position being vec2 in [0..screen_width, 0..screen_height] range.

   Only available when needsDepth = TRUE at ScreenEffect node.
   The version "_fast" is faster, but less precise,
   in case full-screen multi-sampling is used. */
float screenf_get_depth(vec2 position);
float screenf_get_depth_fast(vec2 position);

/* Get original color at this screen position.
   Equivalent to screenf_get_color(screenf_position()),
   but a bit faster and more precise, as it avoids doing division and then multiplication. */
vec4 screenf_get_original_color();

/* Get original depth at this screen position.
   Equivalent to screenf_get_depth(screenf_position()),
   but a bit faster and more precise, as it avoids doing division and then multiplication. */
float screenf_get_original_depth();

// Float-based API with positions in 0..1 range  ------------------------------

// Positions below are expressed as vec2 (pair of float).
// The positions are in range [0..1, 0..1].

/* Current position on the screen, in 0..1 range.
   Note: It is a varying GLSL variable, not a function, unlike screenf_position(..) function. */
vec2 screenf_01_position;

/* Color at given position, with position_01 being vec2 in [0..1, 0..1] range. */
vec4 screenf_01_get_color(vec2 position_01);

/* Depth at given position, with position_01 being vec2 in [0..1, 0..1] range.
   Only available when needsDepth = TRUE at ScreenEffect node. */
float screenf_01_get_depth(vec2 position_01);

// Integer-based API ---------------------------------------------------------

// Positions are expressed as ivec2 (pair of int).
// The positions are in range [0..screen_width - 1, 0..screen_height - 1].

ivec2 screen_position();
int screen_x(); // Same as screen_position().x
int screen_y(); // Same as screen_position().y

/* Color at this position. */
vec4 screen_get_color(ivec2 position);

/* Depth buffer value at the indicated position.
   Only available when needsDepth = TRUE at ScreenEffect node.
   The version "_fast" is faster, but less precise,
   in case full-screen multi-sampling is used. */
float screen_get_depth(ivec2 position);
float screen_get_depth_fast(ivec2 position);
Note: do not redeclare these uniform variables or functions in your own GLSL shader code. Instead, just use them. If you try to declare them, you will get "repeated declaration" GLSL errors, in case of uniforms. Internally, we always "glue" our standard GLSL code (dealing with screen effects) with your GLSL code, to make these variables and functions available without the need to declare them.
5. Examples
A simplest example:
ScreenEffect {
  shaders ComposedShader {
    language "GLSL"
    parts ShaderPart {
      type "FRAGMENT"
      url "data:text/plain,
      void main (void)
      {
        gl_FragColor = screenf_get_original_color();

        // Equivalent:
        // gl_FragColor = screenf_get_color(screenf_position());
      }
      "
    }
  }
}
The above example processes the rendered image without making any changes. You now have the full power of GLSL to modify it to make any changes to colors, sampled positions and such. For example make colors two times smaller (darker) by just dividing by 2.0:
void main (void)
{
  gl_FragColor = screenf_get_original_color() / 2.0;
}
You can also query screen color from a different position than "current". Thus you can warp / reflect etc. the image. For example, make the rendered image upside-down:
void main (void)
{
  vec2 pos = screenf_position();
  pos.y = float(screen_height) - pos.y;
  gl_FragColor = screenf_get_color(pos);
}
6. Details
Details about special functions available in the ScreenEffect shader:
-
Internally, we pass the image contents (color and, optionally, depth buffer) as a texture (normal non-power-of-two texture) or a multi-sample texture. You should always use the functions
screen_get_xxxto read previous image contents, this way your screen effects will work for all multi-sampling (anti-aliasing) configurations. -
The texture coordinates for
screen_xxxare integers, in range[0..screen_width - 1, 0..screen_height - 1]. This is usually comfortable when writing screen effects shaders, for example you know that(screen_x() - 1)is "one pixel to the left".You can of course sample the previous image however you like. The
screen_position()(or, equivalent,ivec2(screen_x(), screen_y())) is the position of current pixel, you can use it e.g. to query previous color at this point, or query some other colors around this point (e.g. to blur the image). -
The texture coordinates for
screenf_xxxare floats (note the extra "f" letter in the name). The float coordinates are in the range[0..screen_width, 0..screen_height].We advise using float-based coordinates usually. They typically result in a simpler code (many typical tasks in shader language are just more natural with floats), and may also enable additional features (e.g. if we enable, as an option, different filtering of the screen image one day).
-
If you set
"needsDepth"toTRUEthen we also pass depth buffer contents to the shader. You can query it usingscreenf_get_depth,screen_get_depthfunctions.You can query depth information at any pixel for various effects. Remember that you are not limited to querying the depth of the current pixel, you can also query the pixels around (for example, for Screen Space Ambient Occlusion). The "Flashlight" effect in Castle Model Viewer queries a couple of pixels in the middle of the screen to estimate the distance to an object in front of the camera, which in turn determines the flashlight circle size.
-
Remember that you can pass other uniform values to the shader, just like with any other
ComposedShadernodes. For example you can pass an additional helper texture (e.g. a headlight mask) to the shader. Or you can route the current time (fromTimeSensor) to the shader, to make your effect based on time.
7. TODOs
ScreenEffect under a dynamic Switch doesn’t react properly — changing "Switch.whichChoice" doesn’t deactivate the old effect, and doesn’t activate the new effect. For now, do not place ScreenEffect under Switch that can change during the world life. If you want to (de)activate the shader dynamically (based on some events in your world), you can send events to the exposed "enabled" field.
To improve this documentation just edit this page and create a pull request to cge-www repository.
