-
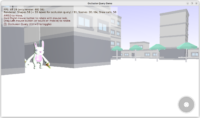
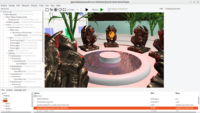
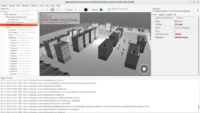
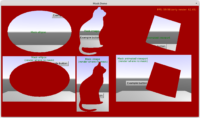
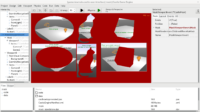
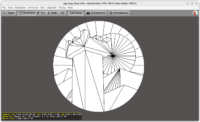
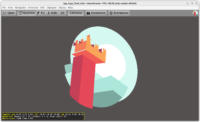
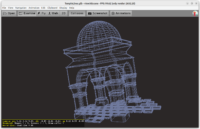
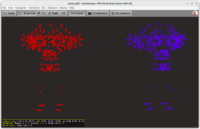
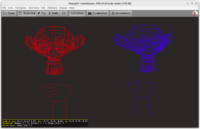
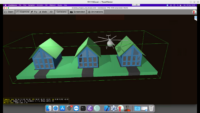
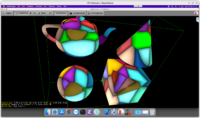
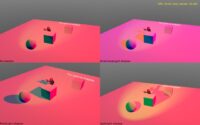
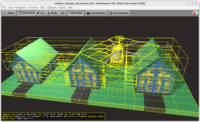
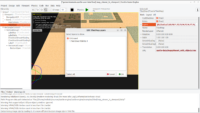
Use Viewport -> Wireframe mode menu, or just hit Alt+Z shortcut, to toggle between viewing:
- Polygons,
- Wireframe or
- Polygons + Wireframe (internally known as
weSolidWireframe
).
-
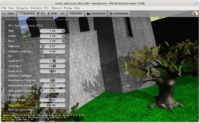
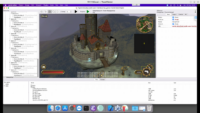
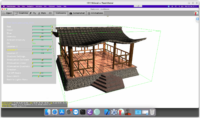
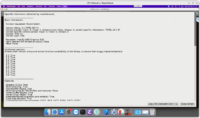
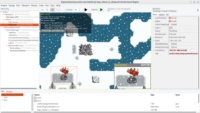
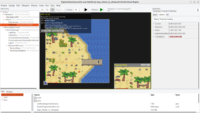
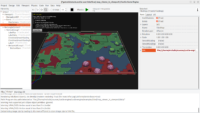
At design-time, in “Fly” mode, mouse scroll wheel now does zoom (if you don’t have right mouse button pressed; when right mouse button is pressed, it changes moving speed, as before).
More details:
Zoom (by mouse scroll wheel) is now available for all navigation modes, including
TCastleWalkNavigation
. Although it is disabled onTCastleWalkNavigation
by default, but you can just enable it byMyWalkNavigation.ZoomEnabled := true
(or clicking onZoomEnabled
checkbox in editor).Editor and view3dscene enable this zoom by default.
Also, zoom-in now honors collision detection. Though at design-time we disable collision detection.
-
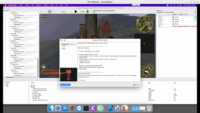
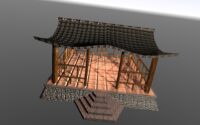
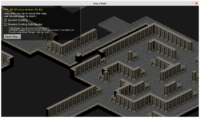
We’ve done a few fixes to make
TCastleWalkNavigation
navigation, including mouse look, work even when the camera is a child of some otherTCastleTransform
with some transformation.This gives you more flexibility where do you place
TCastleCamera
in the transformation hierarchy.
Teaser: Explosion using physics impulse + mesh collider test with terrain
Concept art teaser: Huge graphical (and functional) upgrade to our FPS game is coming
Together with artists from our company Cat-astrophe Games we are working now on a big upgrade to “FPS game” example! Please welcome Adrianna Matejek (concept art, 2D, UI) and Alya Vaneskehyan (3D, textures). They will commit lots of things to fps-game-upgrade branch in the upcoming weeks 🙂
Together we have a great plan how to turn this small example into a cool and impressive short 3D game.
Along with graphical upgrades, there will be functional upgrades. The “easy creature AI, as behaviors” will finally be done along with this rework.
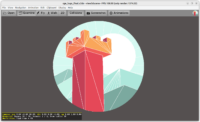
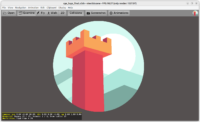
Here’s a teaser — first 2 concept arts from Ada!
Note: I uploaded a really high-res version of these concept arts here. You can click on the image and download a full version.
If you like this, please support us on Patreon. This is exactly why we need your support — to afford to hire more and more talented people to work on CGE!
CGE downloads now come bundled with latest stable version of FPC
Our default downloads are now bundled with latest stable version of FPC (Free Pascal Compiler, an open-source cross-platform compiler that we love and recommend).
The goal is to make Castle Game Engine work out-of-the-box. Building and running a newly-created project from CGE editor will now work out-of-the-box, users don’t need to install their own FPC version. Downloading CGE gives you all you need to perform basic “workflow” with CGE editor: create new project from template, open and edit some design, hit F9 and see it build + run.
This should be great for users that don’t come with existing knowledge of Pascal ecosystem, who don’t want to (or maybe, just today, don’t care) about what FPC or Delphi version they use — they “just want to build CGE application”. Now they don’t need to learn how to install FPC, Lazarus or Delphi. They can just use CGE to build projects immediately. This is also great for people who may not need to edit the game — e.g. if you cooperate on a project with artists, who test the game in the editor, then they just want to edit some designs, and run the game by F9.
Note: You don’t need to use this “bundled” version of FPC of course. You can still use your own FPC or Delphi, we still support many compiler versions. You can still install them however you want (e.g. maybe using fpcupdeluxe). In this case, you also don’t need to download the “bundled” version, just download the unbundled versions from GitHub releases.
Underneath, the “bundled” FPC is stored in tools/contrib/fpc/
. If we don’t find other FPC installation, we will use this one. Moreover, we automatically pass proper -Fu
for the compiler in such “bundled” subdirectory (as it doesn’t have any useful FPC config).
This is another important “quality of life” improvement for developers:
You no longer need to explicitly initialize the components you want to access using DesignedComponent
method. You just need to move your fields to the published
section to make them initialized automatically.
Detailed explanation of the difference
All (or most) of the calls like below can be now removed:
LabelFps := DesignedComponent('LabelFps') as TCastleLabel; |
Previously, we advised to organize your state like this:
type TStateMain = class(TUIState) private { Components designed using CGE editor, loaded from gamestatemain.castle-user-interface. } LabelFps: TCastleLabel; public constructor Create(AOwner: TComponent); override; procedure Start; override; end; constructor TStateMain.Create(AOwner: TComponent); begin inherited; DesignUrl := 'castle-data:/gamestatemain.castle-user-interface'; end; procedure TStateMain.Start; begin inherited; { Find components, by name, that we need to access from code } LabelFps := DesignedComponent('LabelFps') as TCastleLabel; end; |
Now, we advise a simpler approach:
type TStateMain = class(TUIState) published { Components designed using CGE editor. These fields will be automatically initialized at Start. } LabelFps: TCastleLabel; public constructor Create(AOwner: TComponent); override; end; constructor TStateMain.Create(AOwner: TComponent); begin inherited; DesignUrl := 'castle-data:/gamestatemain.castle-user-interface'; end; |
Of course you may still find it useful to define Start
method, to initialize various things about your state. But there’s no need for it if it was only doing DesignedComponent
calls.
What’s going on under the hood
The published fields of the TUIState
descendants are now automatically initialized when the design is loaded. Right before Start
, the published fields (that have names matching some object in the design) are now automatically set to the corresponding objects. At Stop
(when design is unloaded) these fields are set to nil.
As a bonus (advantage over previous solution) this avoids having dangling references after Stop
. While previously you could set all your references to nil
manually in Stop
method… likely nobody did it, as it was a tiresome and usually pointless job. Now they are nil
after Stop automatically, so accessing them will result in clearer errors (and can be safeguarded by X <> nil
reliably).
I should also mention one disadvantage from the previous approach: if you make a typo in component name, e.g. declare BabelFps
instead of LabelFps
, then the mistakenly-named field will just remain uninitialized. Nothing will make an automatic exception like “BabelFps not initialized!”. Of course any code doing BabelFps.Caption := 'aaa';
will crash and the debugger should clearly show that BabelFps
is nil
. And you can write something like Assert(BabelFps <> nil);
in Start
to get explicit exception in case of mistake.
This is very consistent with how Delphi VCL and Lazarus LCL initialize their form fields.
Our conventions — where to put the published section?
I admit I had a little discussion with myself about “where to put the published
section”?
Following our usual conventions for writing components, the published
section should go as last. We usually write private
, then public
, then published
. So I wanted to have section in the increasing order of “being exposed”:
type TStateMain = class(TUIState) // MOST INTERNAL private MyInternalStuff: Integer; // EXPOSED TO OUTSIDE WORLD public constructor Create(AOwner: TComponent); override; // EXPOSED TO OUTSIDE WORLD ALSO THROUGH RTTI published { Components designed using CGE editor. These fields will be automatically initialized at Start. } LabelFps: TCastleLabel; end; |
But eventually I came to the conclusion that it is a bit unnatural in this case. Basically, Delphi VCL and Lazarus LCL are right to put it at the beginning. Because in the usual case, you don’t think about this published section as “the most exposed identifiers for outside code”. You think about it as “internal components I need to access to implement my design”.
And it’s kind of an “unfortunate but sensible limitation” that it means that these things have to be also exposed to everything from the outside. This fact makes sense if you realize that the automatic initialization requires RTTI (RunTime Type Information, known also as reflection in various other languages). Things that RTTI has access to are naturally available to the outside world, through RTTI. So it would not be consistent for compiler to “hide” the fields in the published
section while still making these identifiers available through RTTI.
Yet, when creating Delphi VCL form, or Lazarus LCL form, or CGE state, you usually don’t really want to “expose” these fields to the outside world. You want to access them right within your form / state. Thus, having them at the beginning of the state makes sense. And is consistent with Delphi VCL / Lazarus LCL as a bonus.
Still I decided to explicitly spell the published
section name everywhere. This allows me to easily say in documentation “put your field in the published
section”. I don’t need to say “initial section” or “automatic section” and users don’t need to understand how it works and how {$M+}
in Pascal works and whether TUIState
was compiled with {$M+}
. So, in the end, I propose to write:
type TStateMain = class(TUIState) published { Components designed using CGE editor. These fields will be automatically initialized at Start. } LabelFps: TCastleLabel; private MyInternalStuff: Integer; public constructor Create(AOwner: TComponent); override; end; |
Have fun with this! I have already updated our templates, our manual like here, and some (but not all!) examples to follow the new convention.
Hacktoberfest is an annual event dedicated to promoting Open Source software development and to help developers from all the world (regardless of their experience level) to contribute to open source projects.
Now you can also participate in the event by contributing to Castle Game Engine! Many related projects at Castle Engine (GitHub org) received a hacktoberfest tag 🙂 Feel free to look around!
First of all, of course it’s a good idea to check out main repository of Castle Game Engine:
A good beginner task (whether you want to participate in hacktoberfest or not :)) is to browse our examples. Just download CGE and navigate to projects in examples subdirectory. By testing examples you will:
- learn how to do various things using the engine
- undoubtedly notice places to improve.
The examples are being constantly added and improved, but it is also a never-ending work 🙂
Many examples could use a better 3D, 2D graphics or even just better presentation of the content. This doesn’t necessarily mean that you have to create your own art from the scratch. Using / extending assets with open-source licenses is absolutely welcome and even encouraged. See e.g. Castle Game Engine Assets, OpenGameArt, Kenney, Quaternius etc. — we have lots of people already doing pretty things. In a lot of cases, you can just use / remix them for the purpose of CGE example and create something much prettier than some of the current demos 🙂
Adding various small functionalities is also welcome. With CGE editor, editing a lot of these things to be more functional/prettier is really easy.
Note that we don’t want to over-complicate the examples — each example is deliberately limited in scope. Some examples are deliberately simple. The primary point is to show “how feature X of CGE works, what are the main properties of this feature”. We usually do not show every possible variation of X, alternative of X, property of X — we focus on most important stuff around X. This is of course very subjective — so when in doubt (“should I extend this example with Y?”) just ask on any of our channels (Discord, Forum etc.)
And if you find some example that seems outdated (e.g. doesn’t use CGE editor to design UI, or has missing README.md) — that is also (probably — ask if in doubt!) something to update.
Moreover, non-trivial examples definitely can be published as a demo on Itch.Io Page and Google Play Store (Android).
We did it with examples/platformer. However, some examples may deserve it too, for example:
- examples/tiled/strategy_game
- examples/third_person_navigation (but it really needs better 3D art 🙂 — note that mechanics are already being improved by new physics, but not gfx.)
- examples/mobile/activity_recognition (though recognition is only on iOS now; but another task could be — add recognition of walk/run on Android too, using the simplest approach that relies on Android API for it)
- examples/deprecated_to_upgrade/fixed_camera_game (but it requires upgrade to use glTF and CGE editor for most things)
You can also browse API docs. Surely there are some places that lack description or maybe their description is unclear or could be improved by examples. All these API docs are just taken from comments in units’ interface — to improve those, just edit the appropriate unit’s comments. They are processed by Pasdoc, check PasDoc documentation to see what formatting features are available.
Last Sunday, I gave a presentation about Castle Game Engine at the Game Industry Conference. I think it went really well — a lot of people came, I had a lot of positive feedback and good questions. I felt that a lot of work we put lately into making the engine not only packed with features, but also really easy to use, paid off!
The slides from the presentation are available here, and embedded in them are 4 short movies (physics, 3D game, 2D game, code). Enjoy!
Note that I used physics branch to demonstrate the physics components (not yet merged to master, just due to my obsession to review everything perfectly 🙂 ). Everything else you see there is available on CGE master already.
I also bring back some thoughts and conclusions:
-
Confirmed TODO: The hierarchy on the left is getting a little overcrowded when we put lots of behaviors (like rigid bodies and colliders) together with transformations. The current state may be acceptable at start, but eventually we should improve this. This is a UI thing — we can organize it better and we will, we already talked with Andrzej Kilijański about it.
-
Confirmed TODO: WebGL port is important 🙂
-
My new idea (this one is not from feedback to my CGE talk, but it is a combination of 2 ideas from 2 talks I had at GIC):
We should have a demo in CGE showing a huge city and loading neighboring pieces of the city asynchronously. This idea came to me during “Open World Streaming in Dying Light 2” talk — I believe the core idea is something completely doable in CGE (and testable on a 3D big city generated from ready buildings (with interiors) in CGE example).
This idea clicked with something I learned thanks to meeting Grzegorz Wojciechowski also at GIC. He’s doing amazing things with OpenGL, among them — spreading work into multiple processes and threads at the engine layer. He made me aware that you can load things asynchronously, in another thread, into OpenGL!, if you do this in another OpenGL context that is shared with your main (rendering) context. And in CGE our TCastleWindow and TCastleControl already always do sharing (because it makes caching natural for multi-window applications), so we got this!
This is a very possible and within-reach solution to a promise “Asynchronous loading will be possible some day” made in our Threads usage manual chapter.
Teaser: Physics joints in Castle Game Engine: hinge, ball, grab, rope
A quick video demonstrating new Castle Game Engine physics joints!
Joints presented:
- hinge (rotation around an axis)
-
ball (free rotation)
-
grab (follow a specified point)
-
rope (one object is tied to another with an invisible rope – it can move and rotate, as long as the rope distance is preserved).
We can design and simulate everything in CGE editor. This is all open-source, on Castle Game Engine physics_j branch.
Andrzej Kilijański and Michalis Kamburelis work on making it merged to CGE master 🙂 If you like this work, please support us.
We use physics engine Kraft for the underlying computation by Benjamin ‘BeRo’ Rosseaux.
Easy shadows (in editor, at design-time, too) by shadow volumes (and shadow maps are coming as well)
You can now activate shadows by shadow volumes by toggling a trivial boolean property Shadows at the light source to true
! This works (also) in editor at design-time.
This makes the shadow volumes we have documented here easily available, finally. No more messing around with X3D lights nodes.
A simple demo is in examples/viewport_and_scenes/shadows.
We also publish TCastleTransform.CastShadows
property to control if some object casts shadows.
Future:
This is just the beginning of “really easy shadows”. I enjoy how simple API we have (just a checkbox really!) and how great it is to play with shadows in the editor. But we can improve the functionality underneath now 🙂
-
The most important TODO here is that we plan to expose shadow maps in the same way. Actually shadow maps should be in the future the default algorithm activated by
Shadows
(and toggling between shadow maps and shadow volumes should be done using an independent property likeShadowMode = smShadowMaps, smShadowVolumes
).Shadow maps have a number of advantages — they do not require the shadow caster to be 2-manifold, they already work on both desktop and mobile (OpenGLES), they can be applied on multiple light sources independently with correct result.
While we had shadow maps implemented for years, with some impressive demos (see features section) but they do not work (yet!) across scenes, which means that the light that casts shadow must be in the same glTF/X3D file as the shadow receiver. This makes them not suitable to use shadow maps on our light nodes.
The plan is to, well, remove this limitation (#284). Shadow maps should work cross-scene, they should not transform the X3D graph (whole work done by
CastleInternalShadowMaps
should be removed) and the renderer should just take and use at rendering a shadow map information attached to any light (and the renderer should add using that shadow map to particular shape). -
Shadow volumes for now carry a few limitations:
-
The unfixable limitation is that shadow caster has to be 2-manifold, i.e. every edge must have exactly 2 neighboring faces, so the whole shape is a closed volume. Both CGE and 3D authoring tools like Blender help you modeling such shapes — see Make 3D models of shadow casters geometry to be 2-manifold.
-
The current limitation of shadow volumes in CGE is that we allow them from only one light (so set
Shadows
totrue
only on a single light!)We could improve that, though note that it will increase the number of rendering passes, in general you need to do
2^shadow_volumes_lights
passes. So this technique is really not feasible for multiple lights. (Shadow maps scale much better.) -
A temporary limitation is that shadow volumes do not render properly on mobile (OpenGLES), we have a PR in progress to address that.
-
OK, not really a zillion 🙂 But I seriously addressed a few important issues with editor usability and I think these improvements have a big impact. Some important things are now more intuitive for beginners, some behave better for larger projects.
As usual, I encourage you to try the improvements immediately by downloading the latest engine version. And please support us on Patreon because we really rely on it.
Improvements:
-
The default editor tool now allows to select and modify both UI (instances of
TCastleUserInterface
) and 3D / 2D game stfuf (instances ofTCastleTransform
).In a broader context, the tools to operate on UI and transformations have been merged. There’s no longer a special “Modify UI” tool (that didn’t work on transforms). The tools “Translate” / “Rotate” / “Scale” remain, but now they work on both transforms (allowing to translate / rotate / scale them) or UI (in which case you can always translate + resize it).
This makes using editor much simpler. You will no longer need to switch modes so often.
Note: To operate on something (UI or transform) without changing the currently selected object, remember you can drag with Shift.
-
Hierarchy (left panel) is updated smarter, without rebuilding it from scratch. This makes adding / removing components experience much better: it will not reset the expanded / collapsed state of your components, it will not reset the scroll position within the hierarchy list.
-
We now show a label alongside selected UI components of size zero, to make them actually visible in the editor.
This addresses a common situation with
TCastleVerticalGroup
andTCastleHorizontalGroup
— they have by default size zero (since they have no children initially, and haveAutoSize = true
by default). While the zero size makes sense for them, but to the user it was confusing what is going on — you added a group, but nothing was visible?Now, newly added
TCastleVerticalGroup
andTCastleHorizontalGroup
, while it still has size zero, is clearly visible.This also fixes analogous issue with
TCastleImageControl
, that has size zero by default, becauseURL
of the image is not set initially, andStretch = false
(so control size matches image size, and there’s no image). -
If you cannot resize or move a component, sometimes it makes sense to move or resize the parent. This in particular applies to moving/resizing a UI with
TCastleUserInterface.FullSize
or moving a UI underTCastleVerticalGroup
/TCastleHorizontalGroup
. Previously these operations were blocked, now they affect the parent. -
If you cannot resize a component because it has property like
TCastleButton.AutoSize
, now we display this using a tooltip (when you try to resize it). So it should be more obvious that you can turn off properties likeTCastleButton.AutoSize
on many components to make them resizeable. -
Important API cleanup: We now have
TCastleUserInterface.Translation
property, consistent withTCastleTransform.Translation
.The previous
TCastleUserInterface.AnchorDelta
is a deprecated alias forTranslation
. TheHorizontalAnchorDelta
,VerticalAnchorDelta
,Left
,Bottom
are deprecated.This change is fully backward-compatible. We deprecate some things, but they all continue to work as before.
Screenshot for this news post continues our tradition — “if you don’t have a perfect screenshot to illustrate your features, just find a pretty model on Sketchfab and show it rendered using CGE” 🙂 In this case, I searched for “smooth” and found this beautiful monster: Gears of War – Grinder by nataliedesign.