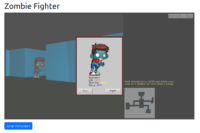
Big renderer improvements: Correct and automatic blending sorting, more powerful batching (now cross-scene), easier and more reliable occlusion culling and occlusion sorting

Posted on

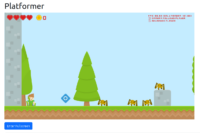
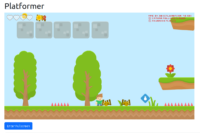
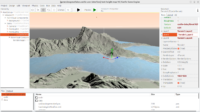
Blending in 2D from "The Unholy Society"
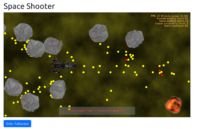
Blending in 2D from "Escape from the Universe"
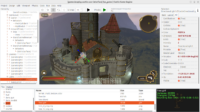
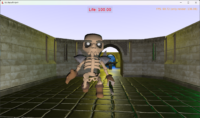
FPS game example - solid wireframe
FPS game example
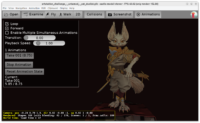
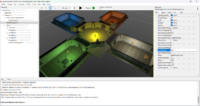
Customized color channels
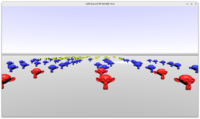
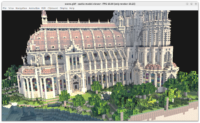
isometric_game with batching
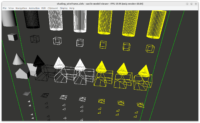
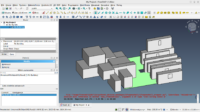
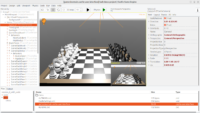
Solid wireframe

It’s a pleasure to finally close a big TODO from our roadmap. This refactor took 122 commits, and it reworks a core rendering code in the engine. This was hard to do but also was a lot of fun — I used this opportunity to do a lot of code simplifications. These simplifications also translate to some performance gains.

New features / improvements

Blending sorting is now much better:

  • It can be controlled using simple TCastleViewport.BlendingSort.

  • The default is sortAuto, which auto-detects and uses best blending sorting for 2D or 3D (depending on camera parameters). For many applications, you should no longer even need to touch this, blending should “just work”. This was tested also with our bigger games The Unholy Society and Escape from the Universe.

  • The new algorithm sorts all shapes, from all scenes. So it can account for transparent objects transformed in any way (using any hierarchy of TCastleTransform) and even for cases when multiple scenes’ shapes may result in mixed order. E.g. some transparent objects on the big (level) TCastleScene may be in front, and some behind, transparent objects of some creature TCastleTransform.

  • To address non-trivial cases we have new TCastleViewport.OnCustomShapeSort event. You can define sorting function, using any criteria you want. See TShapeSortEvent for details and example event implementation.

Batching is now more powerful and easier to use:

  • Batching can be activated by TCastleViewport.DynamicBatching, and thus configurable from CGE editor too.

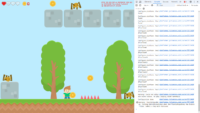
    Remember you can invoke in CGE editor “Edit -> Show Statistics” (F8) to see the rendering statistics. They will reflect batching — the number of rendered shapes will drop.

  • Batching now works cross-scenes. That is, shapes from one scene can be merged with shapes from another, unrelated scene, if their de-facto rendering settings (material, texture) match.

    Also more cases are now allowed for batching. In particular, batching now works for shapes (even from different scenes) with the same image loaded, and for TCastleImageTransform with the same image loaded — these cases, while seem trivial, are important when you design 2D maps.

    This makes batching much more universal, it works in more situations.

    In particular, designing your world using a big number of TCastleImageTransform instances is now reasonable — 100×100 TCastleImageTransform instances will not cause 100*100 draw calls, they will be batched into as few draw calls as possible (maybe even one, if you just use one image for all tiles). Example: examples/isometric_game.

  • The global variable DynamicBatching is deprecated. Prefer to use TCastleViewport.DynamicBatching.

Occlusion culling is now easier and more powerful:

Others:

  • New option TCastleRenderOptions.InternalColorChannels exists to limit which RGBA channels are written by rendering given model. Allows for some cool graphic tricks.

    Also it was necessary to make tricks that require rendering something only to the depth buffer, without touching the color buffer. See the fixed_camera_game example.

    For now this property is “internal” — I’m unsure how much it will be actually useful, and we want to reserve the right to remove it if it will become too unconvenient to maintain. Admittedly it may work a little weird — it doesn’t write some RGBA channels, but it still writes the depth values, so it’s a little hard to control what is visible behind it. If you find it useful anyway, please let me know about it 🙂

  • OpenGL resources that are associated with X3D nodes are now stored in much more straightforward way, avoiding lookups using any dictionaries, and avoiding reinitialization when you move scene from one viewport to another. This makes accessing texture resources and screen effects’ shaders a simple and instant operation, instead of previous inefficient search.

Backward compatibility

This is a compatibility-breaking change, no way around it. The old sorting method, that was only sorting inside a scene, was inherently incorrect. Trying to maintain it for backward compatibility would make code really complicated, and API too. So you just have to adjust — set the TCastleViewport.BlendingSort if needed.

As always, if you have questions about upgrading, ask us!
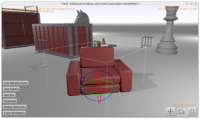
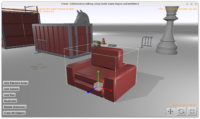
What we did to address backward compatibility:

  • From editor: We make a warning if your scenes use non-standard blending sort on import.

    We make a warning also if you used old Viewport.Items.BlendingSort.

    Judge whether the new version works, adjust TCastleViewport.BlendingSort if needed, and save the design to remove the warning.

  • From code: RenderOptions.BlendingSort is just removed. Deliberately, there’s no way to sort only within scene now. We always sort within viewport.

    Same for Viewport.Items.BlendingSort. Same for TCastleScene.Setup2D.

    The compilation should break, forcing you to upgrade to new the new TCastleViewport.BlendingSort. It takes different arguments (sortXxx enums) and works much better. As explained above, you likely don’t need to set it at all. In my experiments, in almost all cases I just removed the calls to removed methods / properties and things are now automatically good.

  • Default BlendingSort = sortAuto automatically adjusts to your camera.

    Setting typical 2D camera, by TCastleViewport.Setup2D or any other method, will activate 2D blending sorting.

    I’ve done a few iterations of this — I considered Setup2D not doing anything, or having obligatory AdjustBlendingSort (without default=true) or having a set like [seBlendingSort2D] or making Setup2D just set BlendingSort:=sort2D. Ultimately in all usages of TCastleViewport.Setup2D, in CGE and our games it was obvious that using new BlendingSort:=sort2D is a good idea.

    Eventually BlendingSort:=sortAuto won everything. It fills all use-cases nicely and easily. It is also naturally the default TCastleViewport.BlendingSort property value.

Special considerations for custom rendering

By “custom rendering” I mean here things that override TCastleTransform.LocalRender to issue direct OpenGL(ES) commands. For example Kagamma’s (Trung Le) projects:

If you perform custom rendering, without using TCastleScene nodes, note that things are a bit different now. TCastleScene.LocalRender only schedules shapes to be rendered later. So your custom rendering will always happen before the CGE TCastleScene rendering, so objects with custom rendering are assumes to be behind for blending. This shouldn’t really matter for rendering non-blending, but it may matter for rendering with blending.

I have a plan to play with it more, to make custom renderers more flexible. In the future, everything, including custom rendering, should make one “collect stuff for rendering” phase, and then all collected things should be executed. Right now, we do more “collect rendering” phases (once for opaque, once for blending) to also avoid breaking too many things for custom rendering algorithms. But it will change — so an optimization on top of existing work, and improvement for custom renderers, is coming.

Support our work

This was hard, and fun, work 🙂 Like it? Please support us on Patreon!
Comments on the forum ➤

Planned: Steam integration and engine available as a download on Steam

Posted on

Steam page preview

One of bigger things we plan to have ready (before 7.0 release) is Steam integration. This actually means 2 things:

  1. Easy Steam integration (using “Steamworks SDK”) in your projects. This means accessing “Steamworks SDK” directly (without any “wrapper” library necessary) and being able to easily report to Steam things like achievements.

    Once initial integration will be finished, exposing more Steamworks features should be a breeze.

    Thanks to Eugene Loza, this is already in review: Steam PR.

  2. We also want to actually publish “Castle Game Engine” as a tool on Steam. This way you will be able to find, install, upgrade CGE using Steam, of course on all supported desktop platforms: Linux, Windows, macOS.

    As the engine will be a Steam application itself, we’ll have fun achievements
    too — e.g. “compile your first CGE game”, or “see 100 compilation errors” 🙂

    This is in progress, we have already bought the Steam page and we started to fill it with content. As soon as it’s somewhat ready, we’ll want to open it — to allow you to wishlist it, then we’ll release “early access” version on Steam.

Comments on the forum ➤

Engine roadmap – see what’s coming in the future!

Posted on

Our own Oculus Quest 2!
fps_game demo

Let’s do a few posts about features that are planned in Castle Game Engine and should get you excited 🙂

The central document describing our plans is our roadmap.

Some highlights:

The roadmap document is where we’re consolidating a lot of plans. We deliberately do not want this page to be a never-ending long “wishlist” of things — instead, I want to keep tasks there “tangible”. So things there are:

  • Reasonably certain — yes, they will happen.

  • They are confirmed to be needed by users. We have talked about many of these features on forum, Discord or live at events where I presented CGE.

  • We have a confidence that they fit in the scope of CGE, which means we can envision a rough API and implementation for them, that fits nicely with the rest of CGE.

I (Michalis) have given a lot of thought into these plans. Remembering that we’re always constrained by time. It’s easy to come up with 100 new engine features, but the really difficult decision is what should be the first 2, or 5, or 10 — and for this we really look at a cross of “feature will be useful to users + interface (API) seems to fit CGE + implementation seems within reach”.

Note: Just as with all other news, but maybe with these “planned” posts especially, please consider yourself invited to post comments about what we write (on forum, Discord). Do you think a feature X is useful to your case? Or maybe on the contrary, X is not useful and you think it would drag away our resources from some other much higher-priority topic Y? Go ahead and tell us.

And also, remember that we count on community support on Patreon to actually make it happen. I have various ideas how to sponsor the engine, releasing and promoting Castle Game Engine 7.0 factors into it too, talking to companies comes too, but really everything is easier if we also get solid support on Patreon from you — the community of CGE users. So if you like what we do, please consider supporting us on Patreon.

Comments on the forum ➤

Import models from Sketchfab using Castle Game Engine editor

Posted on

Cat with jetpack from Sketchfab - https://sketchfab.com/3d-models/jetpack-cat-6838f7599617408485cd055cd0ce5182
Searching for a cat on Sketchfab
Searching for trees on Sketchfab
Trees from Sketchfab  - https://sketchfab.com/3d-models/low-poly-tree-scene-free-89daa5e21f0d4f08a59dba0d566e88bd
Searching for trees on Sketchfab
Searching for a cat on Sketchfab
Cat, dog, car from Sketchfab
screenshot

You can now easily search and import models from Sketchfab inside Castle Game Engine editor! This feature was fun to make and I’m sure it will be fun to use too 🙂

How to use

  1. Open any project.

  2. Use the menu item “Data -> Import from Sketchfab…”.

  3. Search for any query, like cat, tree… Your imagination is your only limit, Sketchfab has an incredible number of models. There’s a checkbox to limit the results to contain “Only Animated” models.

  4. Pick the model you want to download. You can view the models using a list (with license, description, face count) or using a grid view (with thumbnail). You can also open the corresponding model in the Sketchfab website viewer.

  5. Press “Download” to download the glTF version of the model from Sketchfab.

    Make sure to fill the “API token” field first — find your token on the Sketchfab “Password & API” page. You need a (completely free) Sketchfab account for this.

    The downloaded model is placed inside the data subdirectory of your project, in a file like data/sketchfab/<name>-<id>/scene.gltf. There are accompanying files with textures, license, we also leave the downloaded zip.

  6. If you have some design open, with some viewport selected, then you can even “Download and Add To Viewport”. This is just a shortcut to download and drag-and-drop the glTF model into the viewport, instantiating TCastleScene pointing to the proper glTF model.

Enjoy!

Along with this, I have also improved the automatic Name assigned to dragged-and-dropped components. It now reflects the model URL. E.g. drag-and-dropping the knight.gltf will now create SceneKnight1. There is a smart rule to also generate useful names for models from Sketchfab-imported directories.

License

The models’ licenses are clearly specified (in the search dialog and in downloaded license.txt files). They use various versions of the Creative Commons licenses or Public Domain.

Following Sketchfab docs: Sketchfab provides a library of over 1 million free models, available under Creative Commons licenses. Most models allow commercial use. Read the model licensing for more details.

Note: Be wary of using Non-Commercial or Non-Derivatives variants of the Creative Commons licenses. They are incompatible with general open-source definition, which has been stated explicitly e.g. by Debian (DFSG) and FSF. See Creative Commons at Wikipedia for more information. So works including these models cannot be distributed as freely as most open-source software. Other CC variants are cool.

Caveats

  1. Sketchfab export to glTF is not perfect.

    1. Some models have too dark materials. E.g. this dungeon has very dark unlit materials in glTF. It looks dark when viewed in Castle Game Engine and other glTF viewers.

      TODO: New material components will allow you to easily override faulty materials.

    2. Sometimes the exported glTF says to use blending when it actually should not. For example this chunky knight has rendering issues, in Castle Game Engine and other glTF viewers, due to using blending when it should not.

      This likely follows Sketchfab docs saying that they don’t export Refraction, Dithered, and Additive transparency (will be converted to Blending).

      The solution is just to disable blending in CGE for these models, setting MyScene.RenderOptions.Blending to false.

  2. A minority of Sketchfab models use a “specular glossiness” PBR workflow through a deprecated (by Khronos) KHR_materials_pbrSpecularGlossiness. We support it in CGE only partially — some models may look dark or too contrasting, like this knight.

    As KHR_materials_pbrSpecularGlossiness is deprecated, superseded by KHR_materials_specular, we are reluctant to put effort to support this way of rendering perfectly in CGE.

    Possibly Sketchfab can switch to the new approach in the future. In the meantime you can ask Sketchfab authors to use metallic-roughness PBR workflow.

  3. Some models expose just one big animation like Take 001, which is an artifact how some 3D software exports them.

    You can follow examples/animations/split_long_animation to split such long animation into multiple “sub animations” in CGE. I have actually just upgraded this demo, to show a Halloween Pumpkin Lantern Knight model from Sketchfab created by outcast945.

Comments on the forum (1) ➤

Images in UI: Regions (subset of image) and visual editing of both region and 9-slices

Posted on

Image regions
Image regions
Image 9-slices borders

With big thanks to Freedomax PR, our images in user interface are now much more powerful:

  1. Every image has a region which defines a subset of the image to render. This allows to use a big atlas image to define a whole user interface like in this example UI on OpenGameArt and for each component just choose a suitable region of this atlas.

    “Every image” here means every TCastleImagePersistent component, as the new property is TCastleImagePersistent.Region.

    This is used for images in TCastleImageControl, TCastleButton (for custom button backgrounds), TCastleScrollView (for scrollbar frame and slider). Going forward, 100% of UI should be customizable using TCastleImagePersistent subcomponents.

  2. Moreover, our CGE editor gets a nice visual way to edit both regions (TCastleImagePersistent.Region) and borders for 9-slices algorithm (TCastleImagePersistent.ProtectedSides). Just click on the “…” button in the Object Inspector at them to fire a comfortable form to define a region / borders. Within the form, you can pan and zoom the image, to adjust them perfectly.

Comments on the forum ➤

Using Sketchfab API to search and download glTF (to be integrated in Castle Game Engine)

Posted on

Knight glTF model from https://sketchfab.com/3d-models/chunky-knight-f1722ab650ad4d8dbe6fc4bf44e33d38 by thanhtp
Cthulhu model from https://sketchfab.com/3d-models/flying-cthulhu-4737a3b84e00415b9d8bb42ae44285b2 by TooManyDemons
Apple model from https://sketchfab.com/3d-models/apple-macintosh-608e0f6ce5e9487eb859f48248e1fac4 by tzeshi

This was super-fun and super-quick to develop (thanks to GitHub Copilot) 🙂

I present a sample application that searches Sketchfab and downloads glTF model matching given query string. For extra effect, it even opens the model with view3dscene if it is present on $PATH.

By default it looks for cthutlhu and happily downloads the first result, extracting the ZIP and running view3dscene. From nothing -> Cthulhu 3D model!

Run with some command-line parameter to change the search string, to anything.

The code contains a simple class that downloads from Sketchfab. If you want, you can easily tweak it to download a particular model instead of the first search result. Read the “Usage” description for details.

Comments on the forum ➤

Tiled maps: examples updated (see the new “strategy game demo”), API and docs improvements (how to determine tile picked by mouse, and more)

Posted on

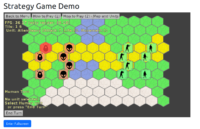
Strategy game demo
Tiled map
  1. Example examples/tiled/strategy_game_demo was upgraded to use our new TCastleTiledMap component. This is a complete turn-based strategy game using our Tiled integration!

    As part of this, the game now features map panning and zooming “for free” thanks to the usage of TCastle2DNavigation in the viewport. It’s nice to see our approach (“map in viewport is more flexible”) coming together, as you can mix Tiled map with all our viewport stuff — images, scenes, sprite sheets, cameras etc.

  2. TCastleTiledMap.TileRectangle method added. Useful to position something at given map tile.

  3. Tiled docs have been extended to describe some new features, and in particular new section Determine tile indicated by mouse was added. It’s rather easy, but there are at least 2 approaches to do it and they deserve proper explanation 🙂

  4. Small thing: TCastleTiledMap.Map is now TCastleTiledMap.Data, it’s just a better property name. Old name is deprecated.

  5. Small thing: The examples/tiled/map_viewer_in_viewport has been renamed to just examples/tiled/map_viewer.

    The older Tiled example using deprecated TCastleTiledMapControl (Tiled map rendered as UI) was removed to not confuse anyone.

Comments on the forum ➤

Shadow volumes: new WholeSceneManifold option, fixes and docs

Posted on

Shadows in editor
Shadow volumes
WholeSceneManifold demo in editor
WholeSceneManifold demo
Select Non-Manifold in Blender
  1. A new feature of our shadow volumes is that you can turn on TCastleRenderOptions.WholeSceneManifold to say that the whole scene must be a closed volume (2-manifold), not necessarily each shape.

    This makes especially sense if your model is, as far as geometry in a 3D authoring tool like Blender is concerned, a single mesh but with different materials. For glTF and X3D (and finally GPU), such mesh must be split into multiple shapes. The whole scene may be thus a closed volume (2-manifold) even if each shape is not.

    The details of when you may want to use this are described in our documentation and example examples/viewport_and_scenes/shadow_volumes_whole_scene_manifold.

  2. An important fix was done to our algorithm that culls shadow casters in case shadow volumes are cast by directional lights. Previously sometimes the shadows could disappear when the shadow caster was not visible — causing funny artifacts (shadows unexpectedly disappearing) in certain views. This is fixed now.

  3. Interaction of frustum culling (TCastleScene.SceneFrustumCulling, TCastleScene.ShapeFrustumCulling), distance culling (TCastleScene.DistanceCulling) and shadow volumes is now simpler and more reliable. If we render shadow quads for something, then we have to also render the shadow caster.

  4. As part of this work, we’ve also removed long deprecated properties TCastleScene.FrustumCulling and TCastleScene.OctreeFrustumCulling. They allowed to configure details… they weren’t really ever useful to configure, in my experience. We recommend to use instead a simpler boolean TCastleScene.ShapeFrustumCulling for a long time now, and even this is usually something you don’t really need to care about. As always, make a noise on our forum or Discord if this change affects your project in any way. From my experience, all usage of these old properties can be just removed — tweaking them most likely didn’t have any effect on the performance anyway.

    Removing these old things allowed to make this code simpler, for shadow volumes fixes described above, and also for upcoming rework how shapes are rendered.

  5. Finally, our shadow volumes documentation was much improved.

    The details about X3D nodes and fields have been moved to a section at the bottom, as likely not relevant for most CGE users. The information how to use it all using Pascal and CGE editor is now prominent.

Comments on the forum ➤

Use Delphinus to install Castle Game Engine in Delphi, also simplified Delphi packages

Posted on

Castle Game Engine 3D in Delphi FMX form

We have a new comfortable way to install Castle Game Engine packages and paths in the Delphi IDE: use Delphinus!

Delphinus is an open-source package manager for Delphi. You can point it to an existing CGE installation using “Install from folder” from Delphinus GUI, and in turn it will

  • Install CGE design-time package that provides the TCastleControl component.

  • Add unit paths to Delphi IDE, to make CGE units available in all your projects. No more need to manually add a long list of CGE paths to your Delphi settings (or each project). And upgrading or uninstalling the CGE package using Delphinus will update the Delphi settings accordingly.

The whole process of installation using Delphinus is outlined here.

By the way of doing this, I have also simplified our Delphi packages. The split into 3 packages (base, vcl, fmx) wasn’t really beneficial (since these were design-time only packages anyway, it is OK to put both VCL and FMX variants in one package) and it actually caused problems for Delphinus (see here). So I simplified things: CGE Delphi package is now just literally one package, castle_engine.dpk. See packages/delphi.

Be sure to remove previous CGE packages from Delphi to avoid problems. Use the “Component -> Install Packages…” menu item in Delphi IDE to get a dialog where you can remove the packages. Then install the new castle_engine package (by Delphinus or manually) to get back TCastleControl component, for both VCL and FMX.

BTW, free Delphi Community Edition has been recently updated to version 11.3. If you want to give Delphi a try, now’s a good time 🙂

Comments on the forum ➤

Big rendering refactor: fully modern OpenGL support (3.3 core profile), mobile OpenGLES more functional (3D textures, occlusion query, more OpenGLES 3 features), ancient OpenGL better (reliable fallback to even 1.1 rendering in VMs), modernized GLSL code

Posted on

fps_game demo
Run parameters submenu
OpenGL information

We have made a few significant refactors of our low-level OpenGL(ES) code, to support better both modern GPUs, ancient GPUs and mobile GPUs. Everybody wins! 🙂

Modern GPUs

We have now much better support of new OpenGL features. If we have shaders, we know we have shaders from “core”, and we initialize them with the same code everywhere. Same for FBO (Framebuffer Object). Most new GPUs support now OpenGL 4.x. So for many things, we can just assume that modern OpenGL will have them in “core”.

So we have implemented a code path using 100% “core profile” OpenGL 3.3 context (using deprecated stuff is prohibited). To force using it, set TGLFeatures.RequestCapabilities to rcForceModern. Or pass command-line option --capabilities=force-modern . Or in CGE editor click “Run -> Run Parameters -> Force Modern Rendering Context (–capabilities=force-modern)”.

Our upgraded renderer:

  • Automatically converts quads to triangles as modern OpenGL(ES) API don’t support quads.

  • Uses image formats without luminance, instead we use texture swizzle.

  • Creates and uses Vertex Array Buffer.

  • Queries OpenGL(ES) extensions in new way

  • Uses shadow samplers following OpenGL(ES) core

The default is a smart choice. We create a “compatibility” context, and

  • if it has a new OpenGL version — we will actually use only the new API , just like from “core” profile. As mentioned above, OpenGL >= 2 implies a lot of things (VBO, shaders) and we will use them. Later versions also imply some nice things, e.g. OpenGL >= 3 implies FBO.

  • However, if the provided OpenGL version will be low (< 2), we will automatically set GLFeatures.EnableFixedFunction to true, and follow ancient fixed-function rendering path.

This makes the approach “automatic”, and it is indicated by (default) TGLFeatures.RequestCapabilities value of rcAutomatic.

Our treatment of old GPUs is now simpler

If you don’t have OpenGL 2, then we assume you also don’t have a lot of other things (we will not even try to use them through old extensions). Without OpenGL 2, we assume you never have shaders or even VBO. To be precise, GLFeatures.Shaders is now always a simple negation of GLFeatures.EnableFixedFunction, same for GLFeatures.VertexObjectBuffer.

This makes things actually better for these ancient GPUs: it means that their support is more reliable. It is easier to write and test one simple “ancient fixed-function” code path when it doesn’t have so many variations. And you can test it easily: just set TGLFeatures.RequestCapabilities to rcForceFixedFunction from code. Or pass command-line option --capabilities=force-fixed-function . Or in CGE editor click “Run -> Run Parameters -> Force Ancient Rendering Context (–capabilities=force-fixed-function)”, then run as usual (F9 or click the button).

Rendering on such old systems supports unlit or Phong lighting. Some modern rendering features are not available (like PBR or shadow maps), but simple games will manage.

The renderer was really tested with actual OpenGL 1.1 implementation available on some Windows 2016 servers 🙂

Switching between modern and ancient OpenGL

We have a new command-line option --capabilities=automatic (or
--capabilities=force-fixed-function or --capabilities=force-modern). It is available in all CGE applications (TCastleApplication.ParseStandardParameters handles it, and it is called from CastleAutoGenerated unit).

We also have a new menu items in CGE editor to easily set it “Run -> Run Parameters -> …”.

view3dscene and the CGE editor itself also support these options. So you can test how does editor behave on ancient OpenGL implementations, just run it like this: castle-editor --capabilities=force-fixed-function.

Mobile

Finally, the end result is also good for OpenGLES (usually on mobile, though it also works on desktop if you want). It is more consistent now with desktop OpenGL, bringing many rendering improvements to OpenGLES and simplifying the code in the process too. E.g. shadow maps now just depend on OpenGL ES 3, and use almost the same code as on desktop OpenGL, with shadow samplers in GLSL.

I wrote more about mobile improvements in this post.

Testing

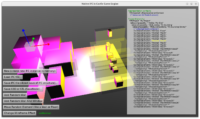
I have also added a test application examples/research_special_rendering_methods/test_rendering_opengl_capabilities/. It exercises all rendering methods:

I have also extended default OpenGL 1-line report to contain vendor name and “modern rendering” (not GLFeatures.EnableFixedFunction), since they are important information about your GPU. It looks like this now:

Rendering Initialized: OpenGL 4.6 (Nvidia) (modern rendering: True) (for more info: LogGLInformationVerbose:=true)

The verbose report (the one you see if you enable LogGLInformationVerbose, you also can see it in CGE editor, use “Help -> System Information”) is also improved in many ways — more relevant stuff reported, better order.

Also our GLSL usage in now more modern

We advise you to not declare any #version in your GLSL code, and internally we will add a modern #version and also define a few macros that turn lowest-supported GLSL versions into modern versions. See CastleGLShaders unit for more comments.

We also automatically define precision for OpenGLES fragment shader, if you didn’t do it automatically.

Debugging

You can use OpengGL debug context feature. Just set TGLFeatures.Debug.

Comments on the forum (9) ➤