-
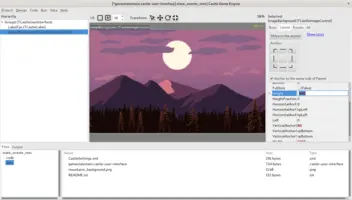
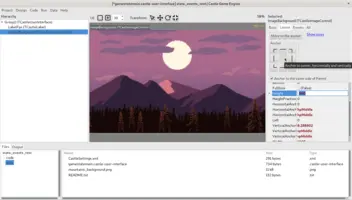
go to the Layout tab and click the middle button in the 3x3 buttons grid. This sets the anchor to the middle.
-
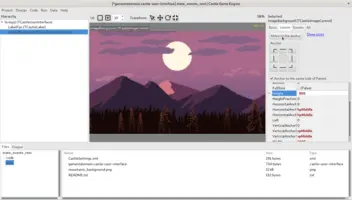
Click the "Move to the anchor" button to change image position right now to be at the center.
Designing user interface and handling events (press, update) within the view
1. Overview
View in Castle Game Engine is a class that descends from TCastleView and manages what you display on the screen and how you react to basic events (user input, updates).
While it is not required to put everything in some view, we highly advise to organize your application into a number of views. They usually divide your application code into a number of smaller pieces in a natural way. If you have used Lazarus LCL or Delphi VCL for visual designing previosly, you will recognize that our TCastleView is a similar concept to TForm from LCL and VCL.
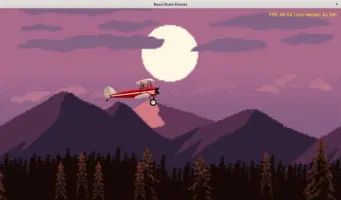
In this chapter we will learn how to use the basic view features. We will create a simple toy that displays some images and allows to move them. You can follow this chapter and do it yourself, or you can look at the ready version in examples/user_interface/view_events.
2. Create empty project
We assume you have already downloaded Castle Game Engine and installed it.
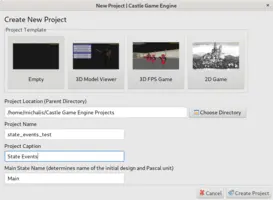
Start by creating a new project using the "Empty" template.
When you create a new project, we create initial views for you. The "Empty" template creates a single view, by default called just "Main". It is
-
a Pascal class called
TViewMain, -
implemented in the unit
GameViewMain(filecode/gameviewmain.pas), -
it has a single instance (singleton)
ViewMain, -
and it displays a design (user interface you can visually create in the editor) from file
data/gameviewmain.castle-user-interface.
We will edit this view (code and design) in the following steps.
3. Add the background image (mountains)
-
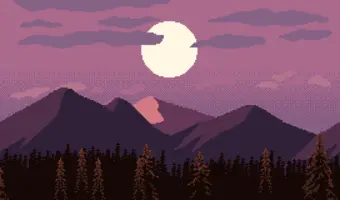
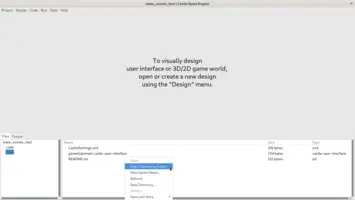
Download the image mountains_background.png and put it inside your project’s
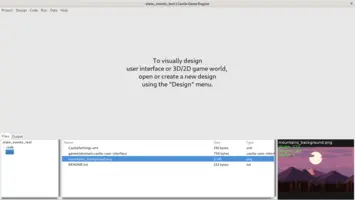
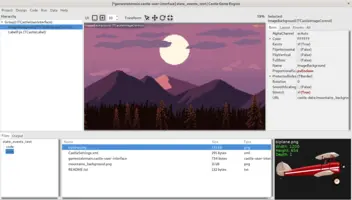
datasubdirectory. You can right-click in the editor "Files" panel to easily open your file manager inside the current project. Then just copy the file into thedatasubdirectory.After copying the file, you can see it inside the editor. If you select it, editor will show a preview in the bottom-right corner.
If you want to experiment with graphics at this point, go ahead. The sample image we propose here is actually constructed from multiple layers in GIMP. If you know your way around, you can create a variation of this image easily. We also have alternative "industrial" background ready. See the examples/user_interface/view_events/data directory.
-
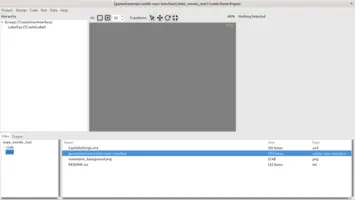
Double-click on the
gameviewmain.castle-user-interfacefile in thedatasubdirectory in the editor. It will open the user interface design, where we’ll add new controls. -
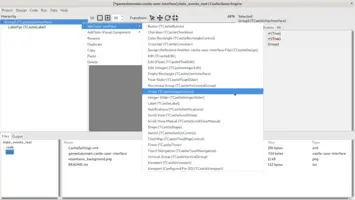
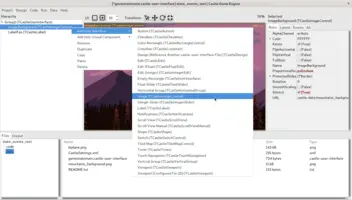
Right-click on the
Group1(the "root" component of your design) to select it and show a context menu. Then choose Add User Interface → Image (TCastleImageControl) from the context menu that appears. -
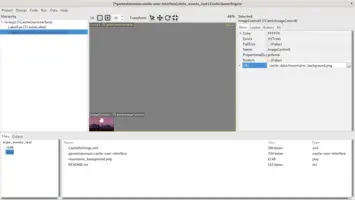
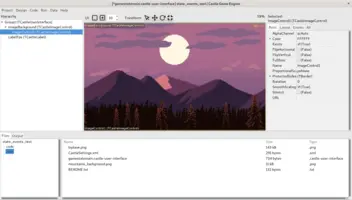
Load the image by editing the URL property. Click on the small button with 3 dots (
…) on the right side ofURLproperty to invoke a standard "Open File" dialog box where you should select your image.Note that once you confirm, the
URLwill change to something likecastle-data:/mountains_background.png. The design saves the file location relative to a special "data" directory. In a typical game, you will want to reference all your data files like this. The specialdatadirectory will be always properly packaged and available in your application. -
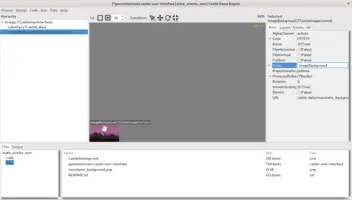
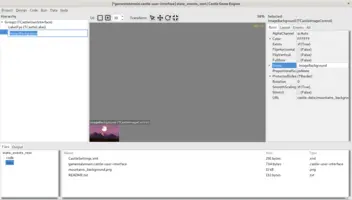
Set the new image name to
ImageBackground.You can adjust the component name by editing the
Namein the inspector on the right. You can alternatively click in the hierarchy on the left, or press F2, to edit the name inside the hierarchy panel.We advise to set useful names for all new components, to easier recognize the components when designing. The
Namecan also be later used to find this component from code (you will see an example of it later). -
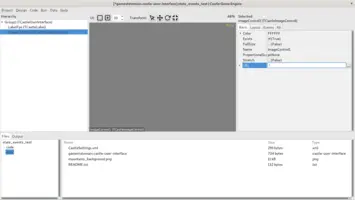
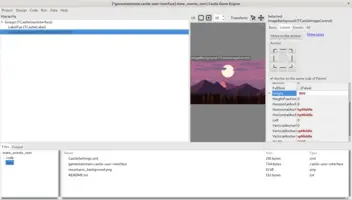
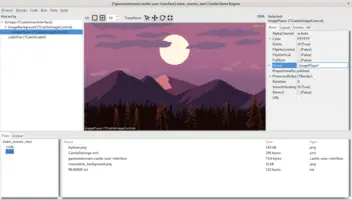
The image is very small at the beginning. The new project by default uses UI scaling that simulates window size of 1600x900, while our image has size 272 x 160. By default
TCastleImageControlfollows the image size.Set on the new
TCastleImageControlpropertyStretchtotrue(allow to resize theTCastleImageControlfreely).Test that you can move and resize the image freely now (by dragging using the left mouse button), test making the image larger. We will adjust the position and size more precisely in the next step, for now just test that you could play with it manually. Note that you could set
ProportionalScaletopsEncloseto always keep aspect ratio of the original image. -
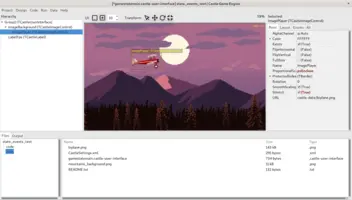
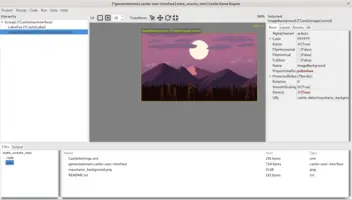
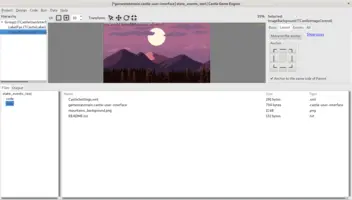
Switch to the Layout tab and set image
Widthto1600andHeightto900. This will make the image fit perfectly inside the game window.Explanation: The project uses UI (user interface) scaling to 1600x900 by default, so it is completely valid to just set sizes and positions to any hardcoded values. They will be adjusted to follow the actual window size correctly. You can take a look at data/CastleSettings.xml file — it allows to adjust how UI scaling works.
Alternative: We can get exactly the same behavior by setting
WidthFractionto1.0,HeightFractionto1.0, andProportionalScaletopsFit. This will also make the image keep nicely within the window, and automatically follows whatever reference window size is used by the UI scaling. -
To make the image stay at the window center, anchor it to the middle of the window (both horizontall and vertically):
When done, resize the game window (by dragging the "splitters", i.e. bars between the game window and hierarchy (on the left) or inspector (on the right)). Notice how image always stays within the window, with the image center in the window center.
-
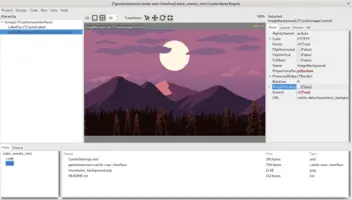
The background image is a pixel-art. It has low resolution, and if you make it larger (as we did) — it is better to scale it without smoothing the colors, to keep the result sharp.
To do this, set
SmoothScalingproperty of the image tofalse. -
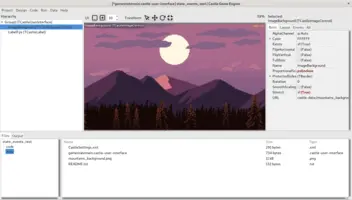
As a final touch, drag the
LabelFpsin the hierarchy on the left to be below the newly addedImageControl1. This will make theLabelFpsdisplayed in front of the background image.This matters when game window aspect ratio is close to 1600x900, the yellow text "FPS: xxx" should then be displayed in front, not hidden behind the background image. The code will update this label to display frames per second when you run the game. This is a basic metric of the performance of your game.
4. Add the player image (plane)
-
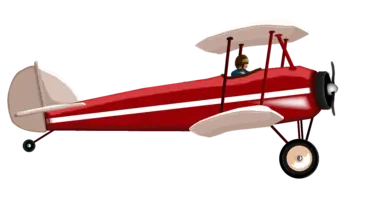
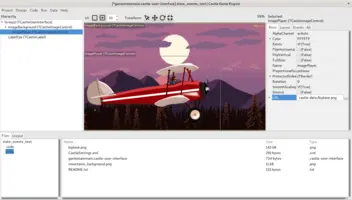
Download the player (plane) image from biplane.png. Just as before, add it to your project’s
datasubdirectory. -
Add a new
TCastleImageControlas a child ofImageBackground.If you made a mistake and placed it under some other parent (like
Group1) then simply drag it (in the hierarchy tree) to be a child ofImageBackground. Just drag the new control over the right side of theImageBackgroundin the hierarchy (it will show a right-arrow — indicating that you will drag the component to be a child ofImageBackground).This relationship means that
ImagePlayerposition is relative to parentImageBackgroundposition. So the player image will keep at the same place of the background, regardless of how do you position/resize the background. -
Adjust new image control:
-
Set the new image
NametoImagePlayer. -
Set it’s
URLto point to the plane image. -
The plane image is quite large. Set
Stretchtotrue,ProportionalScaletopsEnclose, and move and resize it manually to a nice position and size.
-
-
Remember to save your design! Press Ctrl + S (menu item Design → Save).
So far we didn’t write any code, we just modified the file data/gameviewmain.castle-user-interface. You can run the application to see that it displays 2 images, in whatever place you put them.
5. Access designed components in the code
Now we will write some Pascal code. You can use any Pascal editor you like — by default we use Lazarus, but you can configure it in the editor Preferences.
Look at our Modern Object Pascal Introduction for Programmers to learn more about Pascal, the programming language we use.
To access (from code) the components you have designed, you need to declare them in Pascal in the published section of your view class. Therefore we will add the field ImagePlayer, as we want to modify its properties by Pascal code.
-
Use our editor menu item Code → Open Project in Code Editor to make sure that Lazarus has loaded the appropriate project.
Or just open Lazarus yourself, and use Lazarus menu item Project → Open Project and choose the
xxx_standalone.lpiin the created project directory. -
Double-click on the
code/gameviewmain.pasunit to open it in your Pascal code editor. -
Find the
TViewMainclass declaration and add a fieldImagePlayer: TCastleImageControl;in thepublishedsection.So it looks like this:
type
  { Main view, where most of the application logic takes place. }
  TViewMain = class(TCastleView)
  published
    { Components designed using CGE editor.
      These fields will be automatically initialized at Start. }
    LabelFps: TCastleLabel;
    ImagePlayer: TCastleImageControl; // NEW LINE WE ADDED
    ...
The value of this field will be automatically initialized (right before the view Start method is called) to the component loaded from your design.
Pascal code within TViewMain can now use the field ImagePlayer the change the properties of the designed image. We will use it in the following sections, to change the player position and color.
6. Move the player in the Update method
The view has an Update method that is continuously called by the engine. You should use it to update the view of your game as time passes. In this section, we will make the plane fall down by a simple gravity, by moving the plane down each time the Update method is called.
-
Add unit
Mathto the uses clause.You can extend the uses clause of the
interfaceor theimplementationof theGameViewMainunit. It doesn’t matter in this simple example, but it is easier to extend theinterfacesection (in case you will need to use some type in the interface). So extend the uses clause in the interface, so it looks like this:unit GameViewMain; interface uses Classes, Math, CastleComponentSerialize, CastleUIControls, CastleControls, CastleKeysMouse, CastleVectors; -
Find the
TViewMain.Updatemethod implementation and change it into this:procedure TViewMain.Update(const SecondsPassed: Single; var HandleInput: Boolean); var PlayerPosition: TVector2; begin inherited; LabelFps.Caption := 'FPS: ' + Container.Fps.ToString; { update player position to fall down } PlayerPosition := ImagePlayer.Translation; PlayerPosition.Y := Max(PlayerPosition.Y - SecondsPassed * 400, 0); ImagePlayer.Translation := PlayerPosition; end;We use the
SecondsPassedparameter to know how much time has passed since the last frame. You should scale all your movement by it, to adjust to any computer speed. For example, to move by 100 pixels per second, we would increase our position bySecondsPassed * 100.0.We use the
TVector2in this code, which is a 2D vector, that is: just 2 floating-point fieldsXandY(of standard Pascal typeSingle). We modify theYto make the plane fall down, and useMax(from standardMathunit) to prevent it from falling too much (below the game window).We get and set the
ImagePlayer.Translationwhich changes the image position. The translation is relative to the current anchor, which by default is in the left-bottom corner of the parent. So translation (0,0) means that the left-bottom corner ofImagePlayermatches the left-bottom corner of parentImageBackground. This is what we want.
Run the application now to see that the plane falls down. Note that this is a rather naive approach to implement gravity — for a realistic gravity you should rather use physics engine. But it is enough for this demo, and it shows you how to do anything that needs to be done (or tested) "all the time when the game is running".
7. React to a key press
The react to one-time key press, use the TViewMain.Press method.
You can also check which keys are pressed inside the TViewMain.Update method,
to update movement constantly. Examples below shows both ways.
-
Extend the
TViewMain.Updatemethod implementation into this:procedure TViewMain.Update(const SecondsPassed: Single; var HandleInput: Boolean); const MoveSpeed = 800; var PlayerPosition: TVector2; begin inherited; LabelFps.Caption := 'FPS: ' + Container.Fps.ToString; PlayerPosition := ImagePlayer.Translation; // NEW CODE WE ADD: if Container.Pressed[keyArrowLeft] then PlayerPosition := PlayerPosition + Vector2(-MoveSpeed * SecondsPassed, 0); if Container.Pressed[keyArrowRight] then PlayerPosition := PlayerPosition + Vector2( MoveSpeed * SecondsPassed, 0); if Container.Pressed[keyArrowDown] then PlayerPosition := PlayerPosition + Vector2(0, -MoveSpeed * SecondsPassed); if Container.Pressed[keyArrowUp] then PlayerPosition := PlayerPosition + Vector2(0, MoveSpeed * SecondsPassed); { update player position to fall down } PlayerPosition.Y := Max(PlayerPosition.Y - SecondsPassed * 400, 0); ImagePlayer.Translation := PlayerPosition; end;The new code looks whether user has pressed one of the arrow keys by
if Container.Pressed[keyArrowXxx] then. If yes, we modify thePlayerPositionvariable accordingly.Note that we could also modify directly
ImagePlayer.Translation, likeImagePlayer.Translation := ImagePlayer.Translation + Vector2(…);. This would also work perfectly. But since we already had a variablePlayerPosition, it seemed even better to use it, as it has a self-explanatory name.Just as with gravity, we scale all the movement by
SecondsPassed. This way the movement will be equally fast, regardless of whether the game runs at 60 FPS (frames per second) or slower or faster. This also means thatMoveSpeedconstant defines a "movement per 1 second".You can now move the plane by arrow keys!
-
To handle a key press find the
TViewMain.Pressmethod implementation and change it into this:function TViewMain.Press(const Event: TInputPressRelease): Boolean; begin Result := inherited; if Result then Exit; // allow the ancestor to handle keys // NEW CODE WE ADD: if Event.IsKey(keySpace) then begin ImagePlayer.Color := Vector4(Random, Random, Random, 1); Exit(true); // event was handled end; end;The
Event.IsKey(keySpace)checks whether this is a press of thespacekey.As a demo, we modify the
ImagePlayer.Color, which is an RGBA value multiplied by the original image color. This allows to easily "tint" the image, e.g. setting it toVector4(0.5, 0.5, 1, 1)means that red and green color components are darker (multiplied by 0.5) and thus the image appears more blueish. In this case we use random values for the all red, green and blue channels (the standardRandomreturns a random float in the 0..1 range), just for test. So each time you press the space key, the player image will look a bit different.Note that we keep the 4th
ImagePlayer.Colorcomponent (alpha) at 1.0. Lower alpha would make image partially-transparent.Note that you can experiment with changing the
ImagePlayer.Coloreffects also visually, in the editor.
Run the application now to test the key handling.
When to use Press to handle a single key press, and when to use Update to watch the key state? This depends on the need. If the action caused by the key is a single, instant, uninterruptible operation — then do it in Press. If the key causes an effect that is somehow applied more and more over time — then watch the key and apply it in Update.
8. React to a mouse click or touch
The mouse press is also handled in the Press method. In general, Press method receives key press, or a mouse press, or a mouse wheel use (see the documentation of TInputPressRelease).
Everywhere in the engine, the mouse events also work on touch devices, when they correspond to the movement / touches of the fingers. When you use a touch device, then we only report left mouse button clicks (TInputPressRelease.MouseButton will be buttonLeft). When you use use the actual mouse on the desktop, then we only report touches by the 1st finger (TInputPressRelease.FingerIndex will be 0). The example code below checks for if Event.IsMouseButton(buttonLeft) then and thus it will work on both desktop (detecting mouse click) and mobile (detecting touch).
Extend the TViewMain.Press method implementation into this:
function TViewMain.Press(const Event: TInputPressRelease): Boolean;
begin
  Result := inherited;
  if Result then Exit; // allow the ancestor to handle keys

  if Event.IsKey(keySpace) then
  begin
    ImagePlayer.Color := Vector4(Random, Random, Random, 1);
    Exit(true); // event was handled
  end;

  // NEW CODE:
  if Event.IsMouseButton(buttonLeft) then
  begin
    ImagePlayer.Translation := ImagePlayer.Parent.ContainerToLocalPosition(Event.Position);
    Exit(true); // event was handled
  end;
end;
The Event.Position contains the mouse/touch position. It is expressed in the container coordinates, which means it is not affected by UI scaling or the UI hierarchy and anchors. It’s easiest to convert it to a position relative to some UI control using the TCastleUserInterface.ContainerToLocalPosition method. In this case, we use ImagePlayer.Parent.ContainerToLocalPosition, to use the resulting position to set ImagePlayer.Translation. The ImagePlayer.Parent is just another way to access ImageBackground in this case. We want to calculate new player position, in the coordinates of ImagePlayer parent, because that’s what ImagePlayer.Translation expects.
To improve this documentation just edit this page and create a pull request to cge-www repository.
